
Click Here to Download SpyHunter and Stay Protected Against Malware
 You can uninstall SpyHunter, in case you do not need the program anymore. Following the steps below will guide you through the uninstallation process.
Option 1: Uninstallation via SpyHunter’s uninstall option. To locate SpyHunter’s uninstall option:
1. Open the Start menu, and pick Programs or All Programs.
2. Locate SpyHunter’s folder, click on it and choose Uninstall SpyHunter.
Option 2: Uninstallation via Add/Remove Programs Control Panel in Windows.
NB! Administrator privileges may be required to remove programs.
For MacOS:
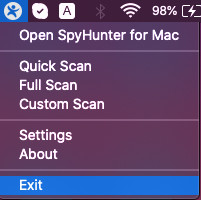
1. Right-click on the top-right tray icon of SpyHunter for Mac and click “Exit”.
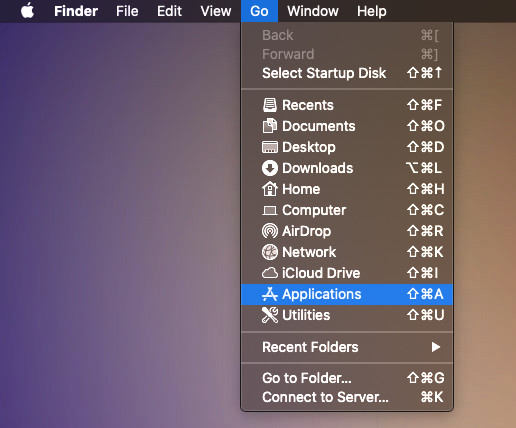
2. While on your Desktop, locate “Go” in the Finder top bar and click on “Applications” from the drop-down menu.
 .
.
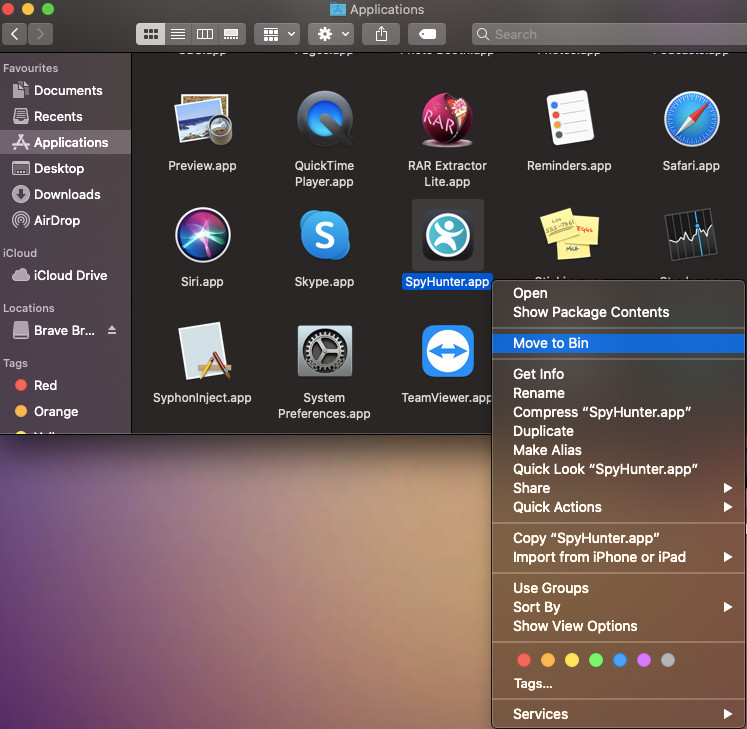
3. Locate SpyHunter for Mac, right-click it and click on “Move to Bin”.
For Windows 10 and 11:
1.Click on the Windows Icon and then open Settings.
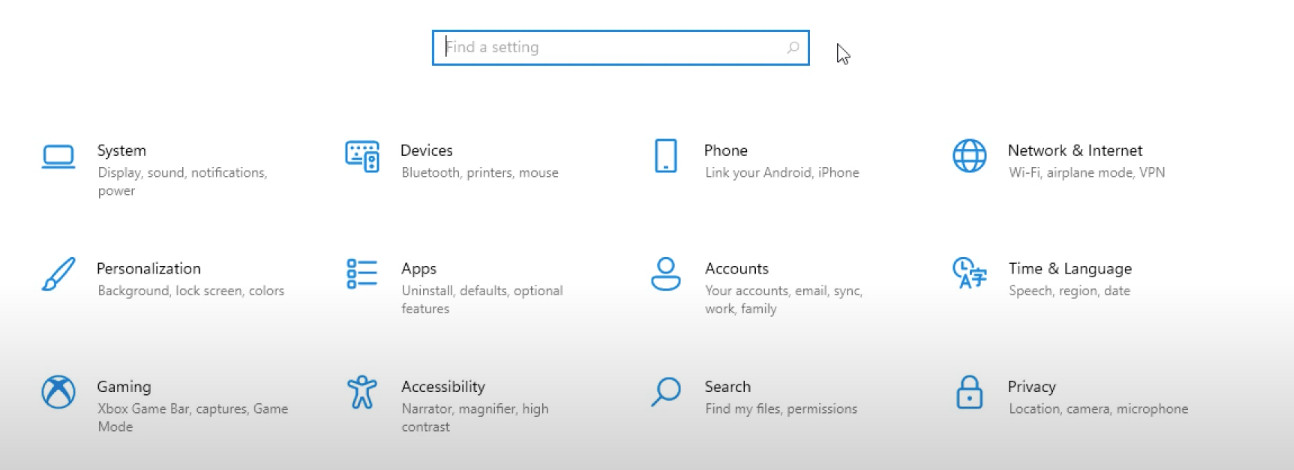
2.Select Apps.
3. From the Apps menu, choose SpyHunter and then click on Uninstall.
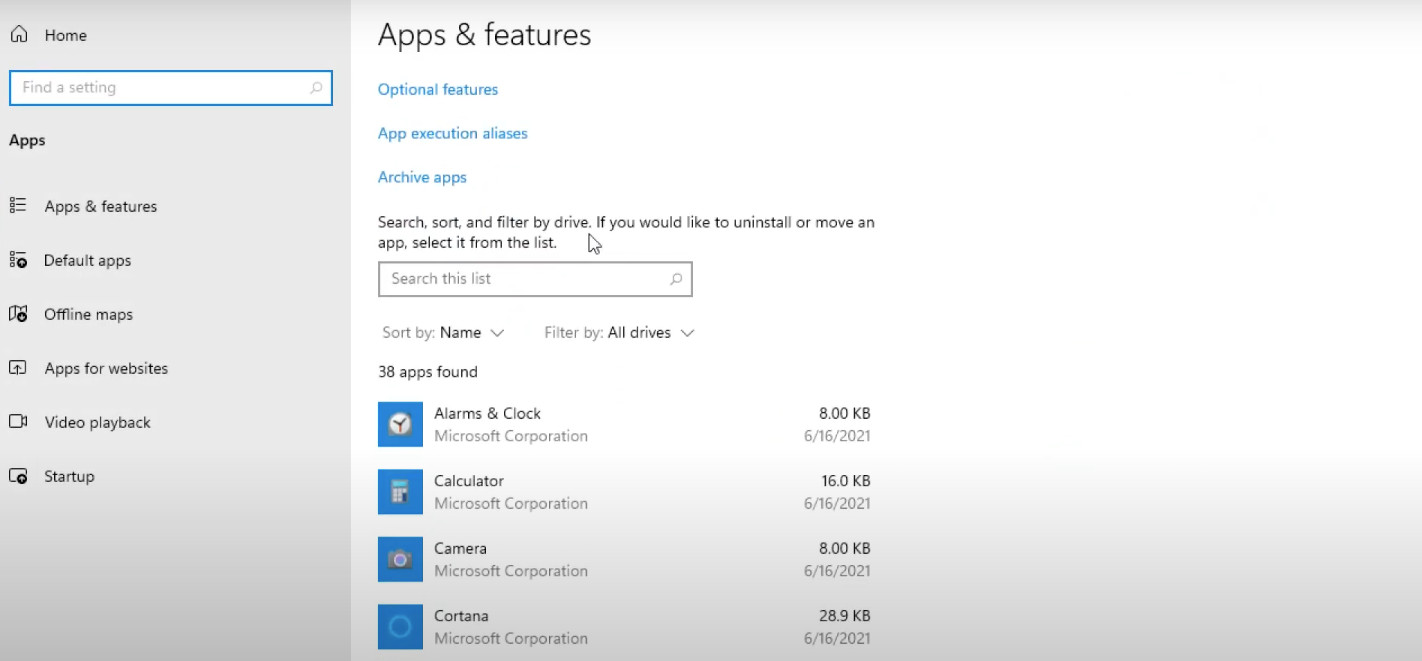
Tip: You can use the search bar to easily find it and remove it.
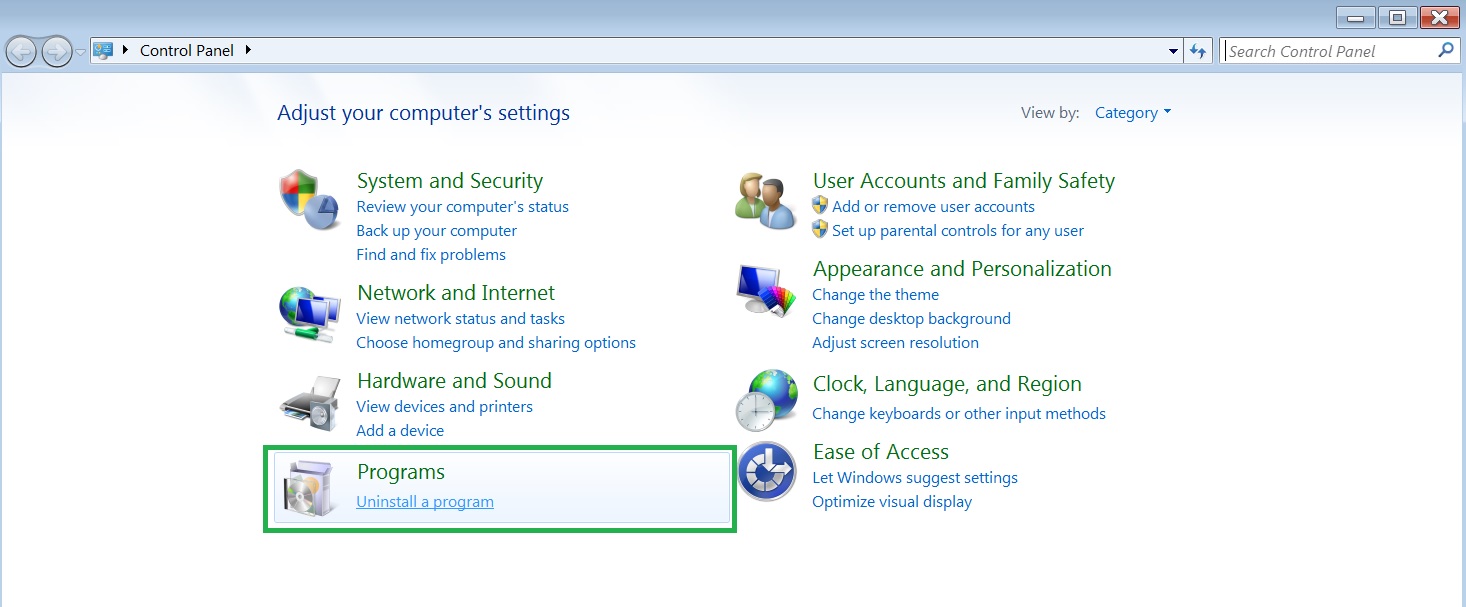
For Windows 7 and Vista:
1. Go to the Start menu.
2. Choose Control Panel.
3. Locate Programs.
4. Choose Uninstall a Program.
5. Choose SpyHunter, and then click the Uninstall button located above.
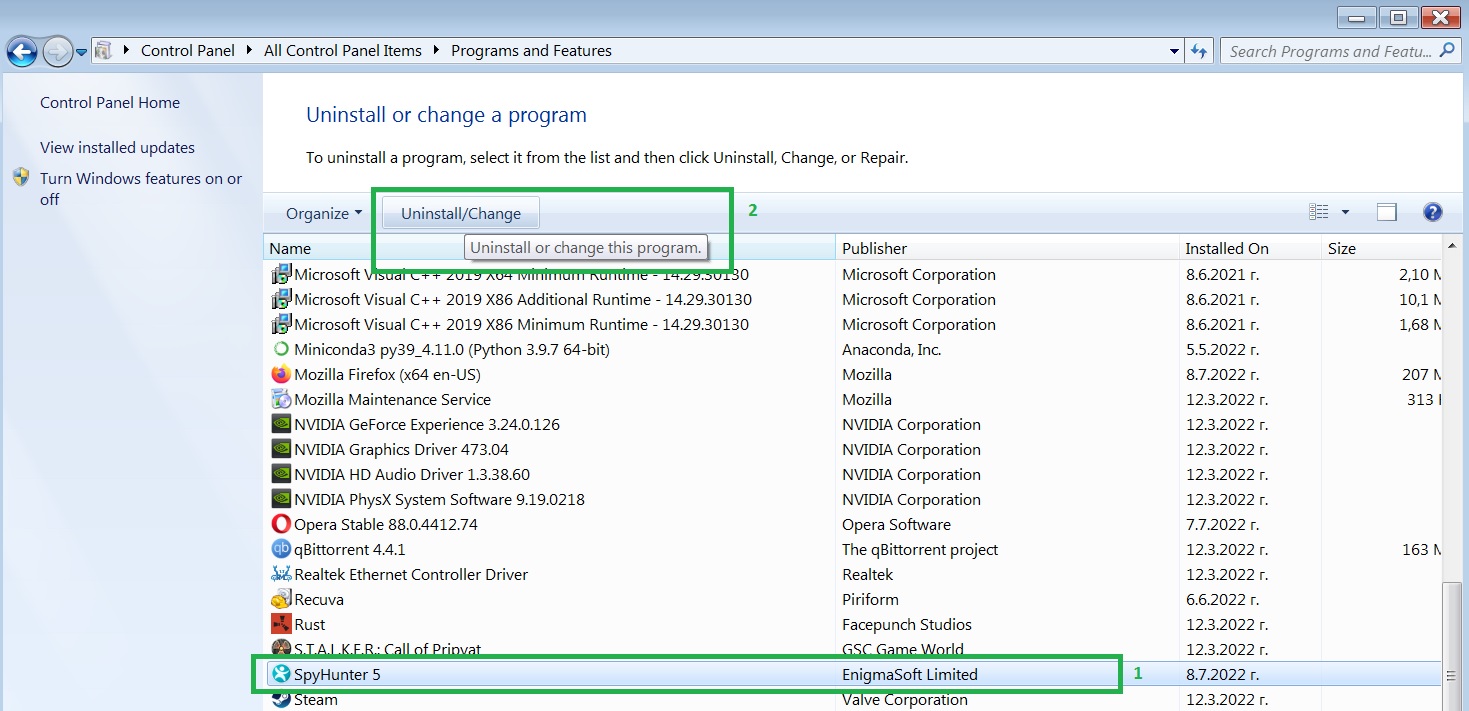
6. You will be prompted to reboot Windows to complete the installation process:

For Windows XP:
1. Go to the Start menu.
2. Choose Control Panel.
3. Select the Add/Remove Programs control panel icon.
4. The Add/Remove control panel now displays a list of programs currently running on your system, SpyHunter included.
5. To uninstall SpyHunter, select it and then click the Remove button.