
If you recently have bought a new computer, chances are that it have arrived with Windows 8 installed in advance. Some of you who are used to work with Windows 7 interface, show interest in downgrading the operating system. Is this possible? Yes, this is possible and might be a fairly easy process depending on what your PC comes with.
Here are some of the options:
- new computer with preinstalled Windows 8 PRO.
- new computer with pre-installed Windows 8 Pro Pack.
- old computer upgraded from Windows 7 to Windows 8.
- old computer upgraded from windows XP to Windows 8.
Before I start showing you what you have to do, to go back to your preferred Operating System, I would like you to determine why you want to downgrade. If the reason is due to some program incompatibility or lack of support for some of the programs you wish to be using, then you do need to downgrade back to Windows 7, if the reason is in the way Windows 8 looks and the changes done to the interface, I would suggest you try a program like: ‘www.classicshell.net‘. A small freeware program which will allow you to change the way Windows 8 looks and feels back to a more well-known interface of your choosing.
If your computer arrived with Windows 8 Pro, then you have the rights to downgrade to Windows 7. Microsoft have given downgrade rights to those who have Windows 8 PRO, and then you can install Windows 7 Professional or Windows Vista Business. Those rights are given mostly because of compatibility issues between the different versions of windows, so in a company or a location that uses many computers it is easier to stick to the older version than to which to the new one.
-
Those are the instructions given from Microsoft themselves:
- Purchase a PC preinstalled with Windows 8 PRO software.
- Accept the Microsoft Software License Terms.
- Perform the downgrade process to the eligible downgrade product using the media/key from a genuine, previously licensed OEM or retail product.
- Use genuine Windows media and a corresponding product key for the version of Windows that is eligible for downgrade. The media/key should come from a previously licensed product from the OEM or retail channel.
- End users who are licensed separately through Microsoft Volume Licensing (VL) may provide their VL media and key to a system builder to facilitate the downgrade on their own systems.
- Insert the downgrade-eligible version of Windows media and follow the installation instructions.
- Enter the product key.
- If the software was previously activated, it cannot be activated online. In this case, the appropriate local Activation Support phone number will be displayed. Call the number and explain the circumstances. When it is determined that the end user has an eligible Windows license, the customer service representative will provide a single-use activation code to activate the software. Please note that Microsoft does not provide a full product key in this scenario.
- Activate the software.
The downgrade process
Follow these steps to downgrade to an earlier version of Windows software:
Here we are talking about downgrade of a completely new system. Brand new computer with no personal information on it. If you want to downgrade your current computer, with all programs, documents and personal information on it, then things are about to become even more complicated.
→ATTENTION :
Microsoft and the hardware manufactories are not obliged in any way to provide drivers for Windows 7, for machines designed and prepared to work with Windows 8. Although for many of the devices proper drivers could be found, it is highly recommended to try to locate all the drivers you will need prior to the reinstall. In case there is a lack of drivers for a certain device, you could disable this device until such a driver is available, or try to start it with a third party driver, in which case ofcours there is no guarantee that it will work properly.
DO YOUR BACK UP – Back up everything you have as information on your computer, before you proceed with the installation of the operating system. During the installation of Windows 7, the partition of the hard-drive designated for the installation will be reformatted and all the information on it will be lost. As well, if you plan to switch back to Windows 8 at some point in time, you should create backup disks of the installation, so that you can reinstall later.
What is needed for the installation :
After you go through all the steps so far, it is time to get what you need for the installation. First you do need an installation copy of Windows 7. It should be either on a CD/DVD or a USB Flash drive. Microsoft allows for you to downgrade the operating system, but they don’t provide you with the installation media. You will need also a valid 25-digit alphanumerical activation code for the operating system you are installing. You can use a brand new copy and use the code that came with it ( which means that you already bought a new operating system ) or use an old media and call the local technical support center of Microsoft, explain the situation with the downgrade, and they can provide you a valid key.
Once again, have a USB flash drive with all the necessary drivers available, as without it, you may get stuck with an unusable machine.
Preparation for the new installation:
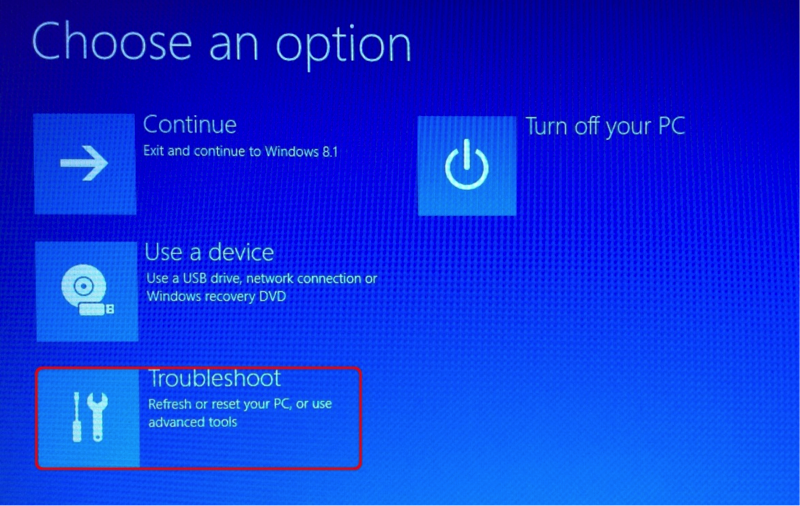
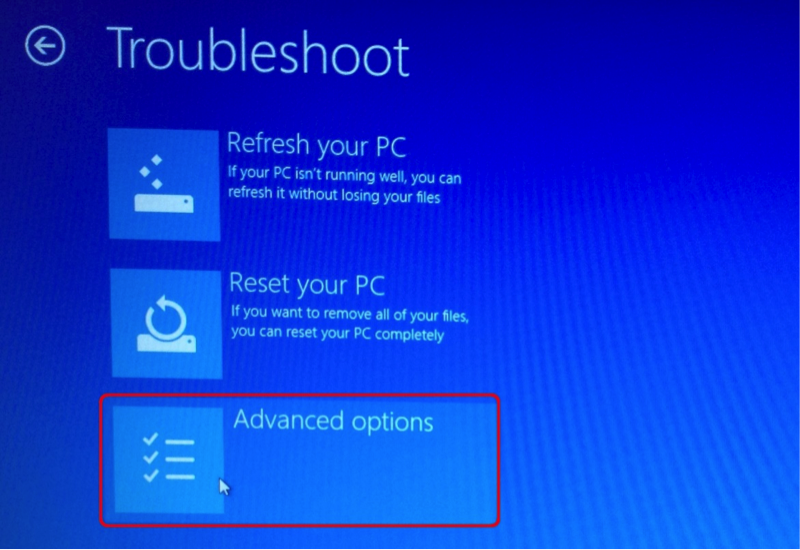
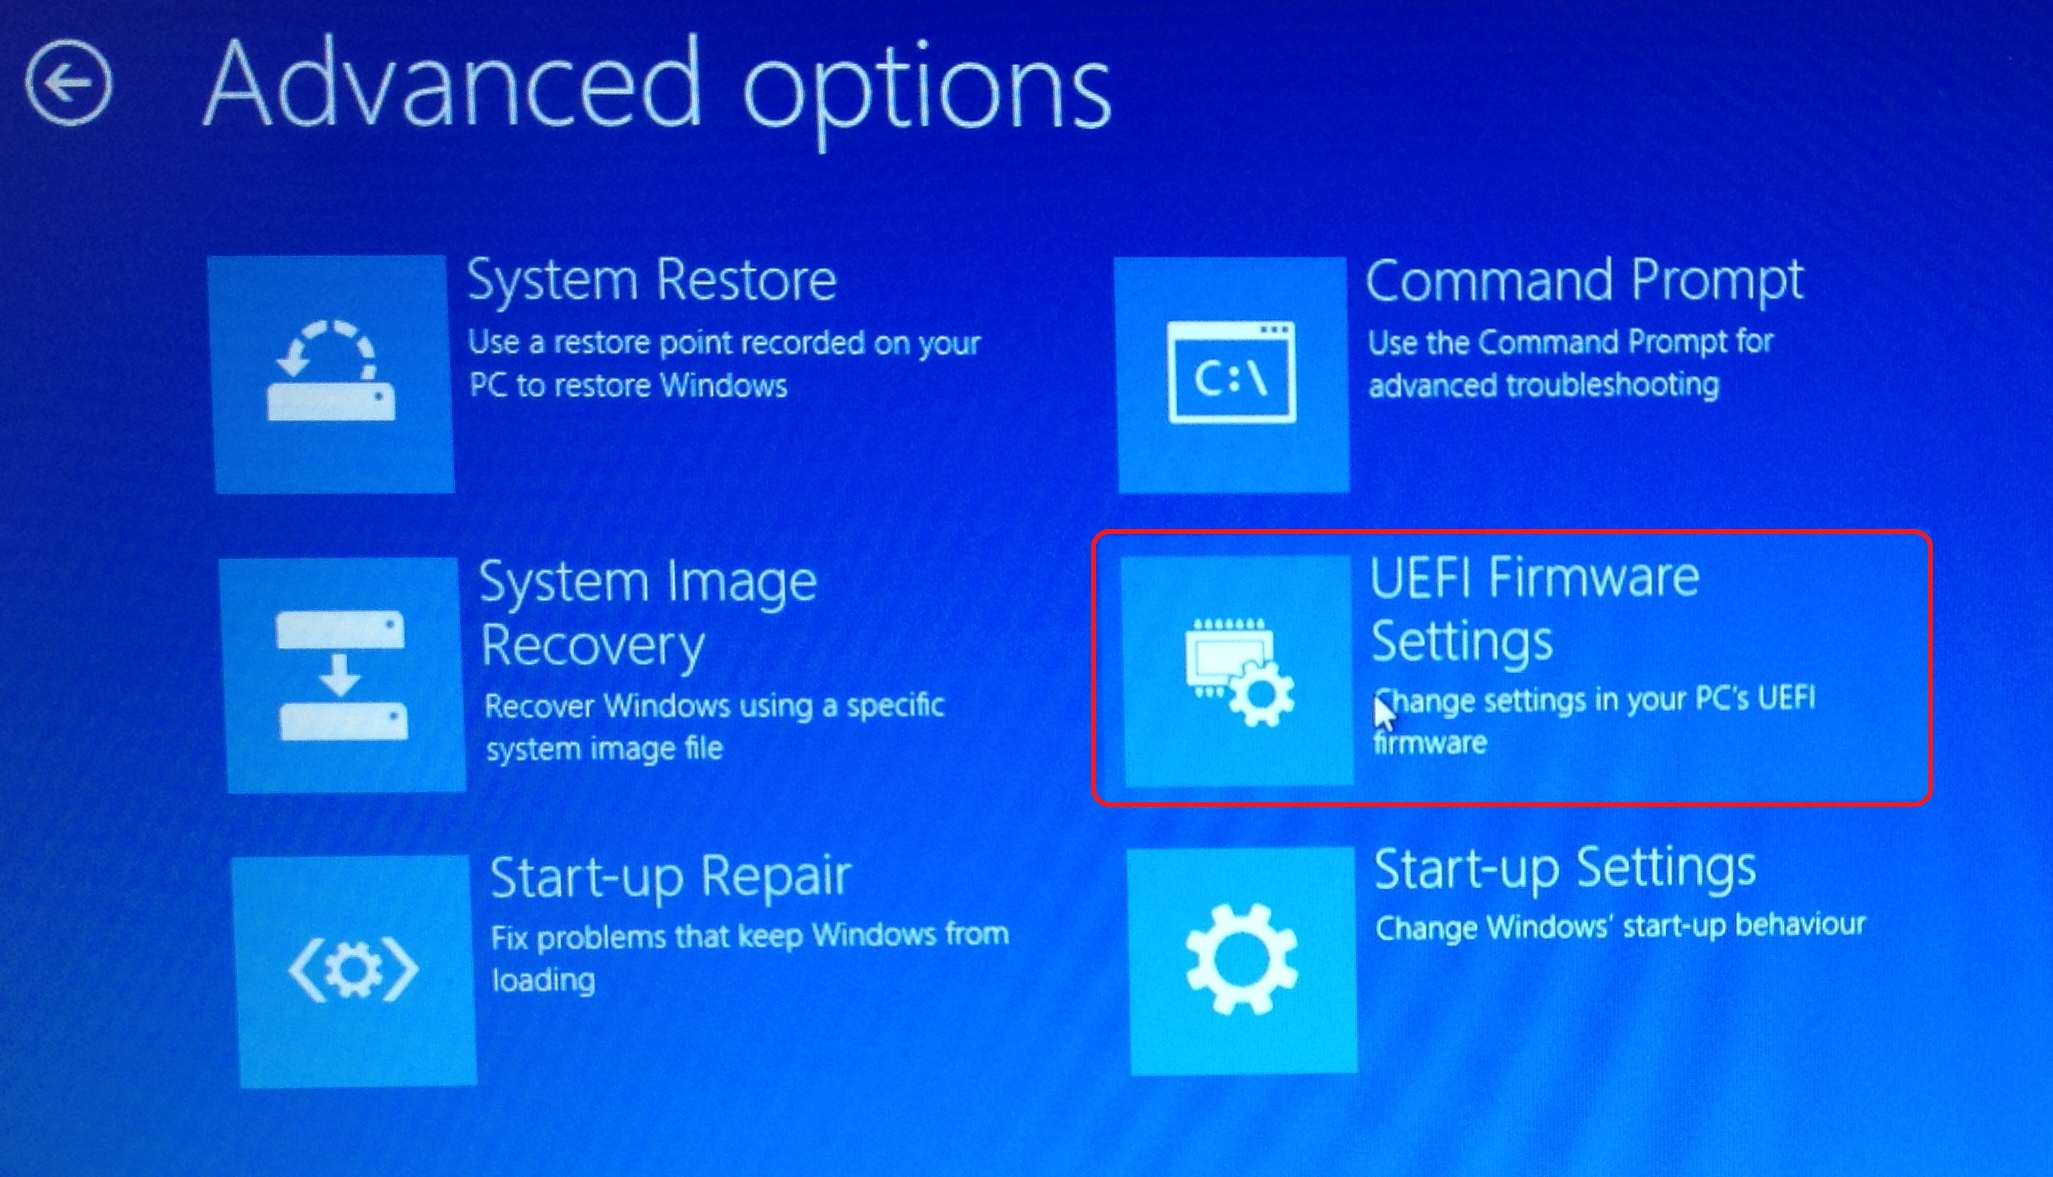
There is an option called UEFI, which doesn’t allow the installation of other Operating System on the machine. To disable it you have to follow these steps :
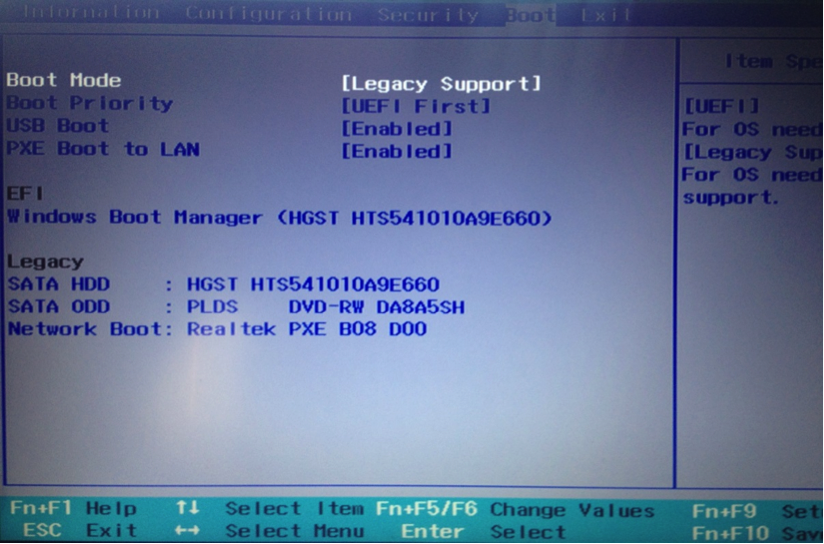
Once you get access to the BIOS, you need to change the Boot options. Locate the option for ‘Security Boot’ and switch it from Enabled to Disabled. This will allow you to start the installation process of the new Operating System on the computer.
Proceed with the new installation.
If all the drivers are prepared, all files back-ups are ready, you have the installation media and have fixed the boot options of your computer, it is time to proceed with the installation. Insert the media in the optical drive or the USB port, depending what is available to you, and follow the given instructions from Microsoft. If you followed all the steps above, you should be enjoy a familiar look and the existing of a usable start button as you have always done by now.