What Is Explore Division?
 Explore Division also known as Adware.ExploreDivision is simply an infection that has been developed to get in your Mac and wreak havoc in it. It might get files, download and install other infections, push several different ads and also do an array of different tasks. It’s categorized as a program that is potentially unwanted to its ability to access Mac operating systems without your permission or knowledge. We recommend that you check this out removal manual to figure out how you can eliminate it from the affected system successfully in case you have noticed Explore Division software on your Mac.

Explore Division Summary
| Name | Explore Division |
| Type | Unwanted app for Mac |
| Short Description | Aims to modify the settings on your Mac in order to get it to cause browser redirects and display different advertisements. |
| Symptoms | Your Mac begins to display various types of online advertisements, which results in slowing down of your machine. |
| Distribution Method | Bundled downloads. Web pages which may advertise it. |
| Detection Tool |
See If Your Mac Has Been Affected by Explore Division
Download
Malware Removal Tool
|
User Experience | Join Our Forum to Discuss Explore Division. |
Explore Division – Activity
The primary ways of infection which are utilized by the Explore Division App on Mac are related to the app being sent to you as a virus e-mail that is pretending to be a completely legitimate file. Another infection approach to this malware is using phony applications that you’ve possibly downloaded and installed from a website offering free downloads. Such fake applications get added on Macs through bundling, or third-party websites offering them as a free extra.
Other similar apps to this one are tBrains for Mac and Private Deep redirect.
In either way, after installation of Explore Division has taken place you do not have any kind of alternative since you do not realise it is added on your computer system. In the meantime, Explore Division Infection can perform the following actions on your Mac:
- Show a lot of advertisements
- Get your saved logins on your web browsers.
- Steal your passwords.
- Track your browsing history and clicks.
- Control your camera and microphone using your browser permissions.
Additionally, the application might begin delivering adverts based on your interests. These advertisements can be invasive as their goal is to fool you to click on them. Be cautious that the related web sites revealed on ads may be jeopardized. This means that they can result in installing other programs that are unwanted by merely clicking on them. Not only this, but the virus can also self-update and install other Explore Division Trojans like it.
It’s much better for your Mac safety to entirely remove Explore Division and ensure that no associated files to it are still on your macOS.

Remove Explore Division from Mac
To get rid of the Explore Division app from your Mac device, we strongly advise that you pay attention to the removal actions underneath this article. They have been made to assist you in isolating and deleting all of the files that have been dropped by Explore Division Infection completely. It is advised that you run a scan of the Mac with an anti-malware program for the best removal. Such a virus removal app is made to scan your Mac and eliminate all unwanted applications, like Explore Division or malware from it.
Steps to Prepare Before Removal:
Before starting to follow the steps below, be advised that you should first do the following preparations:
- Backup your files in case the worst happens.
- Make sure to have a device with these instructions on standy.
- Arm yourself with patience.
- 1. Scan for Mac Malware
- 2. Uninstall Risky Apps
- 3. Clean Your Browsers
Step 1: Scan for and remove Explore Division files from your Mac
When you are facing problems on your Mac as a result of unwanted scripts and programs such as Explore Division, the recommended way of eliminating the threat is by using an anti-malware program. SpyHunter for Mac offers advanced security features along with other modules that will improve your Mac’s security and protect it in the future.
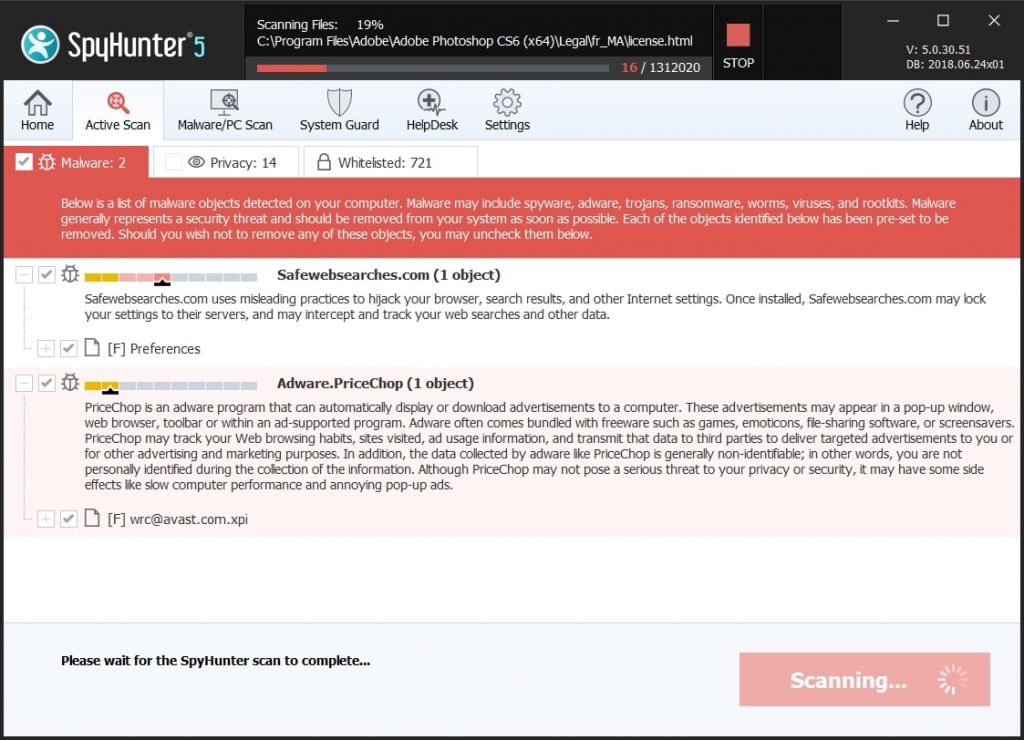
Quick and Easy Mac Malware Video Removal Guide
Bonus Step: How to Make Your Mac Run Faster?
Mac machines maintain probably the fastest operating system out there. Still, Macs do become slow and sluggish sometimes. The video guide below examines all of the possible problems that may lead to your Mac being slower than usual as well as all of the steps that can help you to speed up your Mac.
Step 2: Uninstall Explore Division and remove related files and objects
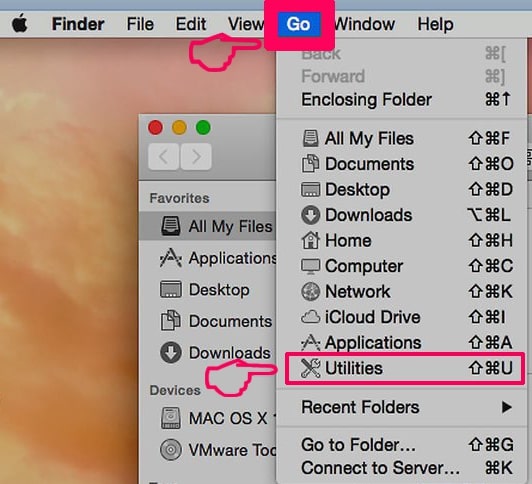
1. Hit the ⇧+⌘+U keys to open Utilities. Another way is to click on “Go” and then click “Utilities”, like the image below shows:
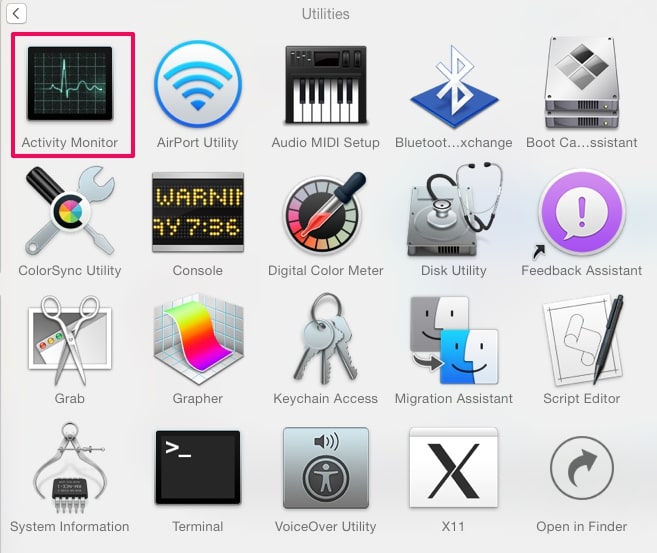
2. Find Activity Monitor and double-click it:
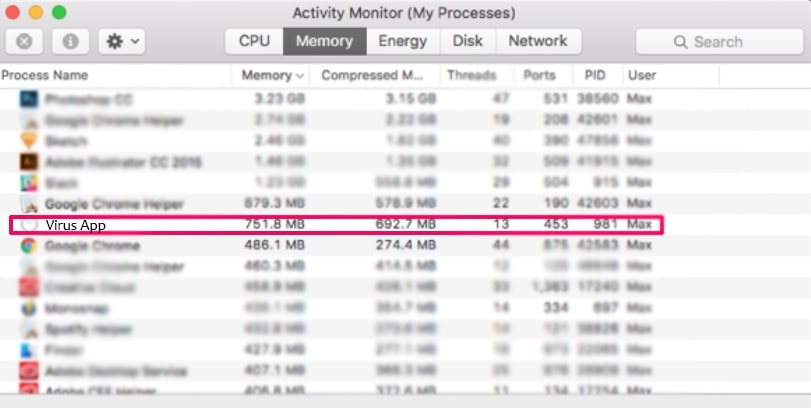
3. In the Activity Monitor look for any suspicious processes, belonging or related to Explore Division:
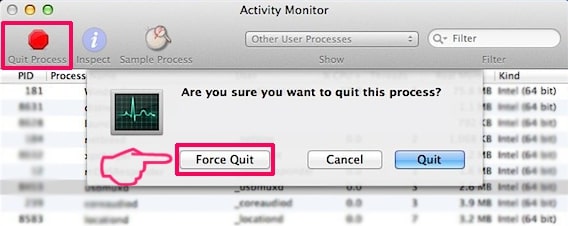
4. Click on the "Go" button again, but this time select Applications. Another way is with the ⇧+⌘+A buttons.
5. In the Applications menu, look for any suspicious app or an app with a name, similar or identical to Explore Division. If you find it, right-click on the app and select “Move to Trash”.
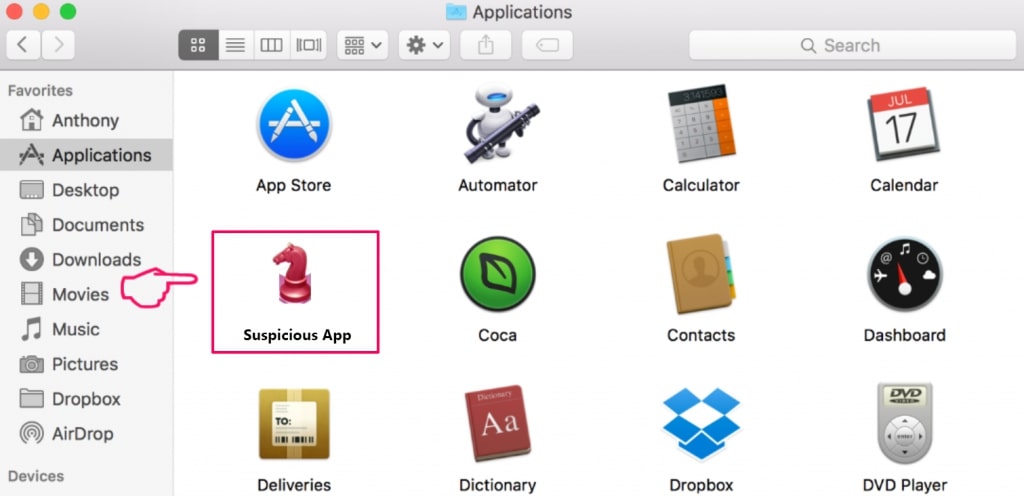
6. Select Accounts, after which click on the Login Items preference. Your Mac will then show you a list of items that start automatically when you log in. Look for any suspicious apps identical or similar to Explore Division. Check the app you want to stop from running automatically and then select on the Minus (“-“) icon to hide it.
7. Remove any leftover files that might be related to this threat manually by following the sub-steps below:
- Go to Finder.
- In the search bar type the name of the app that you want to remove.
- Above the search bar change the two drop down menus to “System Files” and “Are Included” so that you can see all of the files associated with the application you want to remove. Bear in mind that some of the files may not be related to the app so be very careful which files you delete.
- If all of the files are related, hold the ⌘+A buttons to select them and then drive them to “Trash”.
In case you cannot remove Explore Division via Step 1 above:
In case you cannot find the virus files and objects in your Applications or other places we have shown above, you can manually look for them in the Libraries of your Mac. But before doing this, please read the disclaimer below:
1. Click on "Go" and Then "Go to Folder" as shown underneath:
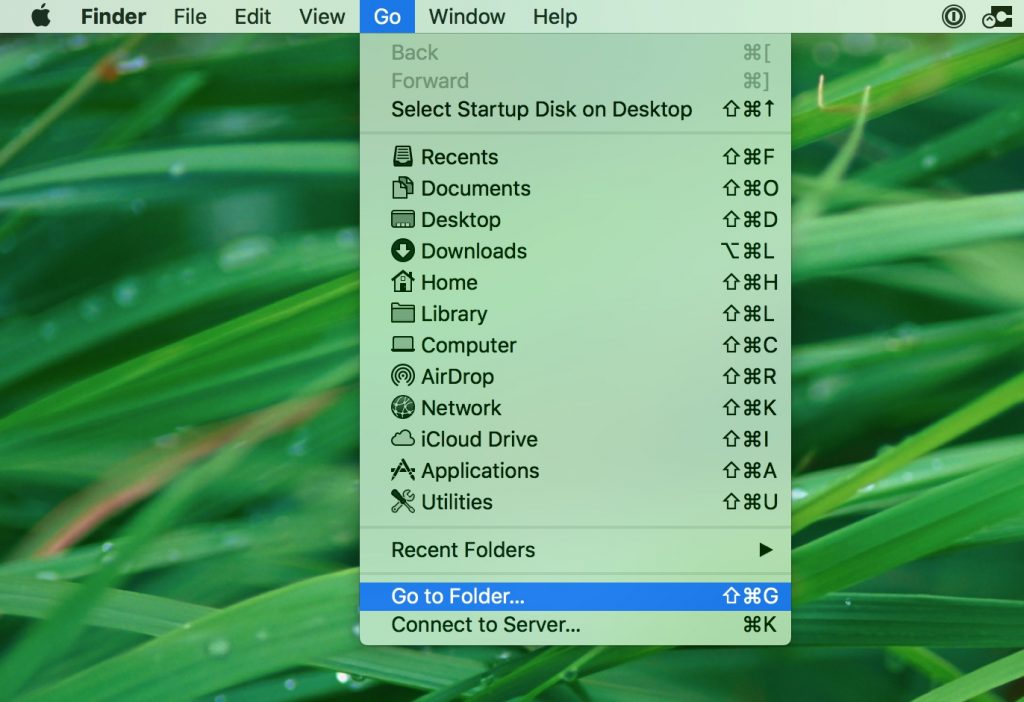
2. Type in "/Library/LauchAgents/" and click Ok:
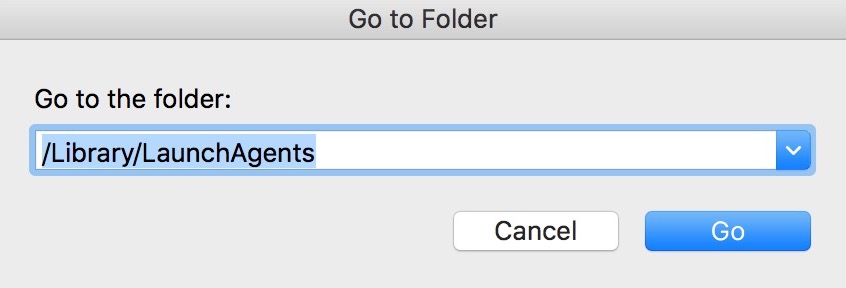
3. Delete all of the virus files that have similar or the same name as Explore Division. If you believe there is no such file, do not delete anything.
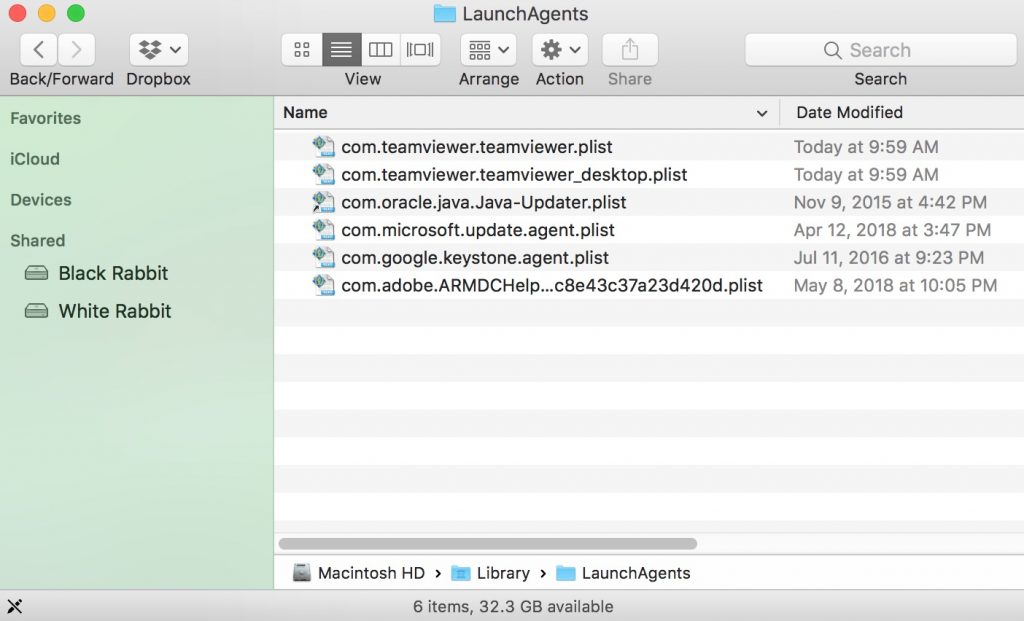
You can repeat the same procedure with the following other Library directories:
→ ~/Library/LaunchAgents
/Library/LaunchDaemons
Tip: ~ is there on purpose, because it leads to more LaunchAgents.
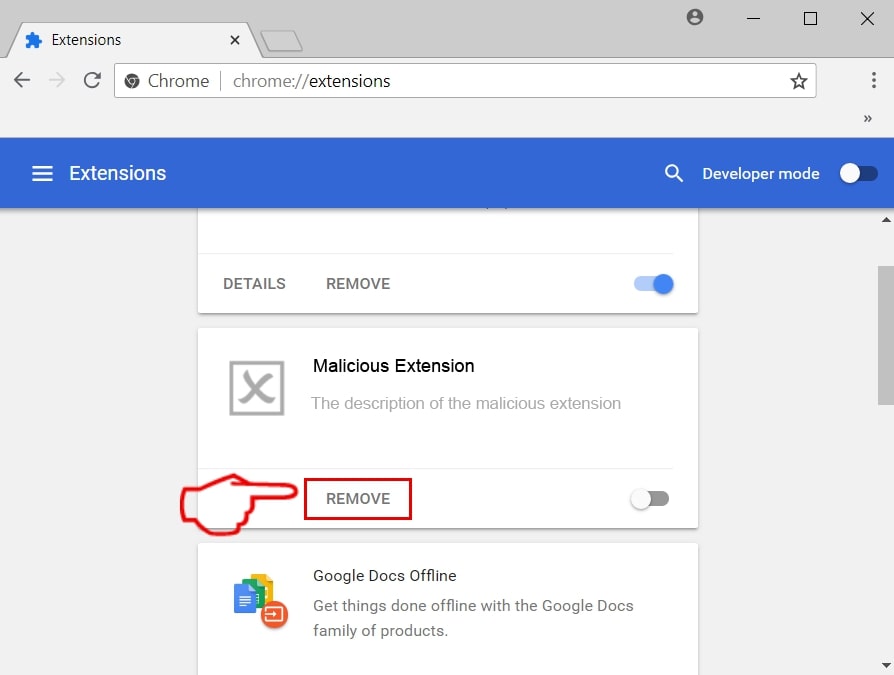
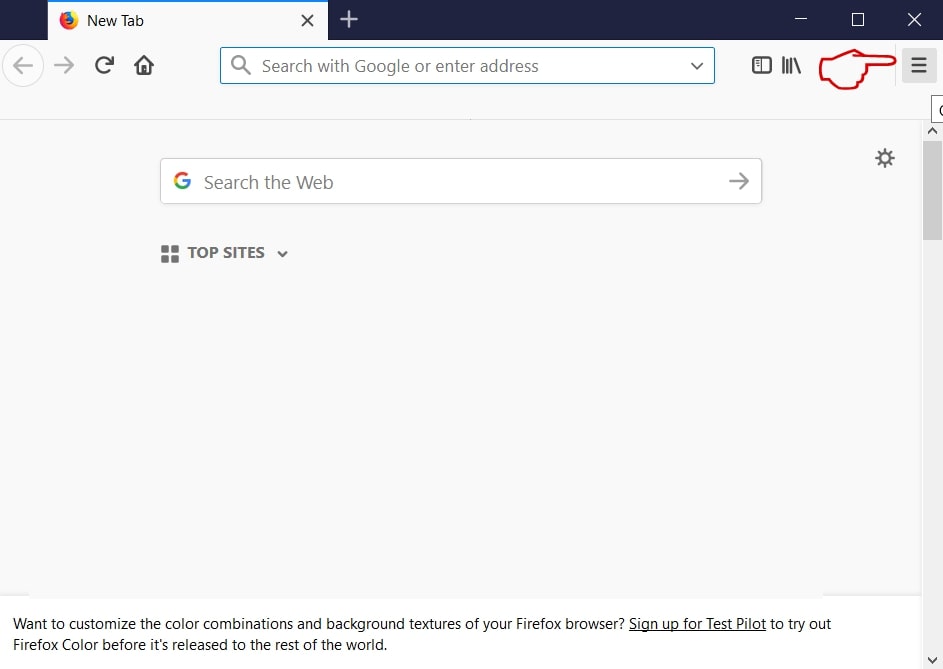
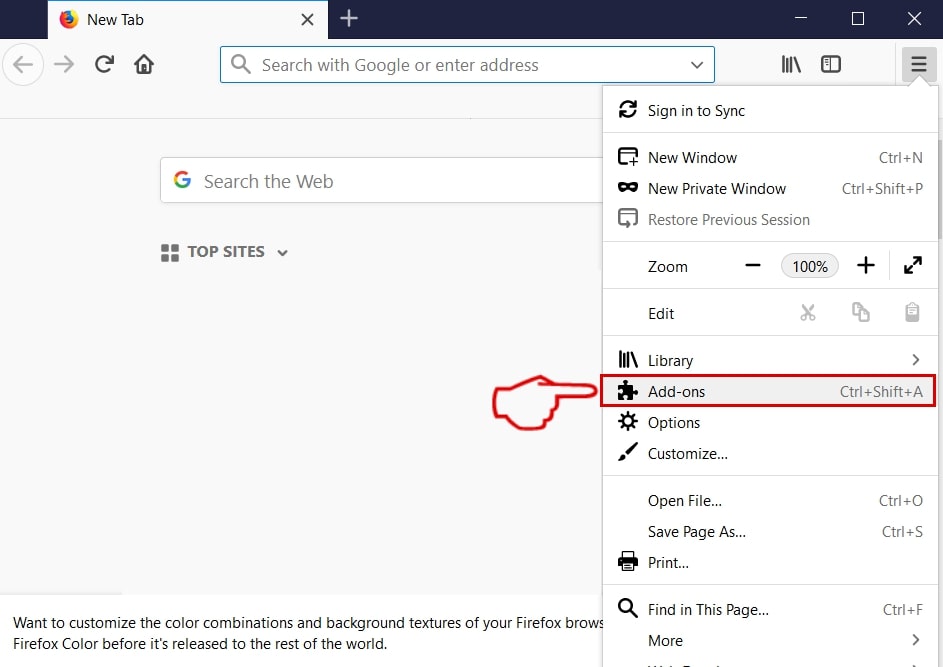
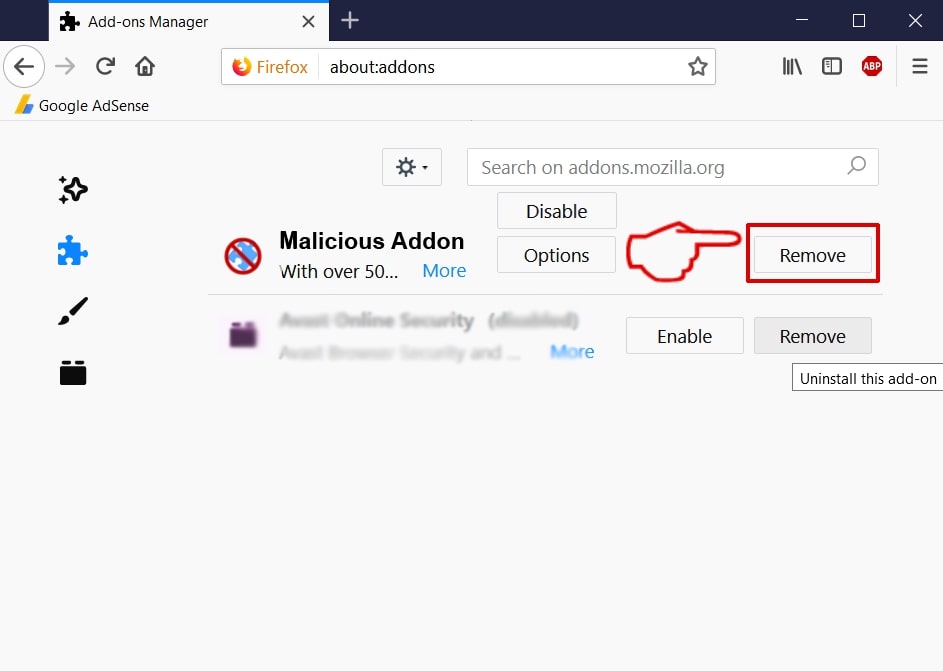
Step 3: Remove Explore Division – related extensions from Safari / Chrome / Firefox
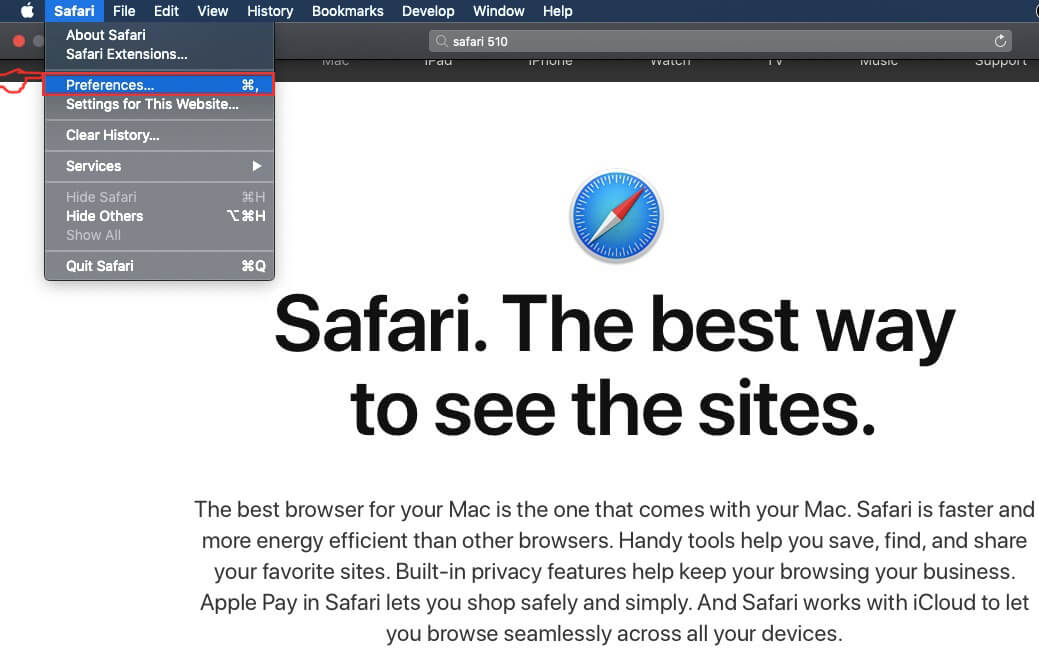

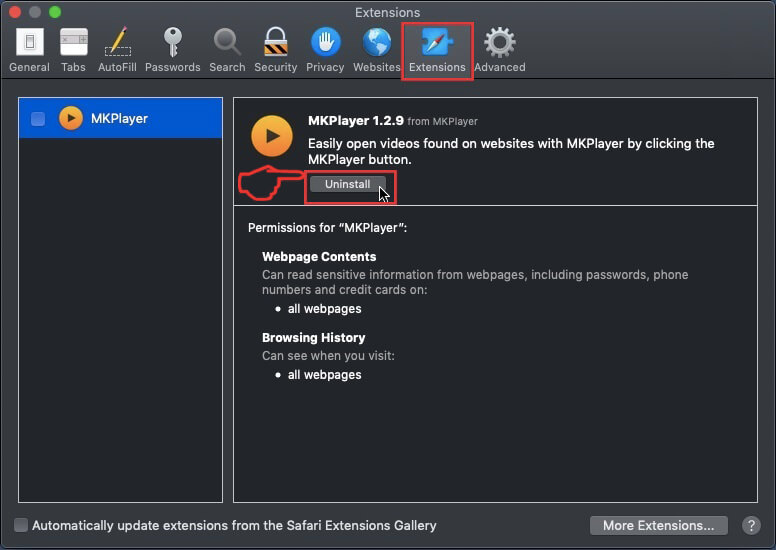

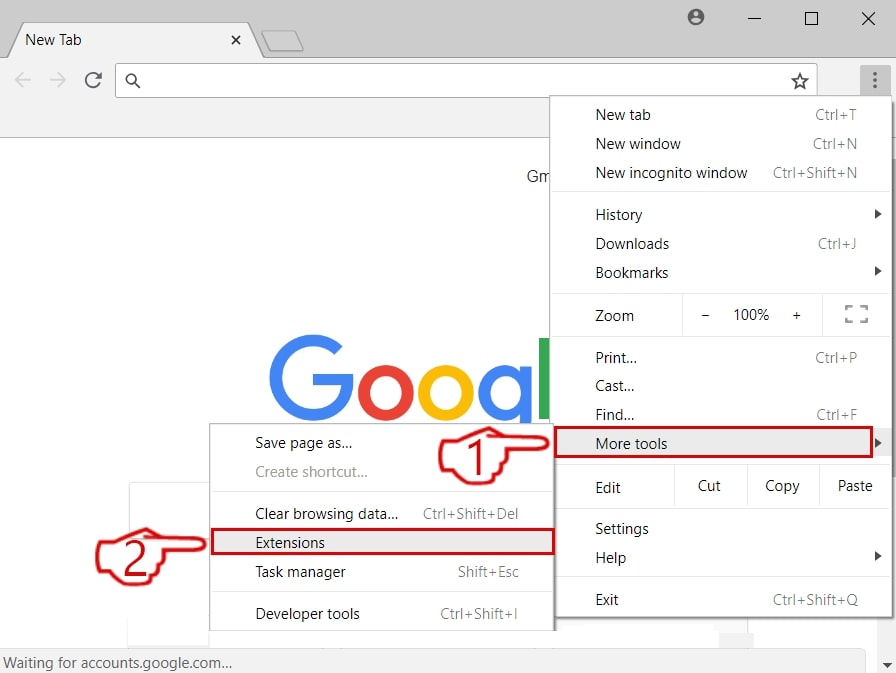
Explore Division-FAQ
What is Explore Division on your Mac?
The Explore Division threat is probably a potentially unwanted app. There is also a chance it could be related to Mac malware. If so, such apps tend to slow your Mac down significantly and display advertisements. They could also use cookies and other trackers to obtain browsing information from the installed web browsers on your Mac.
Can Macs Get Viruses?
Yes. As much as any other device, Apple computers do get malware. Apple devices may not be a frequent target by malware authors, but rest assured that almost all of the Apple devices can become infected with a threat.
What Types of Mac Threats Are There?
According to most malware researchers and cyber-security experts, the types of threats that can currently infect your Mac can be rogue antivirus programs, adware or hijackers (PUPs), Trojan horses, ransomware and crypto-miner malware.
What To Do If I Have a Mac Virus, Like Explore Division?
Do not panic! You can easily get rid of most Mac threats by firstly isolating them and then removing them. One recommended way to do that is by using a reputable malware removal software that can take care of the removal automatically for you.
There are many Mac anti-malware apps out there that you can choose from. SpyHunter for Mac is one of the reccomended Mac anti-malware apps, that can scan for free and detect any viruses. This saves time for manual removal that you would otherwise have to do.
How to Secure My Data from Explore Division?
With few simple actions. First and foremost, it is imperative that you follow these steps:
Step 1: Find a safe computer and connect it to another network, not the one that your Mac was infected in.
Step 2: Change all of your passwords, starting from your e-mail passwords.
Step 3: Enable two-factor authentication for protection of your important accounts.
Step 4: Call your bank to change your credit card details (secret code, etc.) if you have saved your credit card for online shopping or have done online activiites with your card.
Step 5: Make sure to call your ISP (Internet provider or carrier) and ask them to change your IP address.
Step 6: Change your Wi-Fi password.
Step 7: (Optional): Make sure to scan all of the devices connected to your network for viruses and repeat these steps for them if they are affected.
Step 8: Install anti-malware software with real-time protection on every device you have.
Step 9: Try not to download software from sites you know nothing about and stay away from low-reputation websites in general.
If you follow these reccomendations, your network and Apple devices will become significantly more safe against any threats or information invasive software and be virus free and protected in the future too.
More tips you can find on our MacOS Virus section, where you can also ask any questions and comment about your Mac problems.
About the Explore Division Research
The content we publish on SensorsTechForum.com, this Explore Division how-to removal guide included, is the outcome of extensive research, hard work and our team’s devotion to help you remove the specific macOS issue.
How did we conduct the research on Explore Division?
Please note that our research is based on an independent investigation. We are in contact with independent security researchers, thanks to which we receive daily updates on the latest malware definitions, including the various types of Mac threats, especially adware and potentially unwanted apps (PUAs).
Furthermore, the research behind the Explore Division threat is backed with VirusTotal.
To better understand the threat posed by Mac malware, please refer to the following articles which provide knowledgeable details.


