
| Name | Pesquisa.ninja |
| Type | Suspicious Site, employed by a browser hijacker on the PC. |
| Short Description | May display ad-supported search results. May display pop-up advertisements. |
| Symptoms | Instant redirects. Pop-up advertisements. Slow PC. Changed home page and new-tab bage. |
| Distribution Method | Browser Redirect by clicked ads or by PUP applications. |
| Detection tool | Download SpyHunter, to See If Your System Has Been Affected By Pesquisa.ninja |
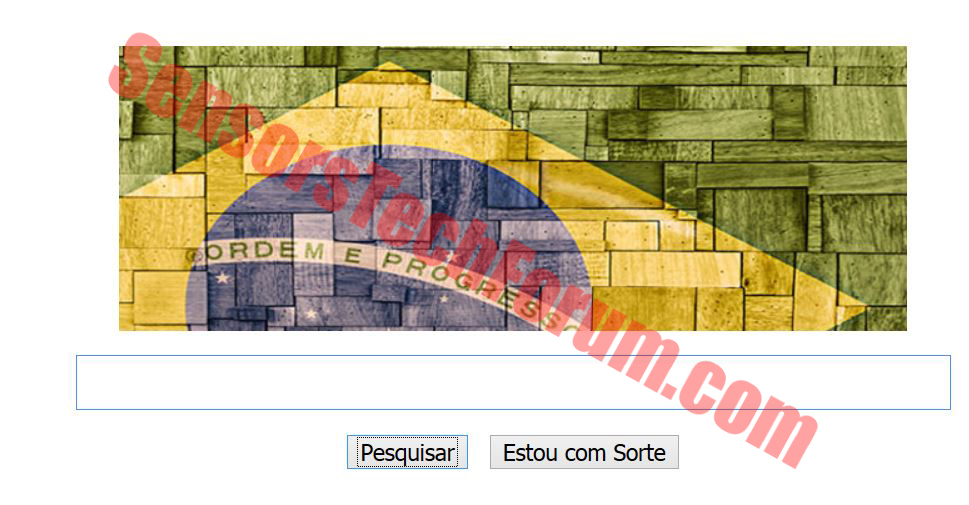 Another annoying browser hijacker has appeared lately, terrorizing the computers of mainly Latin-American users. It is located on the domain https://pesquisa.ninja and uses Yahoo search as a redirect to display search results. Some users have reported seeing advertisements connected with this browser hijacker and their homepage and new tabs changed to its domain. Browser hijackers are believed by experts to be relatively dangerous ad-supported applications, and their removal is often recommended.
How Did Pesquisa.ninja Hijack My PC?
There are several ways by which you may have initiated the installation of pesquisa.ninja related programs on your computer. The most widely employed one is called ‘bundling’ it involves the combination of this app in other program installers. In case you have recently installed a freeware app or added an extension, beware that this may be the cause of having this program hijack your computer. Such free programs may include suspicious third-party apps or search engines like pesquisa.ninja with the purpose of taking advantage of pay-per-click deals and affiliate schemes with third-parties. And third-parties have their agreements and privacy policies, some of which may be in breach with user interests, mainly in the sense of information aggregation. This is why programs, downloaded from third-party sites that are not their official providers should not be entirely trusted.
More About Pesquisa.ninja Hijacker
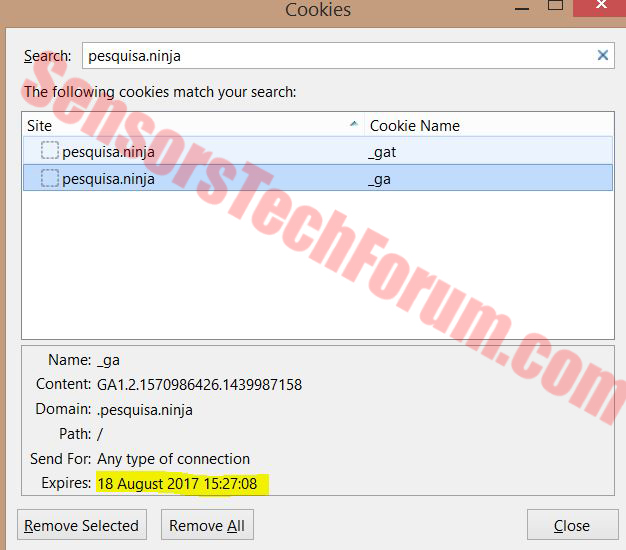
When visited, the first thing noticed about this suspicious search engine is that it uses Yahoo search as its database, which immediately reduced the trust level in it. More to it than that, the search engine installs tracking cookies which are text files on the computer that collect and store different information, such as online clicks, searches, etc.
Most hoax search engines employ other search results to inject ad-supported search results that lead to third parties. More to it than that, some users have reported that after seeing pesquisa.ninja hijack their PC, it may have caused several redirects to unknown third-party sites. Redirects may vary from completely harmless sites through malvertising sites, all the way to web locations that inject malicious code or download malware onto the user PC. Malware can vary since there are different types of it, but the most dangerous of them are:
- Ransomware.
- Trojan horses.
- Worms.
- Viruses.
- Dangerous Scripts.
- Keyloggers.
This is why tech geeks always advise users and businesses to learn how to browse safely and install all the necessary software they need to:
- Block advertisements and pop-ups
- Prevent unknown apps from starting on the computer.
- Look for modifications on the registries of the computers.
- Find a good anti-malware program.
More so, it is a fact that the main reason for $67.2 billion expenses on computer crime is usually the after-effect of poor online behavior. Because, face it, even if you have the best antivirus, the most efficient solution for all types of unwanted code on your machine is you. That is the reason it is essential to keep up with the latest in both malware and risky non-malware applications.
How To Remove Pesquisa.ninja Browser Hijacker
To remove this unwanted software from your computer, you must act fast. To uninstall manually, first you should immediately disconnect the internet connection from your device and then follow the step-by-step removal guide below. After that you should take into consideration the installation of a powerful anti-malware program that will not only remove any traces left after uninstall, but will provide you with an active shield, preventing future threats from entering your computer.

Spy Hunter scanner will only detect the threat. If you want the threat to be automatically removed, you need to purchase the full version of the anti-malware tool.Find Out More About SpyHunter Anti-Malware Tool / How to Uninstall SpyHunter
1. Remove/Uninstall Pesquisa.ninja in Windows
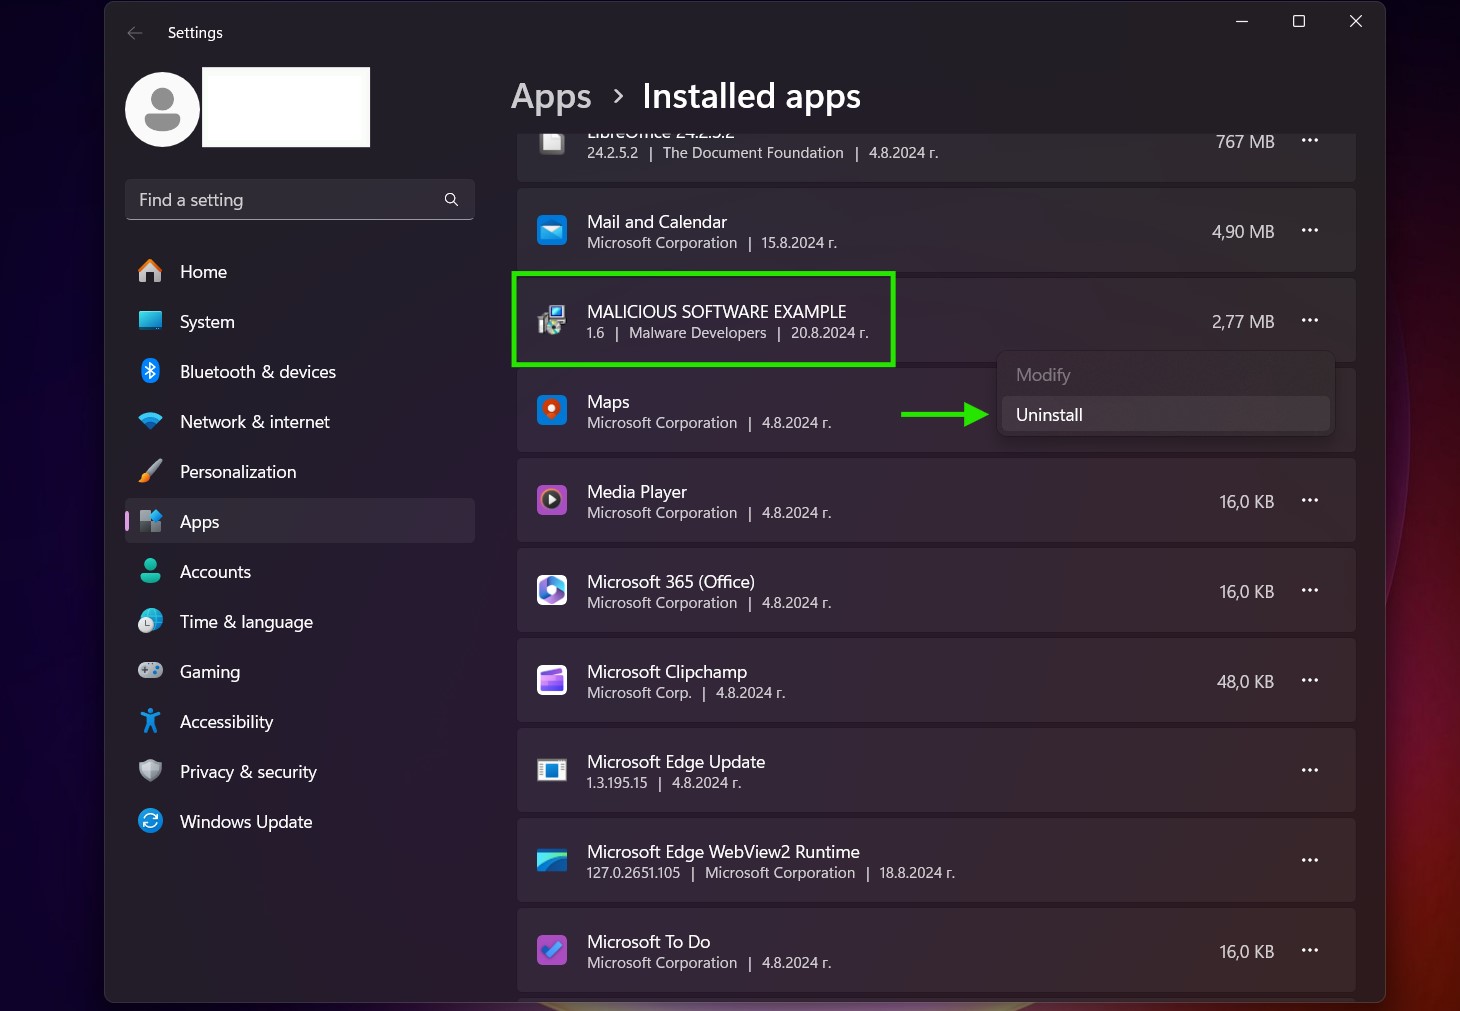
Here is a method in few easy steps to remove that program. No matter if you are using Windows 8, 7, Vista or XP, those steps will get the job done. Dragging the program or its folder to the recycle bin can be a very bad decision. If you do that, bits and pieces of the program get left behind, and that can lead to unstable work of your PC, mistakes with the file type associations and other unpleasant activities. The proper way to get a program off your computer is to Uninstall it. To do that:

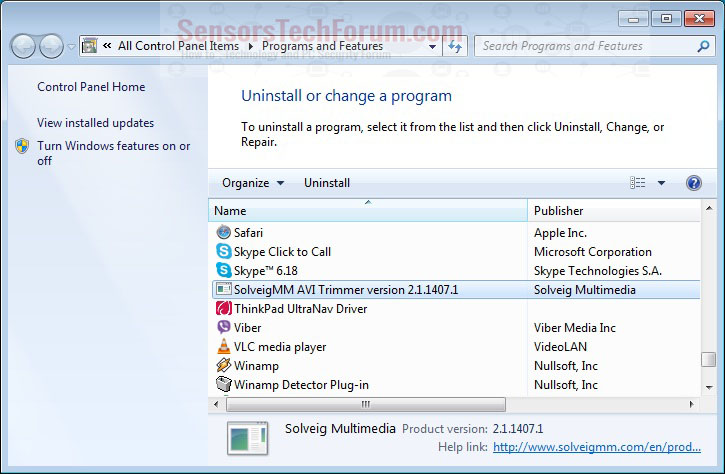
Select the program that you want to remove, and press “Uninstall” (fig.3).
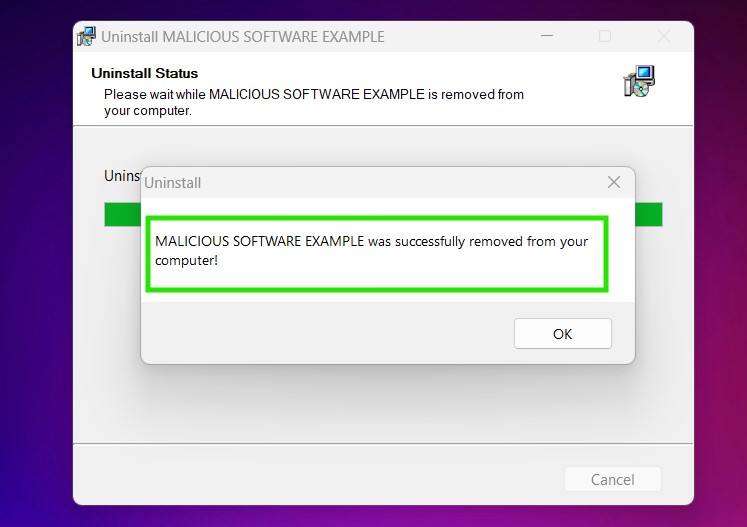
Follow the instructions above and you will successfully uninstall Pesquisa.ninja.
2. Remove Pesquisa.ninja from your browser
Select the “Add-ons” icon from the menu

Select Pesquisa.ninja and click “Remove“

After Pesquisa.ninja is removed, restart Mozilla Firefox by closing it from the red “X” in the top right corner and start it again.

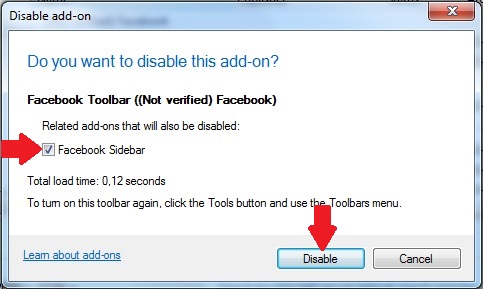
Select Pesquisa.ninja to remove, and then click ‘Disable’. A pop-up window will appear to inform you that you are about to disable the selected toolbar, and some additional toolbars might be disabled as well. Leave all the boxes checked, and click ‘Disable’.
After Pesquisa.ninja has been removed, restart Internet Explorer by closing it from the red ‘X’ in the top right corner and start it again.
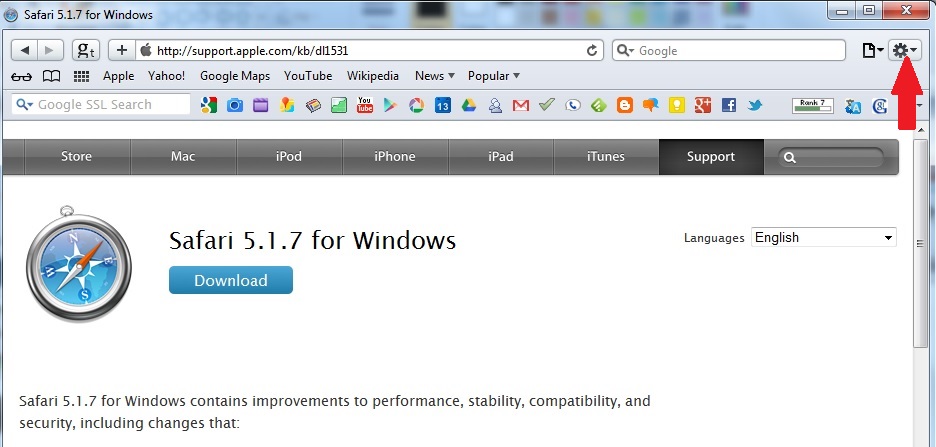
Open the drop menu by clicking on the sprocket icon in the top right corner.
From the drop menu select ‘Preferences’
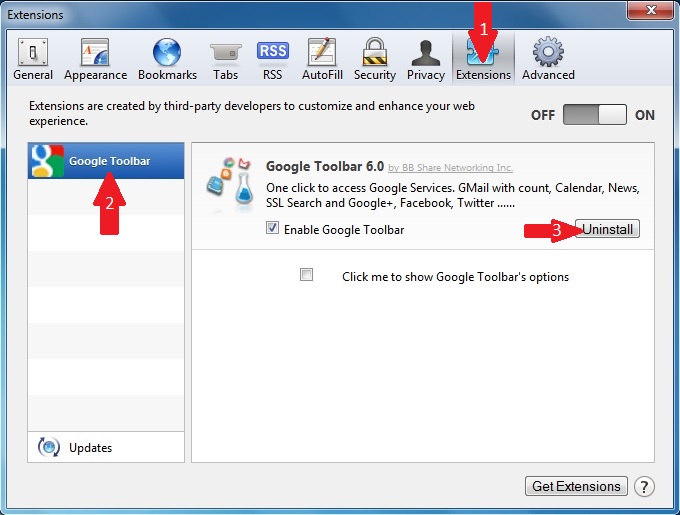
In the new window select ‘Extensions’
Click once on Pesquisa.ninja
Click ‘Uninstall’
A pop-up window will appear asking for confirmation to uninstall Pesquisa.ninja. Select ‘Uninstall’ again, and the Pesquisa.ninja will be removed.
3. Remove Pesquisa.ninja automatically with Spy Hunter Malware – Removal Tool.
To clean your computer with the award-winning software Spy Hunter –
It is highly recommended to run a scan before purchasing the full version of the software to make sure that the current version of the malware can be detected by SpyHunter.
- Windows
- Mac OS X
- Google Chrome
- Mozilla Firefox
- Microsoft Edge
- Safari
- Internet Explorer
- Stop Push Pop-ups
How to Remove Pesquisa.ninja from Windows.
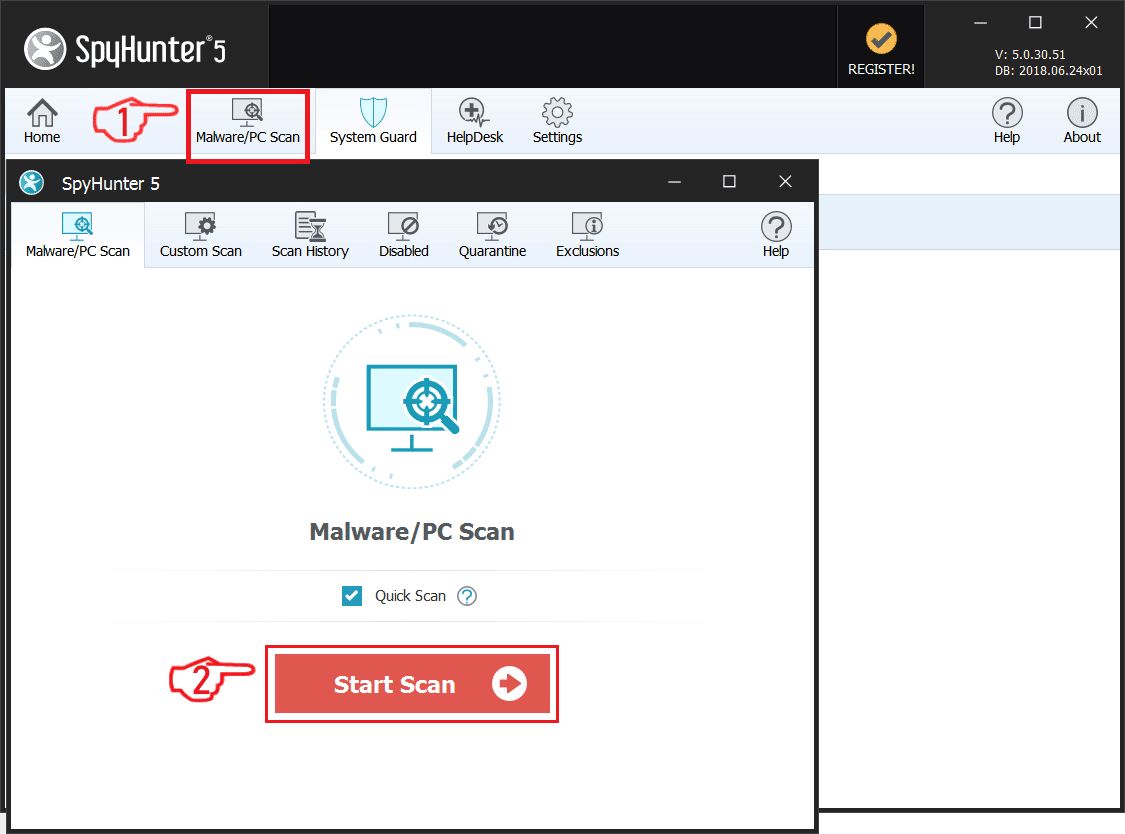
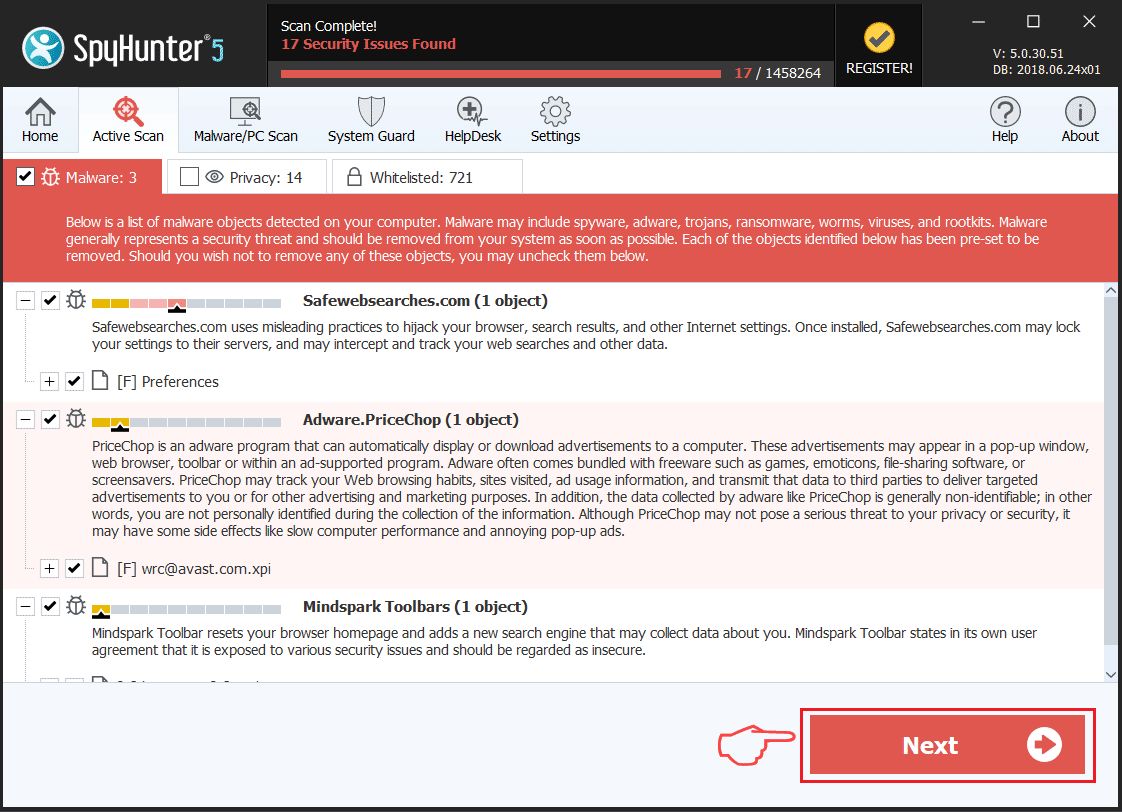
Step 1: Scan for Pesquisa.ninja with SpyHunter Anti-Malware Tool
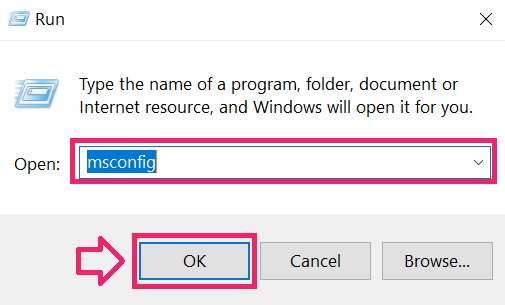
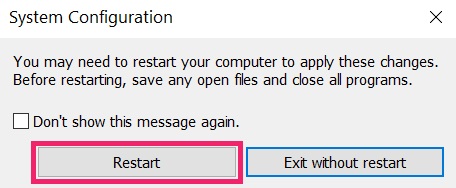
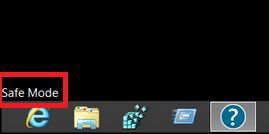
Step 2: Boot Your PC In Safe Mode

Step 3: Uninstall Pesquisa.ninja and related software from Windows
Uninstall Steps for Windows 11
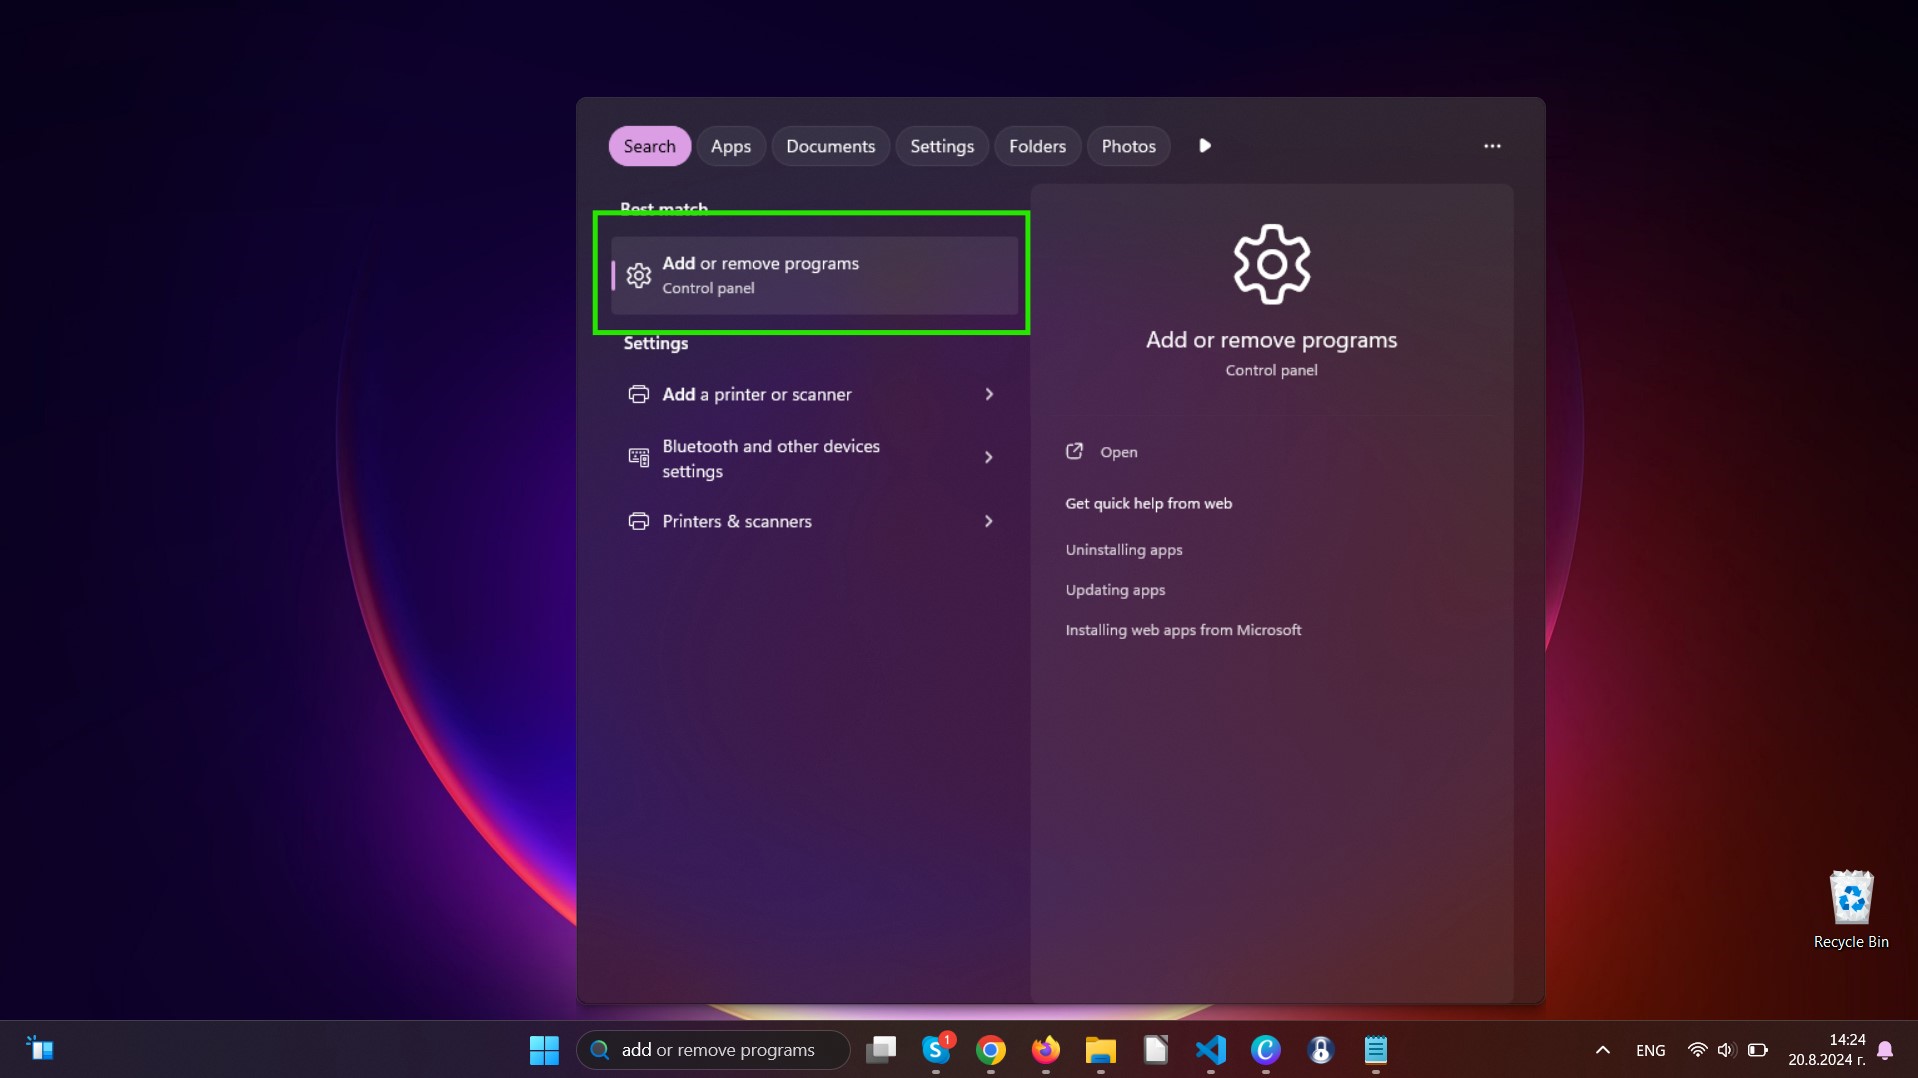
Uninstall Steps for Windows 10 and Older Versions
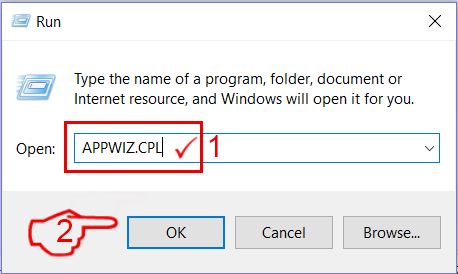
Here is a method in few easy steps that should be able to uninstall most programs. No matter if you are using Windows 10, 8, 7, Vista or XP, those steps will get the job done. Dragging the program or its folder to the recycle bin can be a very bad decision. If you do that, bits and pieces of the program are left behind, and that can lead to unstable work of your PC, errors with the file type associations and other unpleasant activities. The proper way to get a program off your computer is to Uninstall it. To do that:
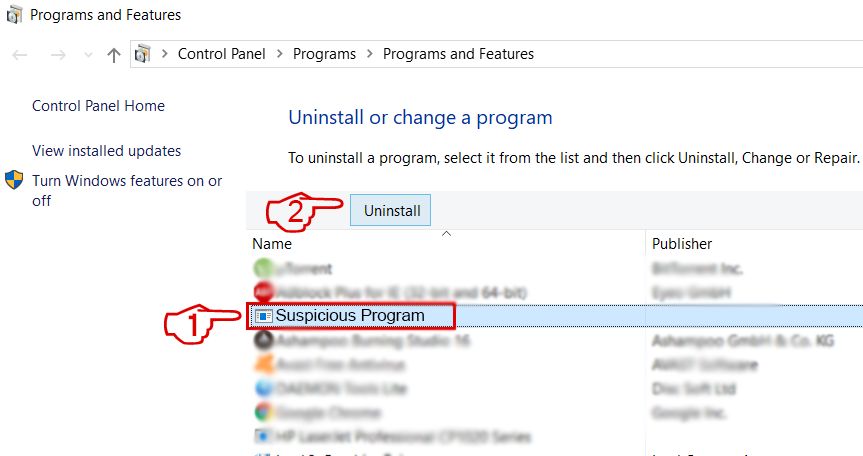 Follow the instructions above and you will successfully uninstall most programs.
Step 4: Clean Any registries, Created by Pesquisa.ninja on Your PC.
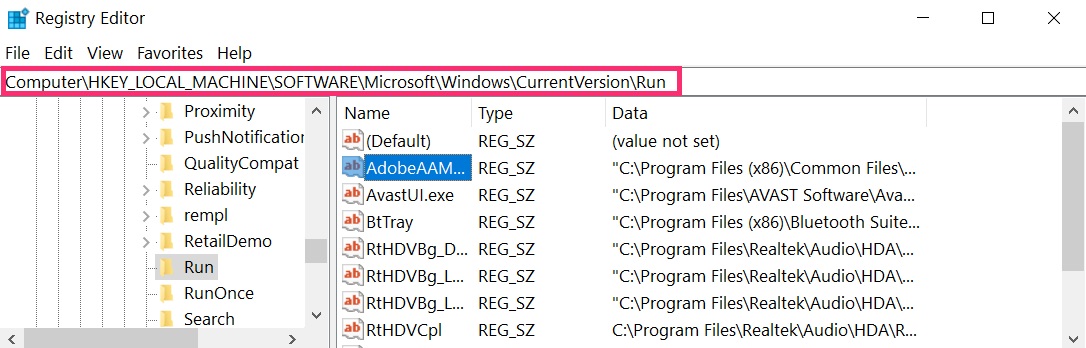
The usually targeted registries of Windows machines are the following:
- HKEY_LOCAL_MACHINE\Software\Microsoft\Windows\CurrentVersion\Run
- HKEY_CURRENT_USER\Software\Microsoft\Windows\CurrentVersion\Run
- HKEY_LOCAL_MACHINE\Software\Microsoft\Windows\CurrentVersion\RunOnce
- HKEY_CURRENT_USER\Software\Microsoft\Windows\CurrentVersion\RunOnce
You can access them by opening the Windows registry editor and deleting any values, created by Pesquisa.ninja there. This can happen by following the steps underneath:
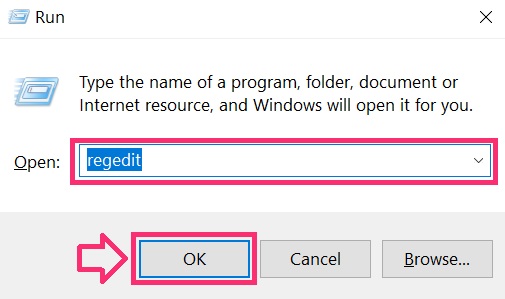
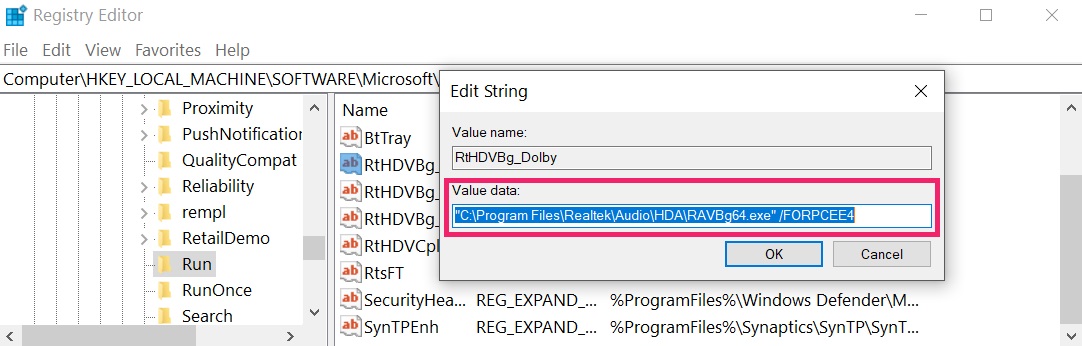 Tip: To find a virus-created value, you can right-click on it and click "Modify" to see which file it is set to run. If this is the virus file location, remove the value.
Video Removal Guide for Pesquisa.ninja (Windows).
Get rid of Pesquisa.ninja from Mac OS X.
Step 1: Uninstall Pesquisa.ninja and remove related files and objects

Your Mac will then show you a list of items that start automatically when you log in. Look for any suspicious apps identical or similar to Pesquisa.ninja. Check the app you want to stop from running automatically and then select on the Minus (“-“) icon to hide it.
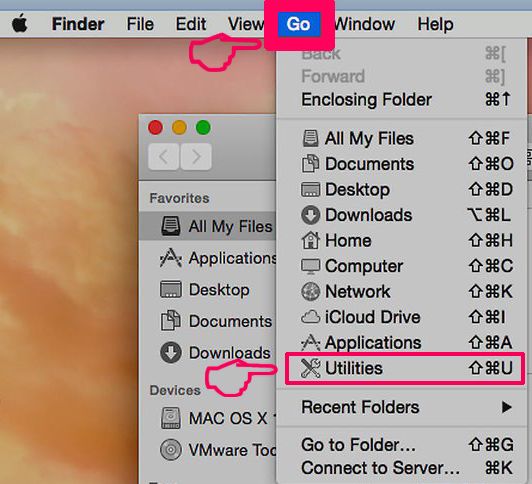
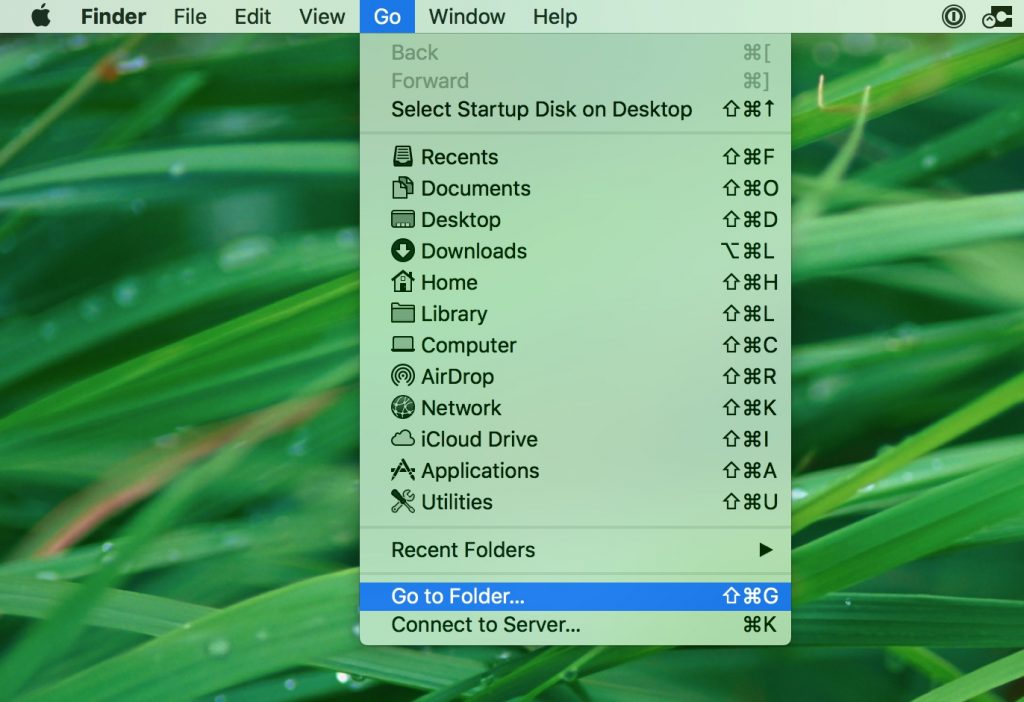
- Go to Finder.
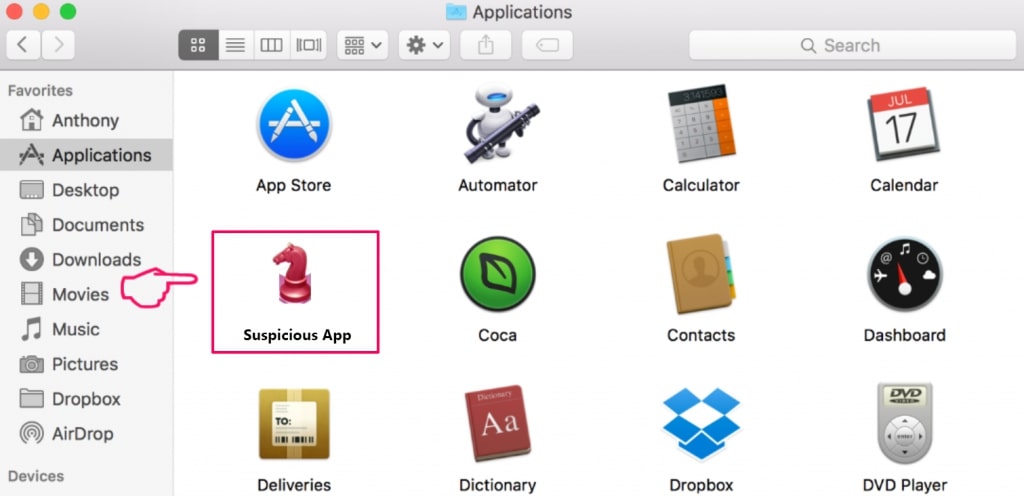
- In the search bar type the name of the app that you want to remove.
- Above the search bar change the two drop down menus to “System Files” and “Are Included” so that you can see all of the files associated with the application you want to remove. Bear in mind that some of the files may not be related to the app so be very careful which files you delete.
- If all of the files are related, hold the ⌘+A buttons to select them and then drive them to “Trash”.
In case you cannot remove Pesquisa.ninja via Step 1 above:
In case you cannot find the virus files and objects in your Applications or other places we have shown above, you can manually look for them in the Libraries of your Mac. But before doing this, please read the disclaimer below:
You can repeat the same procedure with the following other Library directories:
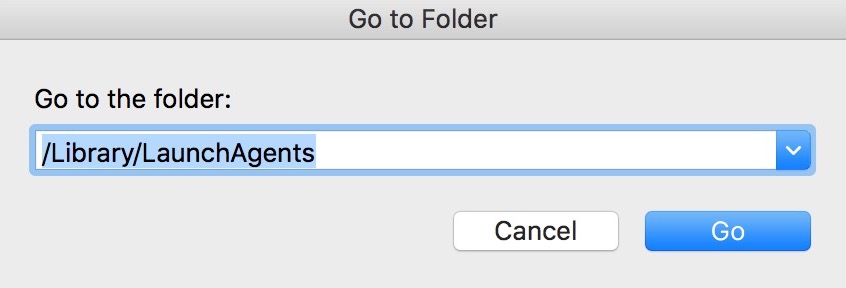
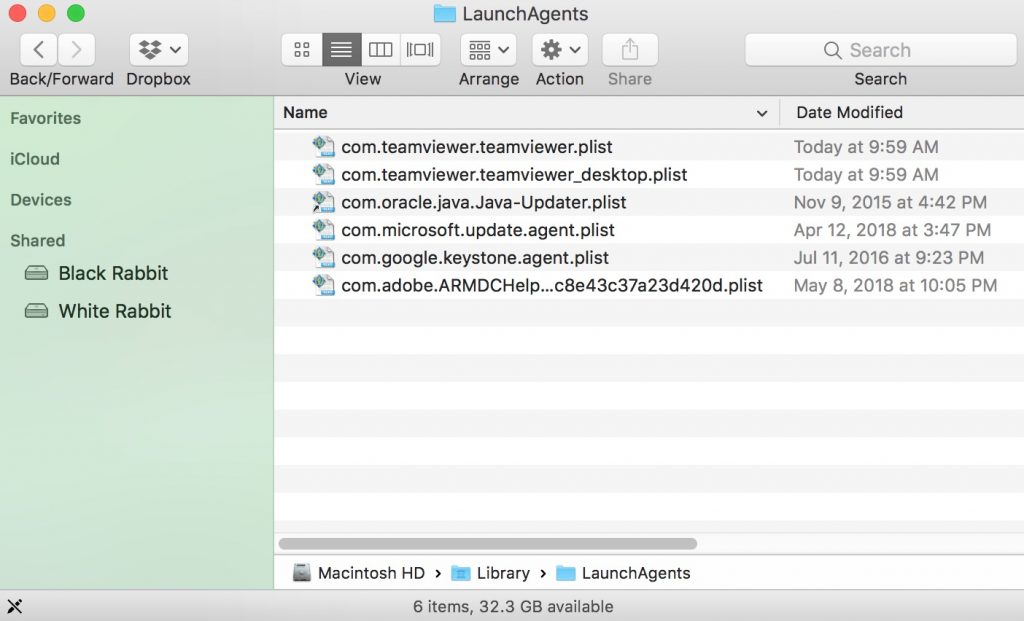
→ ~/Library/LaunchAgents
/Library/LaunchDaemons
Tip: ~ is there on purpose, because it leads to more LaunchAgents.
Step 2: Scan for and remove Pesquisa.ninja files from your Mac
When you are facing problems on your Mac as a result of unwanted scripts and programs such as Pesquisa.ninja, the recommended way of eliminating the threat is by using an anti-malware program. SpyHunter for Mac offers advanced security features along with other modules that will improve your Mac’s security and protect it in the future.
Video Removal Guide for Pesquisa.ninja (Mac)
Remove Pesquisa.ninja from Google Chrome.
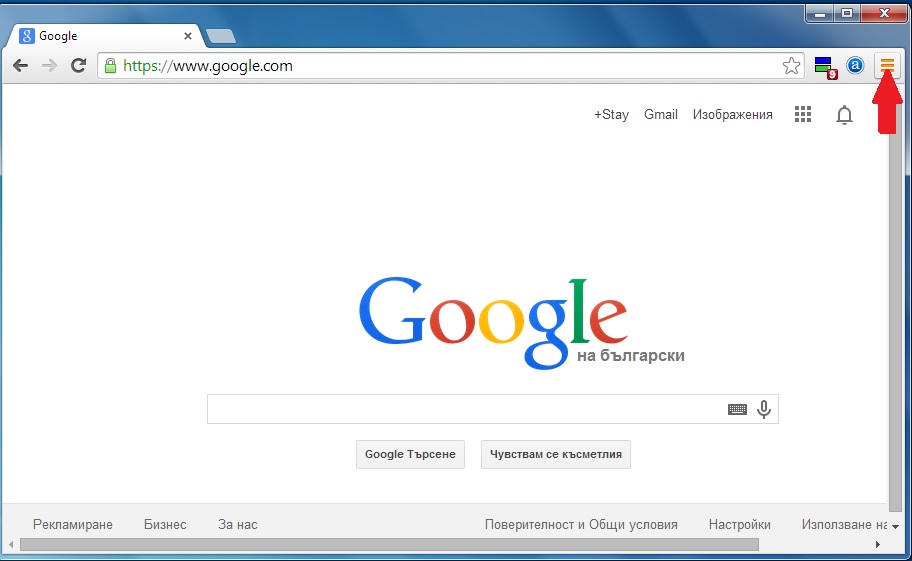
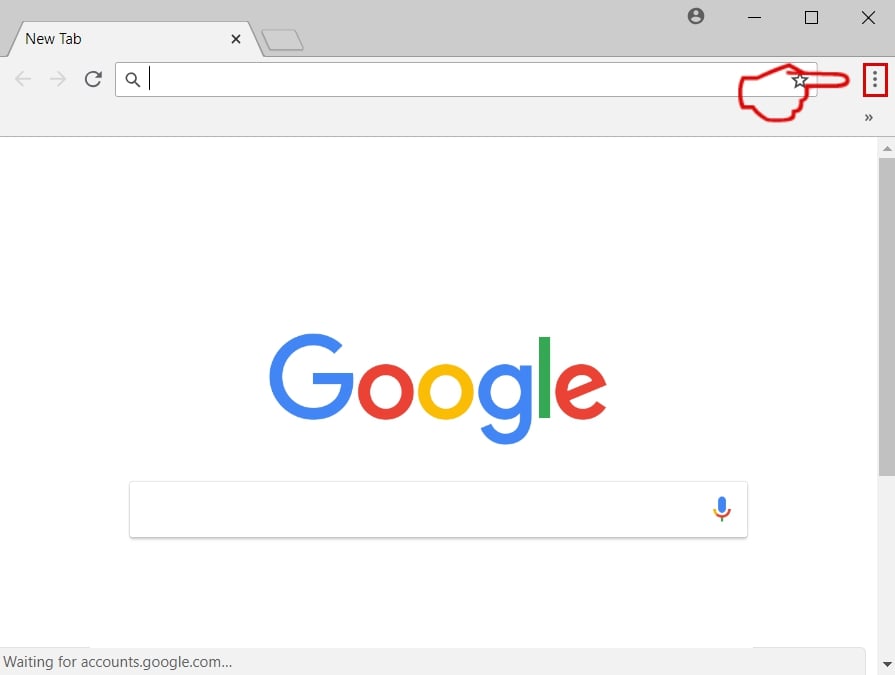
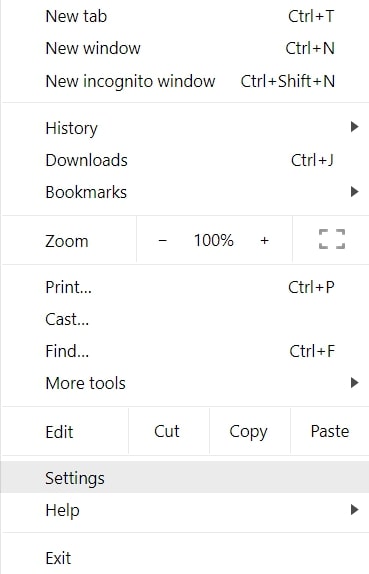
Step 1: Start Google Chrome and open the drop menu
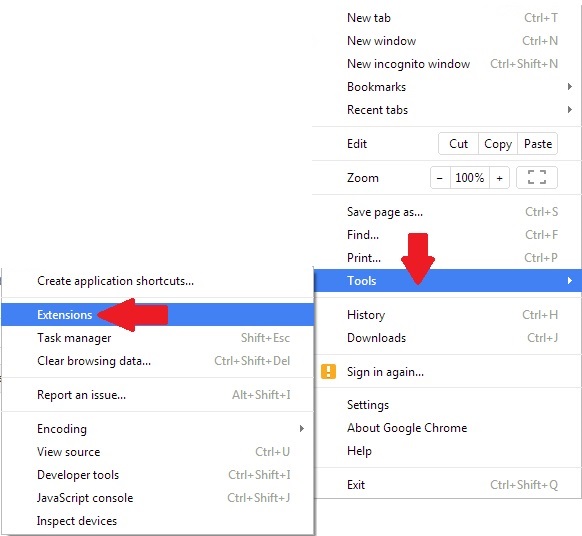
Step 2: Move the cursor over "Tools" and then from the extended menu choose "Extensions"
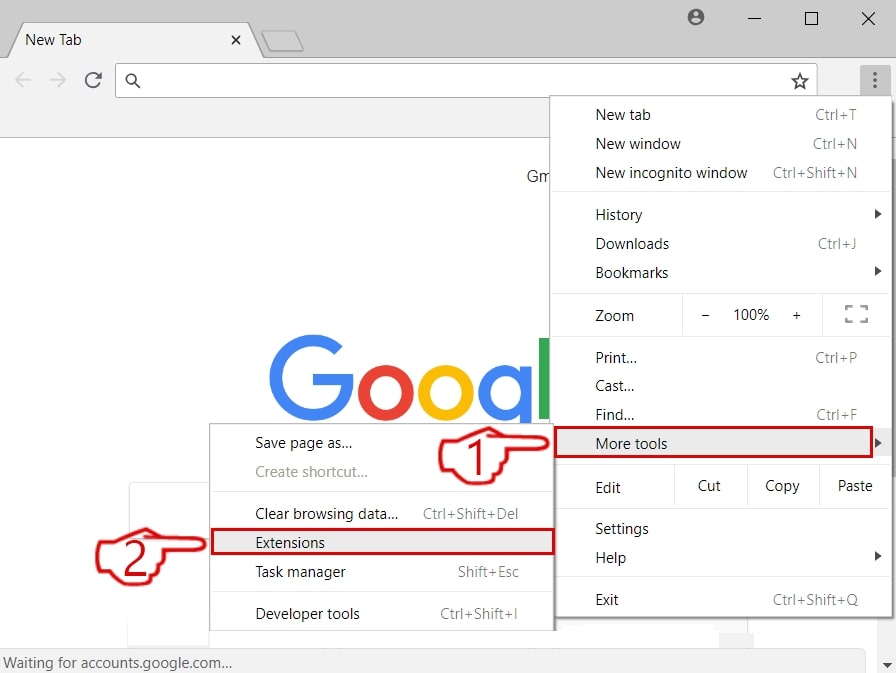
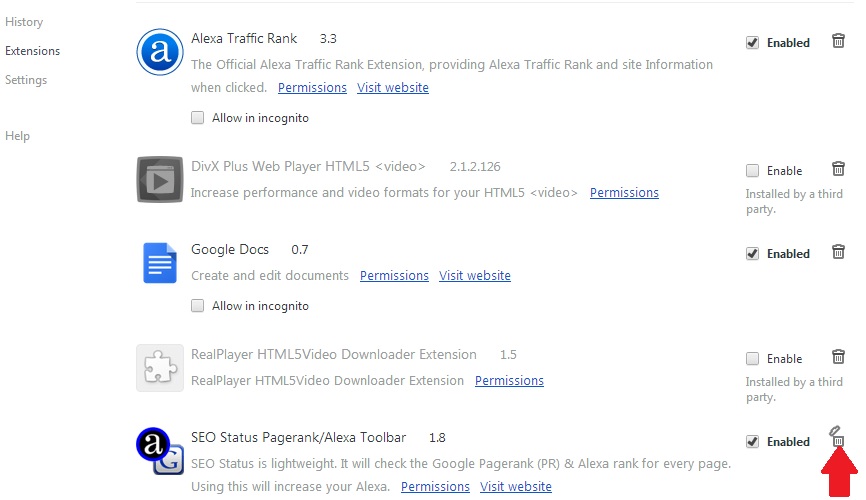
Step 3: From the opened "Extensions" menu locate the unwanted extension and click on its "Remove" button.
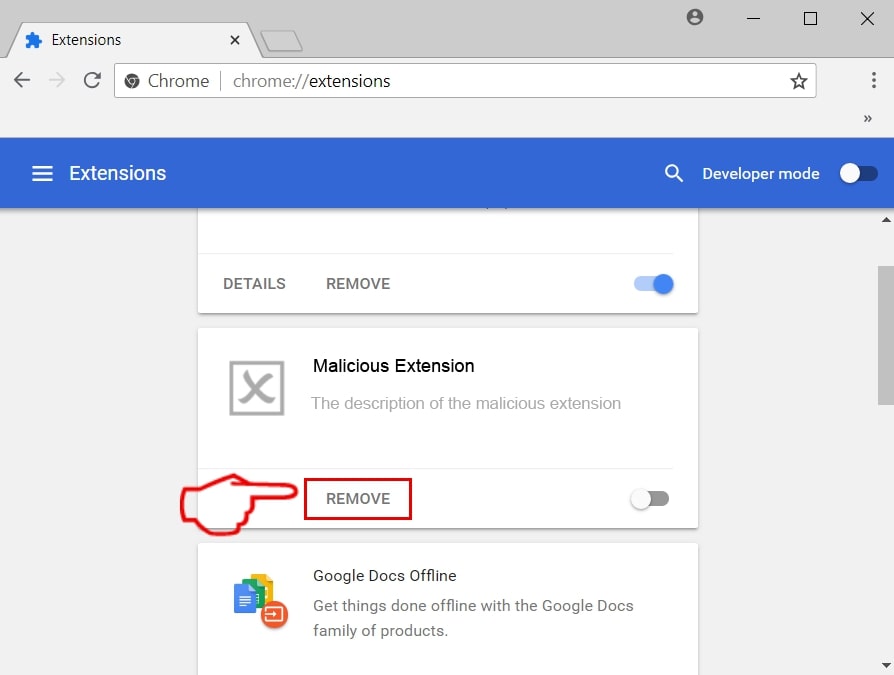
Step 4: After the extension is removed, restart Google Chrome by closing it from the red "X" button at the top right corner and start it again.
Erase Pesquisa.ninja from Mozilla Firefox.
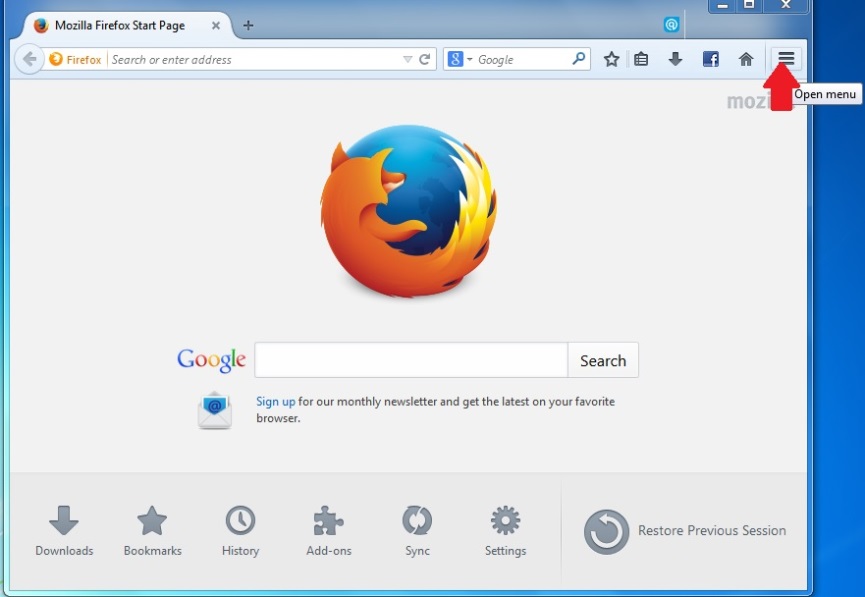
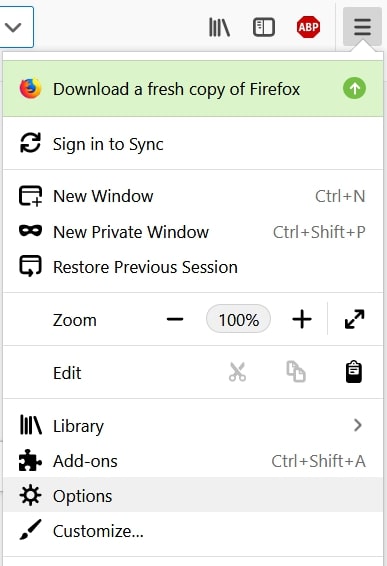
Step 1: Start Mozilla Firefox. Open the menu window:

Step 2: Select the "Add-ons" icon from the menu.
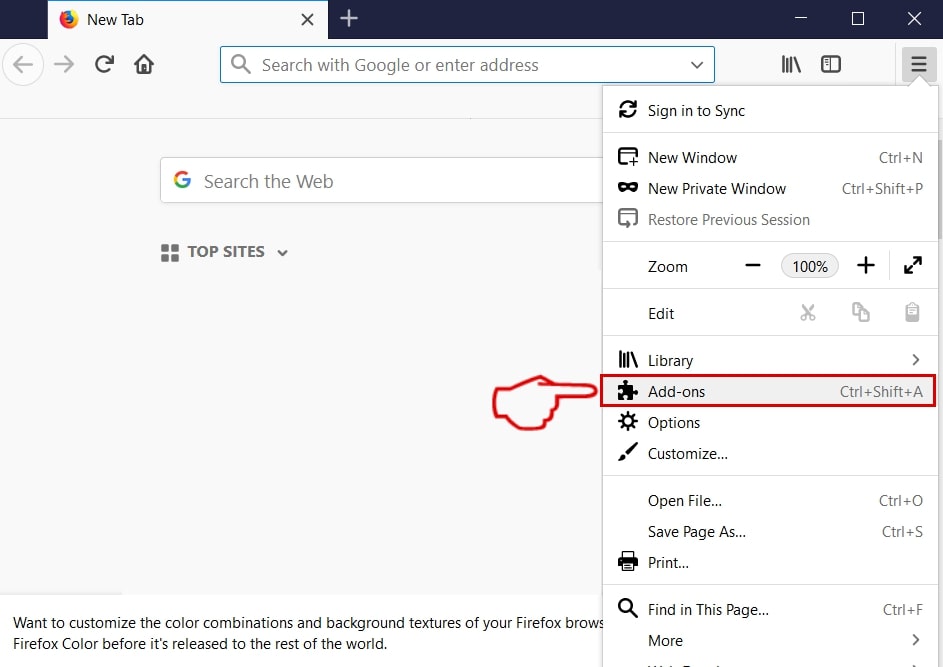
Step 3: Select the unwanted extension and click "Remove"

Step 4: After the extension is removed, restart Mozilla Firefox by closing it from the red "X" button at the top right corner and start it again.
Uninstall Pesquisa.ninja from Microsoft Edge.
Step 1: Start Edge browser.
Step 2: Open the drop menu by clicking on the icon at the top right corner.
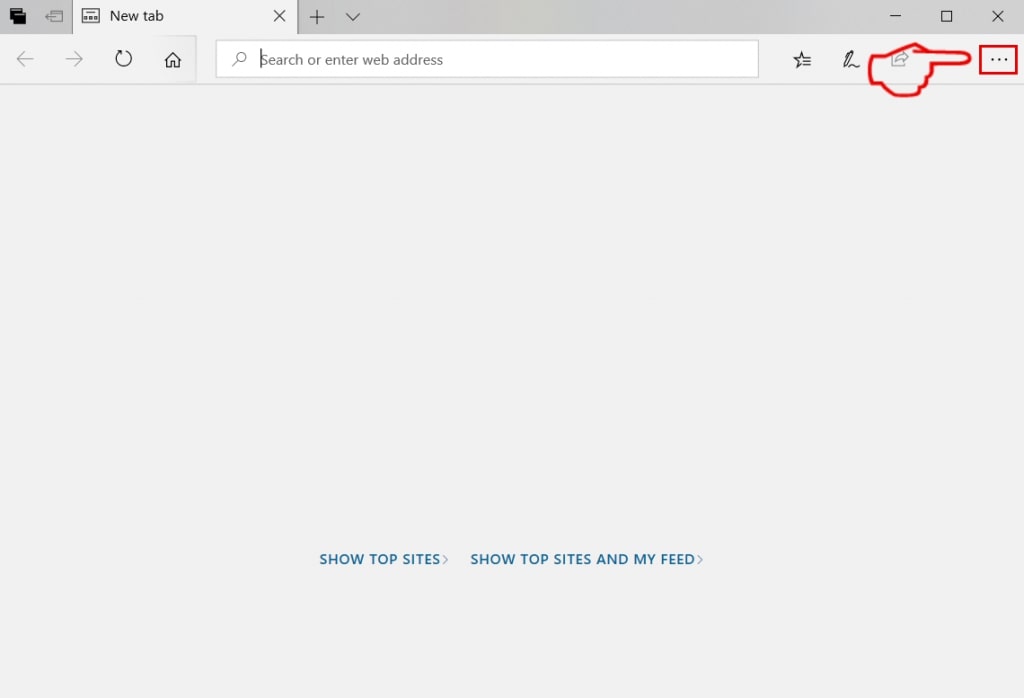
Step 3: From the drop menu select "Extensions".
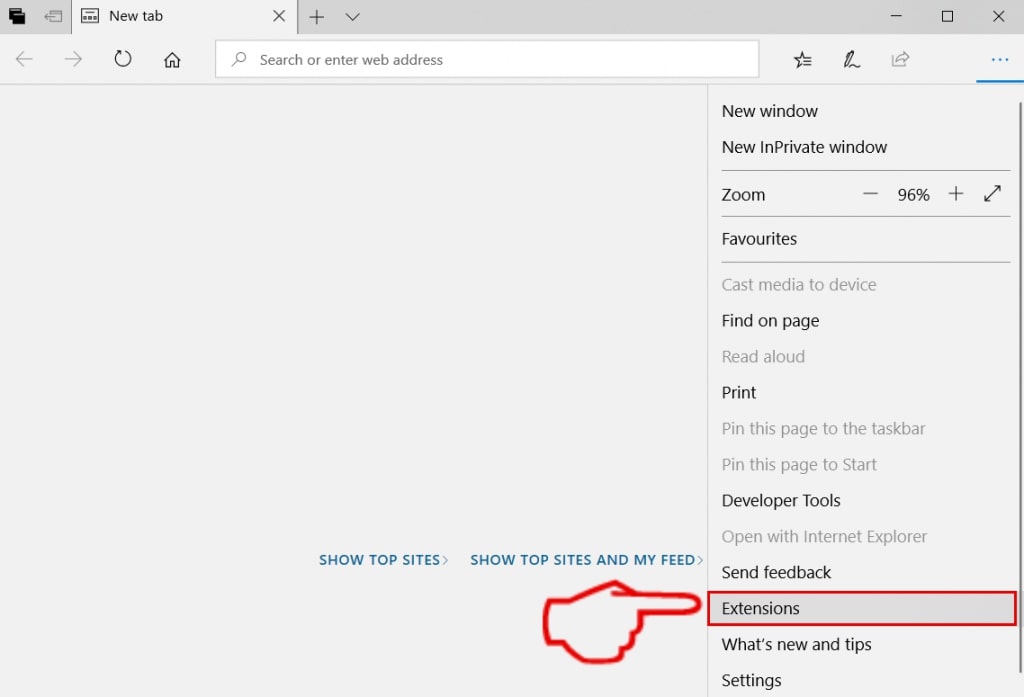
Step 4: Choose the suspected malicious extension you want to remove and then click on the gear icon.
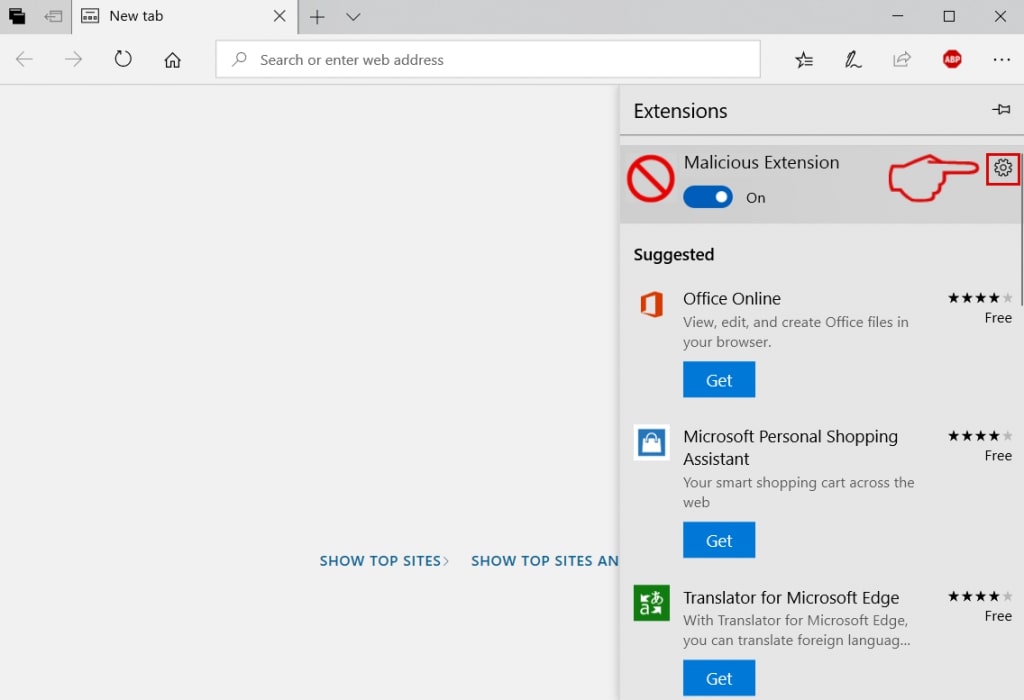
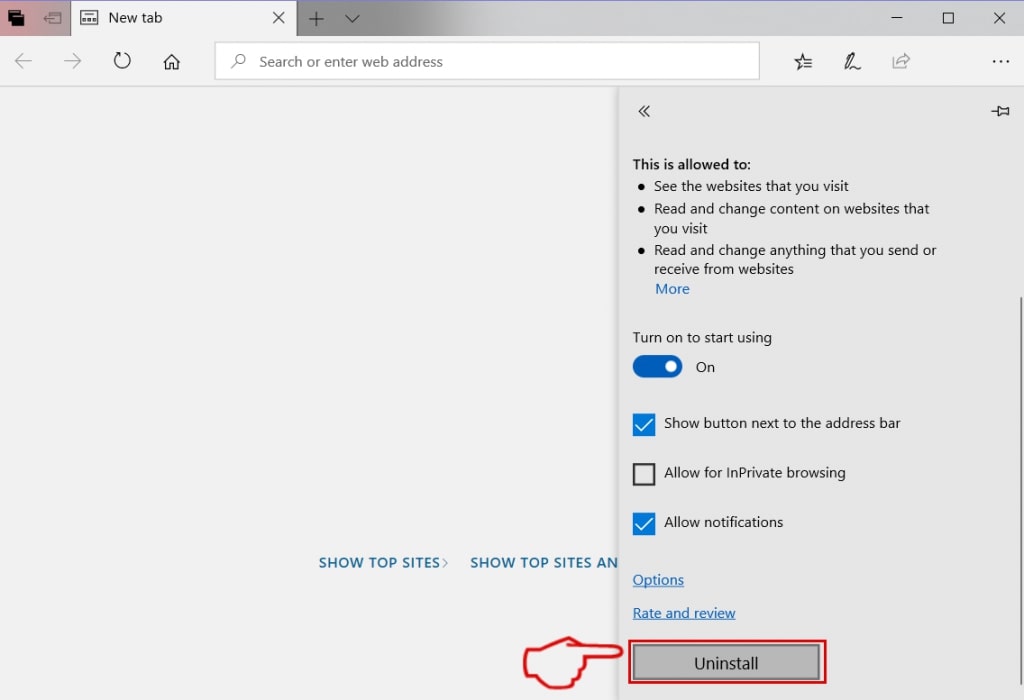
Step 5: Remove the malicious extension by scrolling down and then clicking on Uninstall.
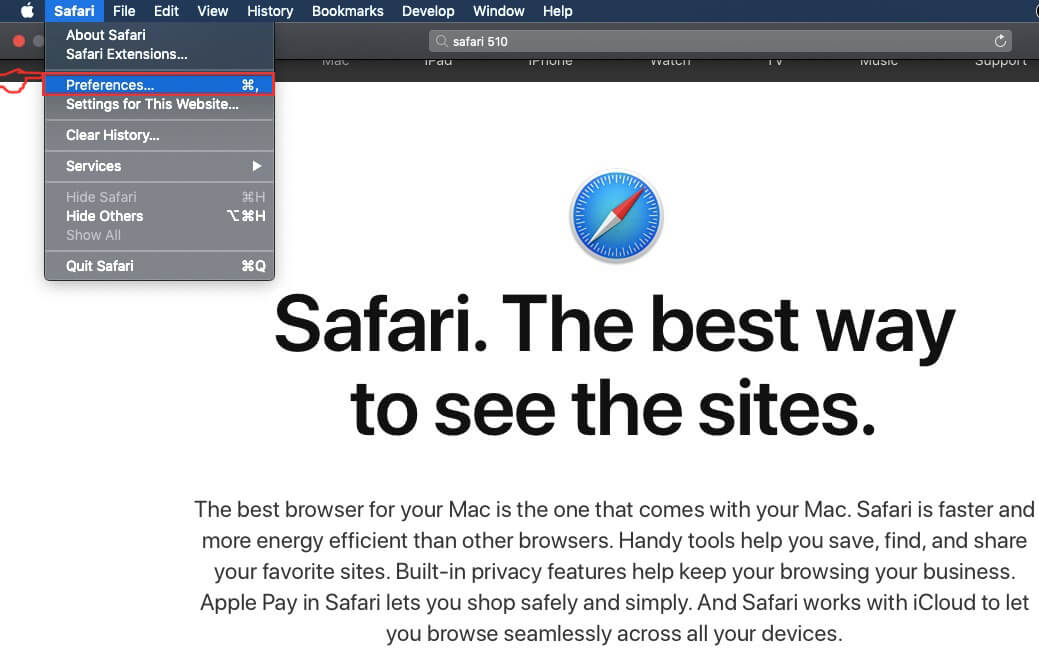
Remove Pesquisa.ninja from Safari
Step 1: Start the Safari app.
Step 2: After hovering your mouse cursor to the top of the screen, click on the Safari text to open its drop down menu.
Step 3: From the menu, click on "Preferences".
Step 4: After that, select the 'Extensions' Tab.

Step 5: Click once on the extension you want to remove.
Step 6: Click 'Uninstall'.
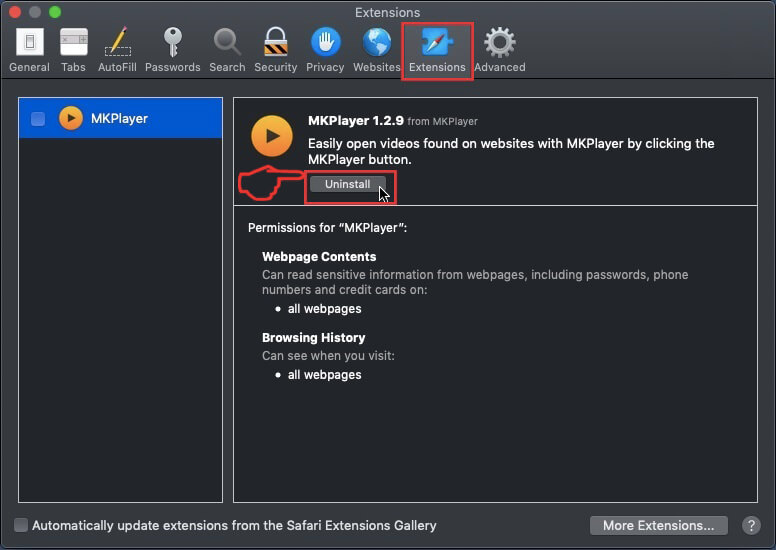
A pop-up window will appear asking for confirmation to uninstall the extension. Select 'Uninstall' again, and the Pesquisa.ninja will be removed.
Eliminate Pesquisa.ninja from Internet Explorer.
Step 1: Start Internet Explorer.
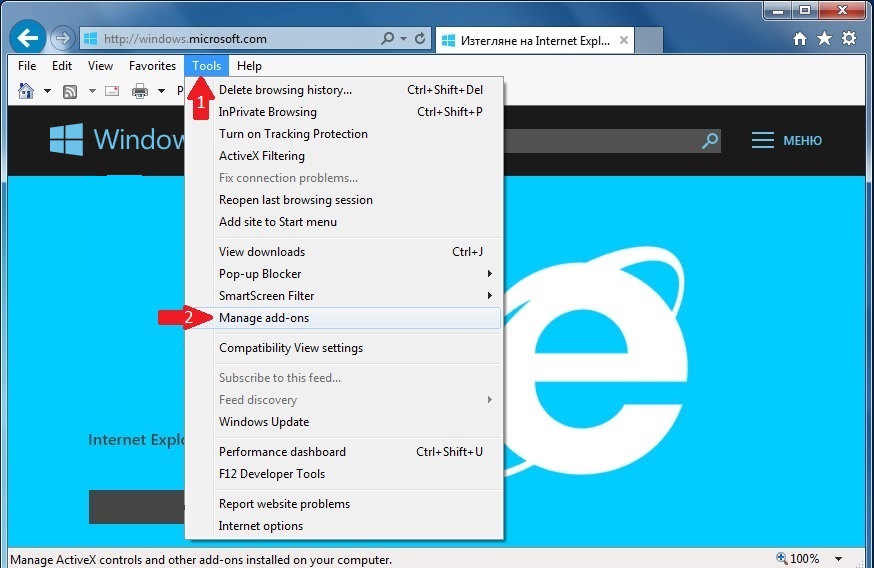
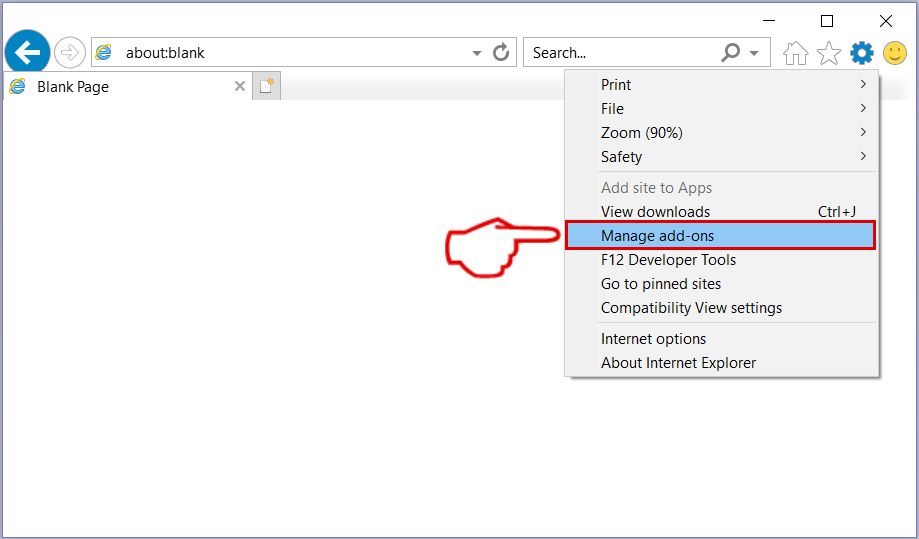
Step 2: Click on the gear icon labeled 'Tools' to open the drop menu and select 'Manage Add-ons'
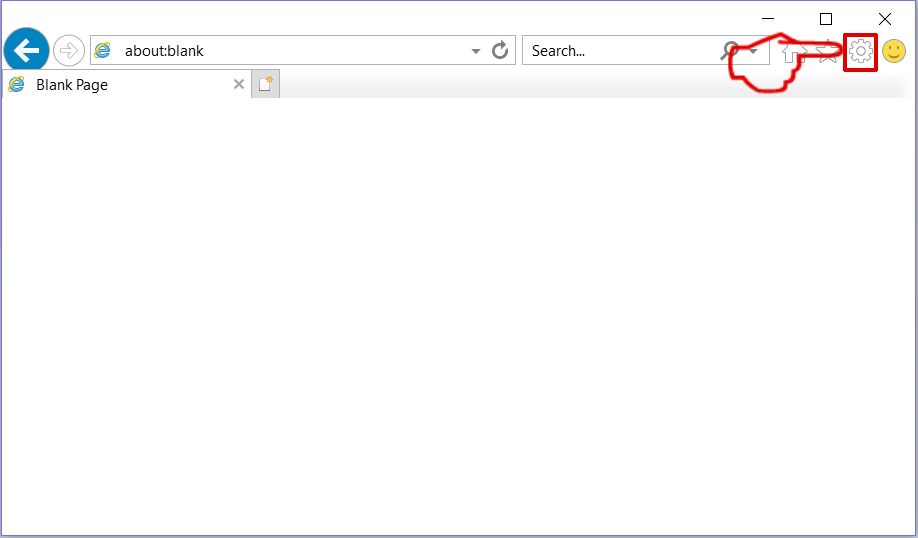
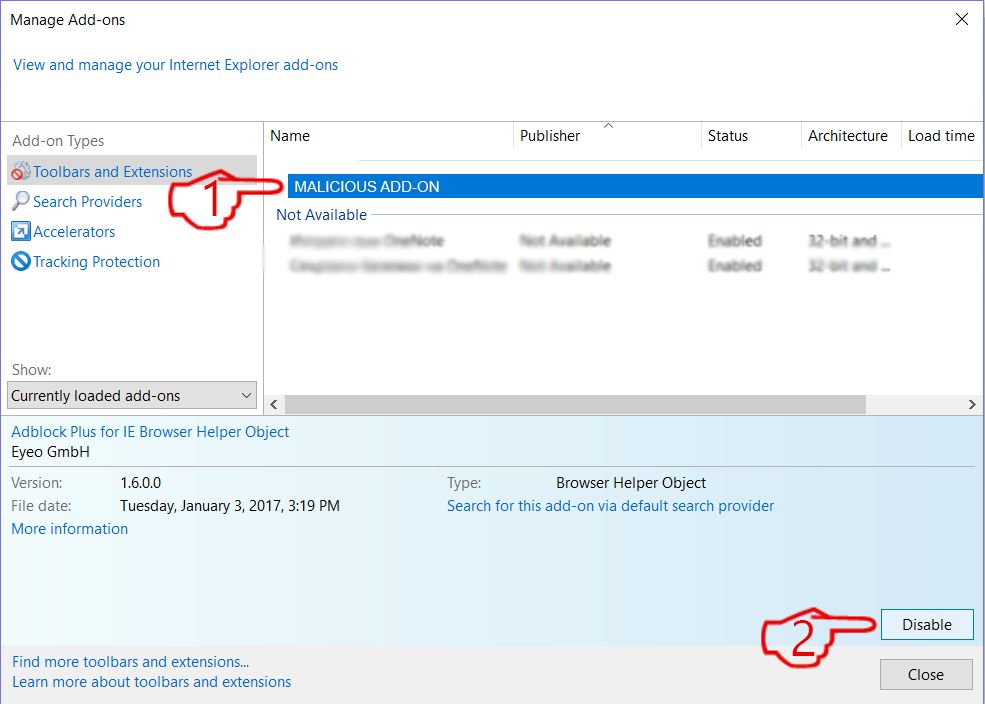
Step 3: In the 'Manage Add-ons' window.
Step 4: Select the extension you want to remove and then click 'Disable'. A pop-up window will appear to inform you that you are about to disable the selected extension, and some more add-ons might be disabled as well. Leave all the boxes checked, and click 'Disable'.
Step 5: After the unwanted extension has been removed, restart Internet Explorer by closing it from the red 'X' button located at the top right corner and start it again.
Remove Push Notifications from Your Browsers
Turn Off Push Notifications from Google Chrome
To disable any Push Notices from Google Chrome browser, please follow the steps below:
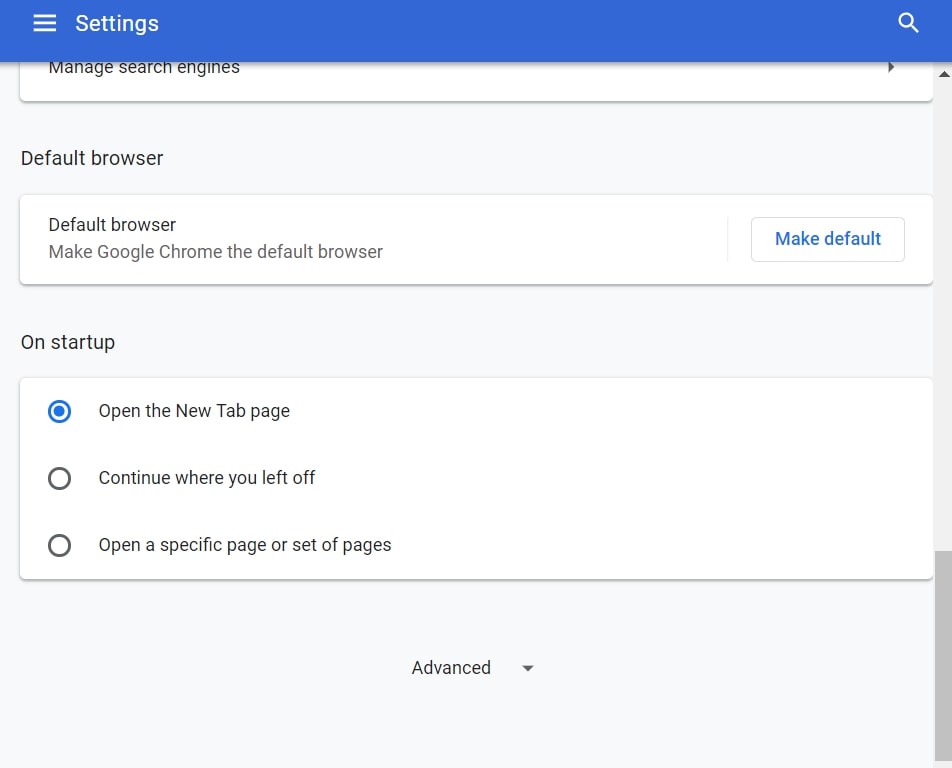
Step 1: Go to Settings in Chrome.
Step 2: In Settings, select “Advanced Settings”:
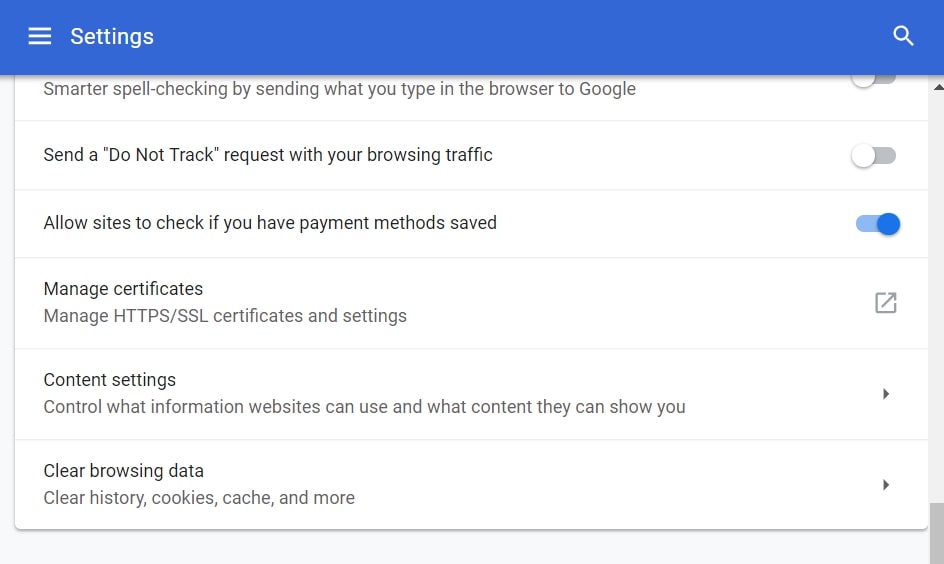
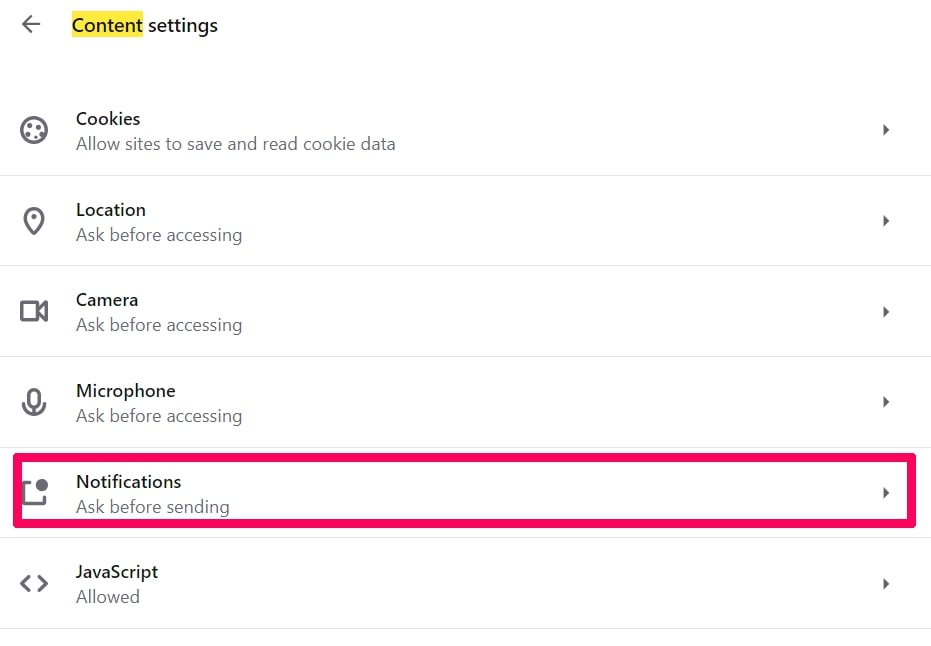
Step 3: Click “Content Settings”:
Step 4: Open “Notifications”:
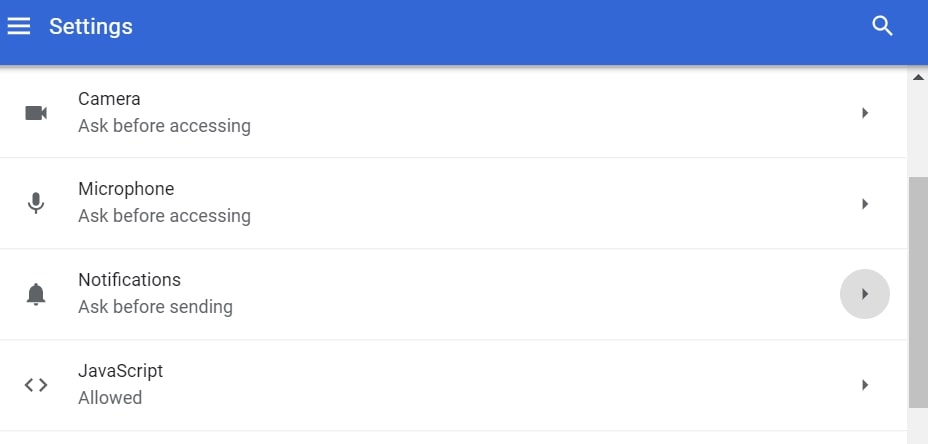
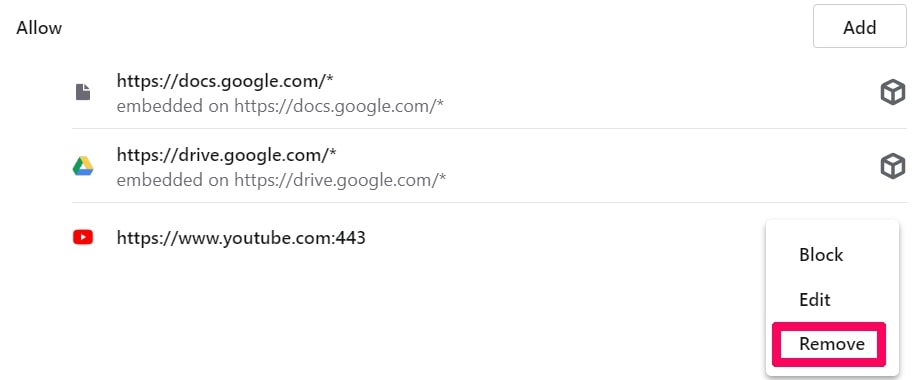
Step 5: Click the three dots and choose Block, Edit or Remove options:

Remove Push Notifications on Firefox
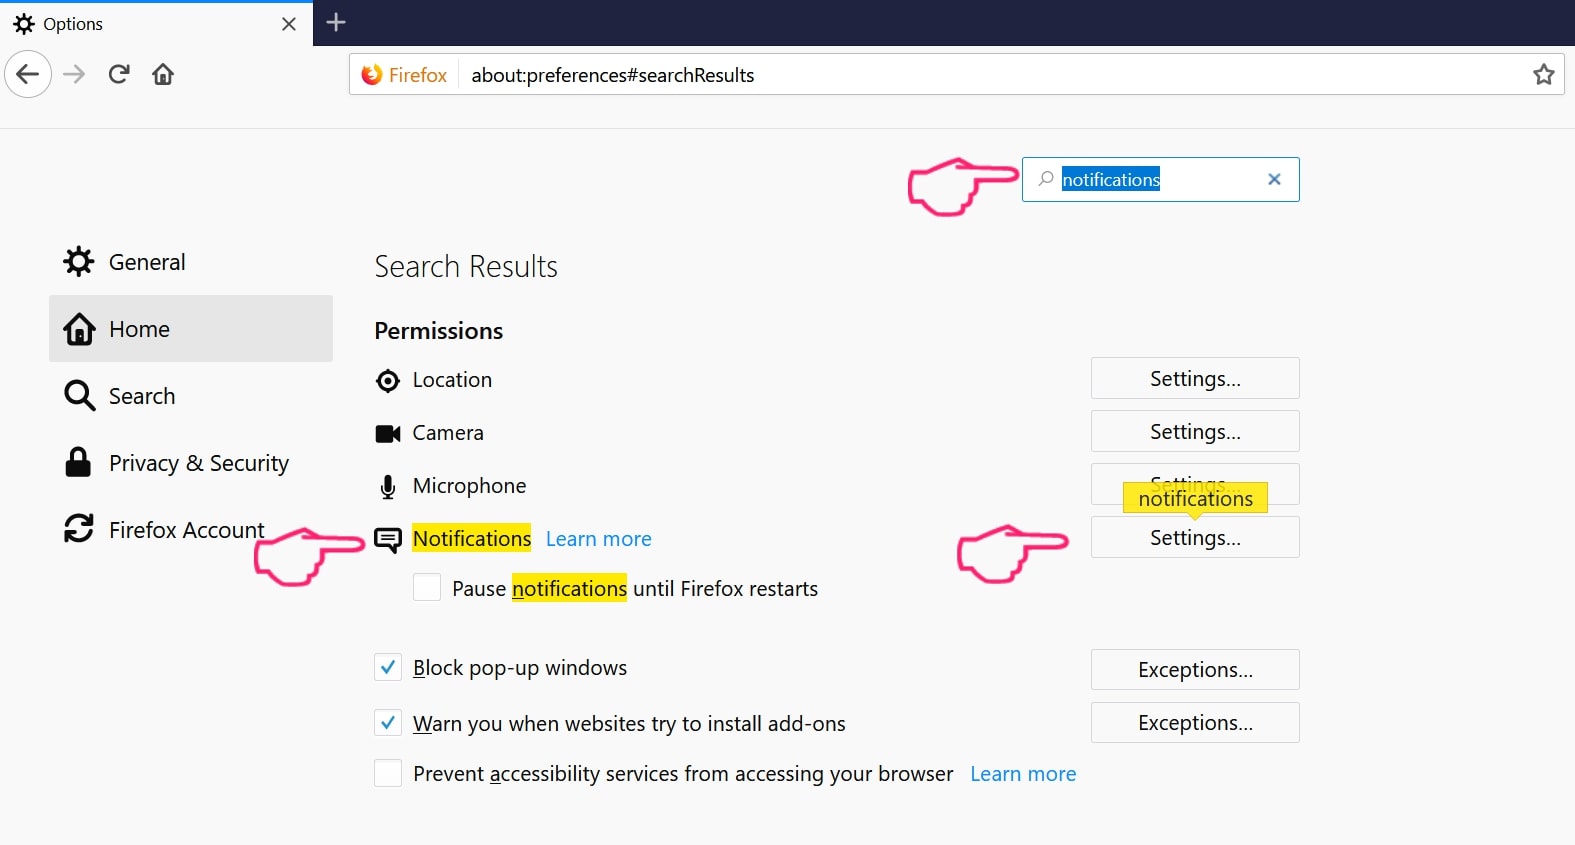
Step 1: Go to Firefox Options.
Step 2: Go to “Settings”, type “notifications” in the search bar and click "Settings":
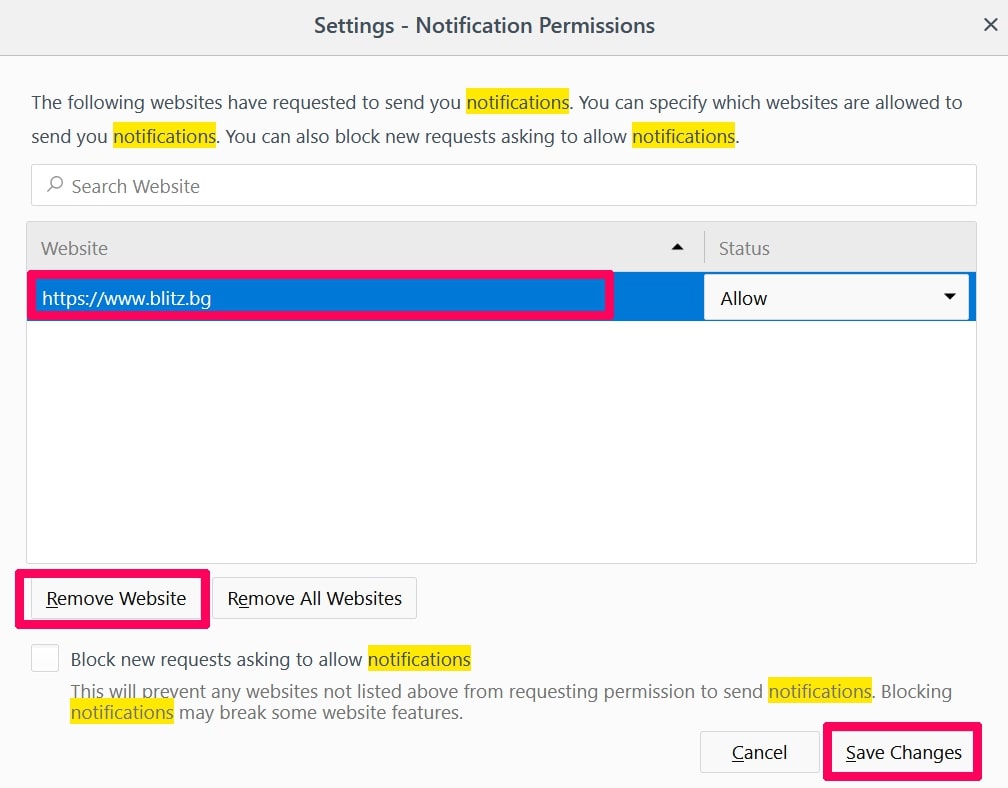
Step 3: Click “Remove” on any site you wish notifications gone and click “Save Changes”
Stop Push Notifications on Opera
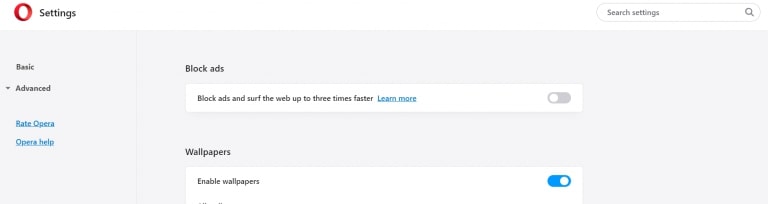
Step 1: In Opera, press ALT+P to go to Settings.
Step 2: In Setting search, type “Content” to go to Content Settings.
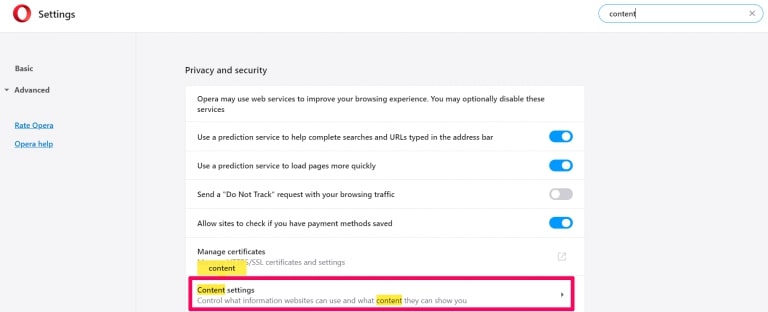
Step 3: Open Notifications:
Step 4: Do the same as you did with Google Chrome (explained below):
Eliminate Push Notifications on Safari
Step 1: Open Safari Preferences.
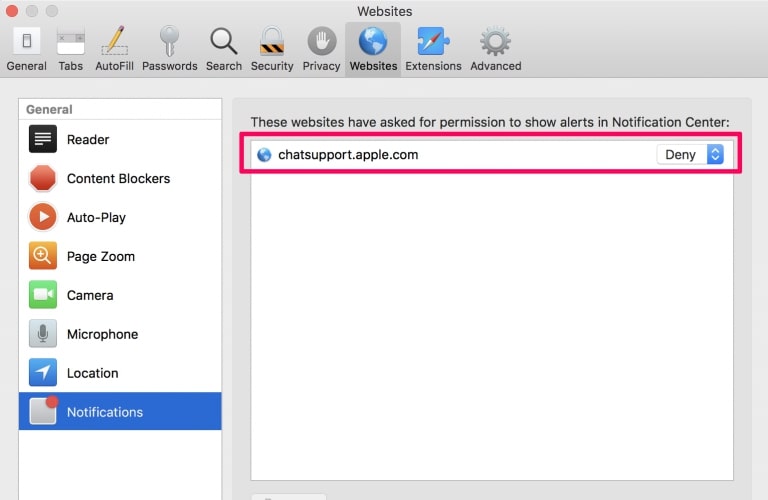
Step 2: Choose the domain from where you like push pop-ups gone and change to "Deny" from "Allow".
Pesquisa.ninja-FAQ
What Is Pesquisa.ninja?
The Pesquisa.ninja threat is adware or browser redirect virus.
It may slow your computer down significantly and display advertisements. The main idea is for your information to likely get stolen or more ads to appear on your device.
The creators of such unwanted apps work with pay-per-click schemes to get your computer to visit risky or different types of websites that may generate them funds. This is why they do not even care what types of websites show up on the ads. This makes their unwanted software indirectly risky for your OS.
What Are the Symptoms of Pesquisa.ninja?
There are several symptoms to look for when this particular threat and also unwanted apps in general are active:
Symptom #1: Your computer may become slow and have poor performance in general.
Symptom #2: You have toolbars, add-ons or extensions on your web browsers that you don't remember adding.
Symptom #3: You see all types of ads, like ad-supported search results, pop-ups and redirects to randomly appear.
Symptom #4: You see installed apps on your Mac running automatically and you do not remember installing them.
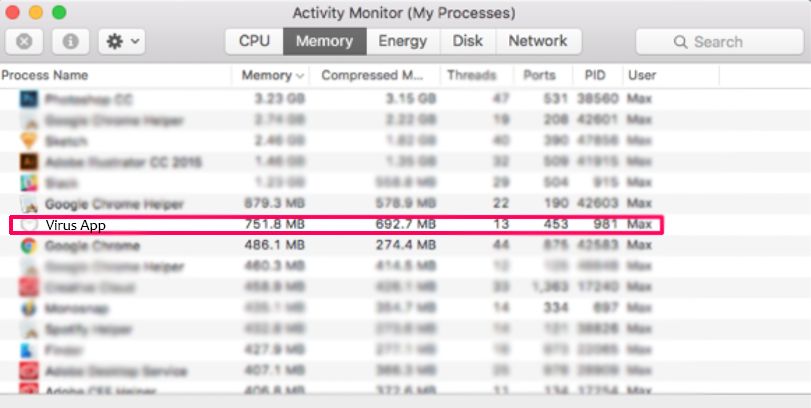
Symptom #5: You see suspicious processes running in your Task Manager.
If you see one or more of those symptoms, then security experts recommend that you check your computer for viruses.
What Types of Unwanted Programs Are There?
According to most malware researchers and cyber-security experts, the threats that can currently affect your device can be rogue antivirus software, adware, browser hijackers, clickers, fake optimizers and any forms of PUPs.
What to Do If I Have a "virus" like Pesquisa.ninja?
With few simple actions. First and foremost, it is imperative that you follow these steps:
Step 1: Find a safe computer and connect it to another network, not the one that your Mac was infected in.
Step 2: Change all of your passwords, starting from your email passwords.
Step 3: Enable two-factor authentication for protection of your important accounts.
Step 4: Call your bank to change your credit card details (secret code, etc.) if you have saved your credit card for online shopping or have done online activities with your card.
Step 5: Make sure to call your ISP (Internet provider or carrier) and ask them to change your IP address.
Step 6: Change your Wi-Fi password.
Step 7: (Optional): Make sure to scan all of the devices connected to your network for viruses and repeat these steps for them if they are affected.
Step 8: Install anti-malware software with real-time protection on every device you have.
Step 9: Try not to download software from sites you know nothing about and stay away from low-reputation websites in general.
If you follow these recommendations, your network and all devices will become significantly more secure against any threats or information invasive software and be virus free and protected in the future too.
How Does Pesquisa.ninja Work?
Once installed, Pesquisa.ninja can collect data using trackers. This data is about your web browsing habits, such as the websites you visit and the search terms you use. It is then used to target you with ads or to sell your information to third parties.
Pesquisa.ninja can also download other malicious software onto your computer, such as viruses and spyware, which can be used to steal your personal information and show risky ads, that may redirect to virus sites or scams.
Is Pesquisa.ninja Malware?
The truth is that PUPs (adware, browser hijackers) are not viruses, but may be just as dangerous since they may show you and redirect you to malware websites and scam pages.
Many security experts classify potentially unwanted programs as malware. This is because of the unwanted effects that PUPs can cause, such as displaying intrusive ads and collecting user data without the user’s knowledge or consent.
About the Pesquisa.ninja Research
The content we publish on SensorsTechForum.com, this Pesquisa.ninja how-to removal guide included, is the outcome of extensive research, hard work and our team’s devotion to help you remove the specific, adware-related problem, and restore your browser and computer system.
How did we conduct the research on Pesquisa.ninja?
Please note that our research is based on independent investigation. We are in contact with independent security researchers, thanks to which we receive daily updates on the latest malware, adware, and browser hijacker definitions.
Furthermore, the research behind the Pesquisa.ninja threat is backed with VirusTotal.
To better understand this online threat, please refer to the following articles which provide knowledgeable details.