Ventsislav has been covering the latest malware, software and newest tech developments at SensorsTechForum for 3 years now. He started out as a network administrator. Having graduated Marketing as well, Ventsislav also has passion for discovery of new shifts and innovations in cybersecurity that become game changers. After studying Value Chain Management and then Network Administration, he found his passion within cybersecrurity and is a strong believer in basic education of every user towards online safety.
During the 21st century, cryptocurrencies have begun to become the center of attention of many miners as well as traders and as time goes by, they are beginning to form the idea of actual real world usage. Long gone is the idea when people used to believe that they were made in order to purchase non-realistic things, however BitCoin proved wrong in the sense that it let widely adaptation to take place and now even has ATMs embedded in it. In addition ot this, many have also invested and made their fortune, as a result of the emergence of cryptocurrencies. Companies are now developing their own ICOs and this results in various different products which have been created in order to be oriented towards cryptos, and this includes security products as well.
Ever since the first cryptocurrency miners, which aimed directly at using your CPU power in order to mine for BitCoin, other viruses have also began appearing and their threat level has become widespread and online. Newer miners which use JavaScript code to take advantage of the processes of your Web browser have appeared, making it possible to mine without any malware installed, but simply by visiting a web page. But the most vita threats are malware which is created to directly steal your cryptocurrency money on your PC or to send those to other wallets. This is the main reason why it is important to have a secure system which can keep your coins safe. One such system is by using hardware wallet, designed specifically in order to keep your coins offline, but in the same time features strong security measures, even if it’s connected to your computer and exposed to malware.
To best explain which is the most suitable wallet, we have addressed key security bottlenecks and events during each of those companies’ existence which are related to cybersecurity. In addition to this we also take into account the price of each hardware wallets and how much bang yiu get for this price. The main key points on which our research was focused during writing this are the following:
Unique features.
Security.
Support.
Based on those, each of the wallets we have shown you in thuis article posseses key strenghts and weaknesses as well, but keep calm because each has been created for specific type of users. This is why it is important to make an informed choice about which wallet is good for you, based on the budget you have and your requirements. Here are the reviews of 10 best hardware wallets in 2018, according to SensorsTechForum.
Trezor Hardware Wallet Review
Being a pioneer in the hardware wallet segment, Trezor is created in order to be suitable for every user and has been updated constantly ever since. The hardware wallet can provide extensive security to different types of cryptocurrencies and on top of it, the wallet is extremely easy to setup and use, even if you are not as tech savvy as you want to be.
Security When we consider the security of this wallet, the first thing that comes to mind is that it is made to resemble the Nano S cold storage wallet, but in addition to this, it also posseses some unique features to it as well. Furthermore, besides having the 2-factor authentication as standards and being portected via SSH, the Trezor wallet also features a micro USB connector plus runs completely on it’s customly made operating system. Furthermore, the device is also rugged, weighing 11 grams and has water resistance too. In addition to being water resistance, the TREZOR team has also added private keys which protect the hardware wallet in the event htat someone steals it from you. And they have also thought about the future, too, providing lifetime firmware updgades to the wallet and they can even provide you with custom firmwate, provided that you want more security than the standard protection. This is really useful, considering the latest security breaches concerning hardware wallets, like some of the Ledger products.
Trezor Hardware Wallet – Support
The TREZOR cold wallet supports more than just BitCoin. It can work with the following blockchains:
Trezor – Unique Features In addition to being the regular hardware wallet, TREZOR also offers a hell of a lot more. The neat device has Password-less login and it can be done if you sync the wallet with the computer which you use on a regular basis. Furthermore, another feature is also to perform the signing and verifying of the messages plus the verification with cryptographic proof that the address sent to the victim is the right address. In addition to these, the clever device has also been created in order for you to be able to transfer your virtual wallet to another hardware wallet, using seed and paper backup. This means that even if your Trezor breaks down for some reason, your tokens can still remain safe, as long as you have set up the backup. This and the other features make Trezor the ideal hardware wallet, hence it’s 1st position among many in our list.
Ledger Blue Hardware Wallet Review
Being the hardware wallet with the most features from this list also makes the Ledger Blue the most expensive one. The smart wallet features Lithium Polymer accumulator batter plus a wide display that is user-friendly and has a touchscreen to easify the operations with it during transactions and wallet management actions. In addition to this, the Ledger blue also has a robust case which is packed with various protection features. Furthermore, the device also has sophisticated features which enable it to even be completely capable of handling smart contracts, which is extremenly appropriate if you are into Ethereum blockchain and it’s part of your daily life. In addition to this, the price of the Ledger Blue makes it the most expensive device from this list, which is for a good reason, because this is a powerful and flexible BitCoin wallet and it’s the best at it for the features it offers.
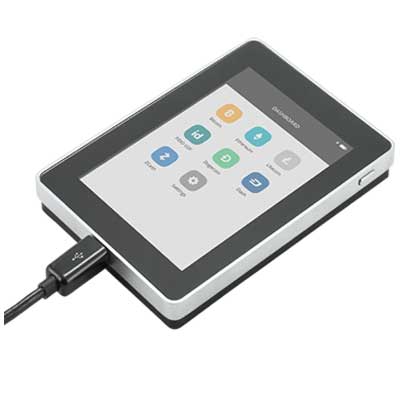
Ledger Blue Hardware Wallet – Security When we look into the security of the Ledger Blue the first thing that caught our eye was that a solid research was made by the team to create a sophisticated device, such asthis one – more than 2 years of R&D to be prices. The Ledger Blue has been created with a touchscreen large enough to fit all of the necessary menu options and arrange them to be easy to work with as well. The method by why Ledger Blue supports Smart Contracts locally is achieved as a result of having a BOLOS (Blockchain Open Ledger) platform which is a flexible as well as powerful OS to work on. To further strenghten security, Ledger Blue features a dual-chip architecture which contains ST31 Secure Element plus SMT32 microcontroller. These technologies allow the hardware wallet to make it possible that a fully isolated environment is available for active work. Furthermore, the device has a Lithium Polymer battery which can make it last for weeks time without being active. The battery is rechargable and it can be charged wirelessly as well. In addition to this, Ledger Blue can also help to run various apps in the same time for multitasking as well, being able to run series of apps and actions in complete isolation. The best part from this when we take a look at the security is that all of this is isolated from the device’s firmware, which additionally enhances the security of this device and is characteristic for usage on an enterprise level. In addition to this, the device is also based on the paradigm WYSIWYS (What Your See Is What You Sign). Finally, when it comes to authenticating the device, you should know that it uses strong security authentication methods, which combine Secure Elements, such as PIN code in combination to fingerprint, etc.
Support When it comes to support, the Ledger Blue supports all of the libraries off the well known cryptocurrencies, but it’s firmware comes preinstall with the source codes for all the widely known cryptos in use today so you will be able to use it even if the tokens you want to store do not belong to a cryptocurrency which is well known. Here are the main cryptos which we know that are supported for sure:
Unique Features When we talk about the Ledger Blue, features is not the thing it is short of – the list is pretty long. Since some of those were already mentioned, we will stick to ones we havent. The main one of those is the LED backlit technology of the display which removes the need for you to operate the wallet while it is connected to a PC. This makes it much faster and easier to work directly via the wallet. When we include the BOLOS platform on thop of this which a flexible and secure environment to work on it makes it a very secure device to choose among the bunch. Another feature which is not available on most hardware walllets is that it’s firmware is also pre-programmed to have an open support even for new blockchains that come out in the future, making this wallet the most compatible of the bunch and very appropriate for traders or users who want to use a lot of hardware wallets In the same time, but leave them separated in secure environments.
Ledger Nano S Hardware Wallet Review
The Nano S which is the most sought after hardware wallet right now is the type of hardware wallet that has a flash-drive-like designe and is packed full of features, even though it does not look like that when you look at it. The wallet support various types of cryptocurrencies, besides only BitCoin and it also has active support of the ability to create different addresses on it In which you can store Ethereum, BitCoin and LiteCoin on one device. Very much imitating TREZOR, Ledger does not allow the ability to send bitcoin directly from it, unless you have the physical device connected and you perform the sending operation. The primary advantage of the wallet is that while it may be costly, you can rest assured that it has decent support enabled and is very user-friendly.
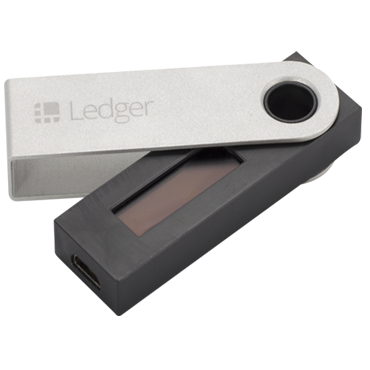
Ledger Nano S Hardware Wallet – Security 
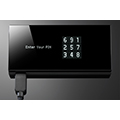
When we talk about the encryption features and the security of the Ledger Nano S, It uses SSH for secure communication, which is expected and also has USP type B connector. Furthermore, similar to the TREZOR, the Ledger Nano S features a dual-chip architecture, having ST31 and STM32 architectures, specifically designed to boost security. Furthermore, the accounts are created with a backup on a paper wallet which is stand alone and allows for easirer recovery via any other ledger device in case of system failure. Furthermore, for authenticaltion, Ledger Nano S uses the 4 digit PIN, which it requests from users every time they perform a login.
When it comes to the certificates, the Nano S uses CC EAL 5+ authentication. Since it has it’s own screen the Ledger Nano S allows for usage even on a PC which is already infected with malware and still to remain secure while doing so. In addition to this, FIDO second factor authentication is also used (U2F standard), meaning that authentication Is even stronger.
Ledger Nano S – Support When it comes to the support of the Nano S, the wallet is able to provide support fo the following cryptos:
BitCoin Ethereum Litecoin Ripple DOGE coin Stratis REP GNT 1 ST SNGLS Any Ethereum ERC20 token
Ledger Nano S Hardware Wallet – Unique Features The Ledger Nano S offers 3rd party integration, unlike most of it’s competitors and the device is also malware proof, meaning that it can run even on a compromised PC. The hardware wallet also features BIP 39 seed, guaranteeing the creation of seeds which use lists of various words for encoding. This feature is rather unique, because it is very hard to know this word list, in comparison to traditional protection system. Furthermore, using BIP 39 also makes it much faster to recover your wallet from a compromised Nano S.
KeepKey Hardware Wallet Review
In case you know a thing or two about hardware wallets, there is a possibility that you may have heard of KeepKey. It is a popular hardware wallet, which uses PIN code for protection plus a long recovery password and a simplistic screen which has all of the required information. IN addition to being extremely compatible with all different operating systems, the small device also has one of the most secure systems for hardware wallets out there which puts it on a very high security level.
Security The security of KeepKey has been created to feature a USB HID-class of security system, meaning that you can run the device with everything, because KeepKey does not require pre-installed drivers in order to be active and running. Furthemore, for authentication, KeepKey features a PIN code support which helps it for login, much like the Nano S. The PIN code systen is an advantage for easy login and in the same time it remains very secure, primarily because it shows the numbers from 1 to 9 in different sequences, each time you use Google Chrome’s KeepKey login extension installed in it. The system is designed in a manner that it displays dashes instead of numbers and the numbers are randomized each ime you login, so that you enter them via different order. This prevents screenshots and screen recording to reveal what is on your device, in case your computer has been compromised. In addition to this, the device also has regular firmware updates and digital signature for it’s wallets and what is amazing about this is that you can use it together with the TREZOR v1.3.3. device which it is also compatible with. Overall and all the ones behind KeepKey have aimed at accessibility, flexibility while in the same time they have created a secure device to support such operations in a user friendly manner – neat indeed and it can be installed with few clicks on your machine.
KeepKey Hardware Wallet – Support KeepKey supports the following cryptocurrencies so far:
KeepKey Hardware Wallet – Unique Features Besides the awesome display which is extremely convenient to work with, the KeepKey hardware wallet also has BIP44 suppoer and 3rd party integrations. In addition to this, the wallet is also compatible with any OS, as long as it supports Google Chrome, which is quie convenient. It is important however to know how to recognize the original KeepKey Chome extension from a fake one, since dubious ones may appear in the future, so make sure to know how to spot the fake.
Case Hardware Wallet Review
This hardware BitCoin wallet has more diverse unique features than the other ones and it has been sold quite often since it first became notorious. The wallet comes with an embedded GSM network that actually allows you to transfer crypto tokens between the borders of more than 100 countries. And the sucurity of Case is top-notch as well, making it a preferred choice for those holding a lot of funds in cryptocurrencies.
Security When Case’s security becomes the subject of discussion, you can feel assured that you are in safe hands. The wallets demands the use of 2 out of 3 total keys just to authenticate a transaction. In addition to being a multi-signature device, shte Case hardware wallet also has multi-factor authentication. The keys, generated by Case are usually located in various places on their servers, leaving the servers, the only ones with access to them, provided the authentication takes place, however even Case do not know this authentication, making your wallet as secure as possible. In addition to this, the company also provides a fingerprint scanning feature, which is built in by design and the firmware of the wallet is open-source, meaning that it is less likely to have bugs. In addition to this, if it has bugs or vulnerabilitites, the wallet has virus protection, in order to stop any malware from reading it’s information as well. Last, but not least, case is also created in order to meet the Level 3 CryptoCurrencies security standard.
Case Hardware Wallet – Support When we talk about support, Case has the ability to work only with one cryptocurrency at the moment and that is, ofcourse BitCoin. Case Hardware Wallet – Unique Features In addition to the biometric scanning features, such as fingerprint ID, the smart wallet also has a GSM network working capability, allowing it to send transactions via external connectivity. The wallet can also scan for barcodes and perform fast transactions, without the user having to manually enter the targeted BitCoin address. These features plus the strong security of this device and it’s battery, lasting up to 50 transactions results in a device which is much needed when it comes to BitCoin cold storage and transfer.
CoolWallet Hardware Wallet Review
CoolWallet, much like it’s name suggests is not only beautiful and elegant to stare at, but the it also has a credit-card like design, which is quite practical as well. The device has a beautifully embedded screen which shows your balance in it, much like a credit card would do when you plug it in the ATM. In addition to this, the practicality of this device allows it to be kept in an actual wallet or your backpocket, and since it’s secured and rugged, it is not easy to break it as well.
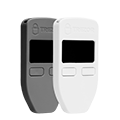
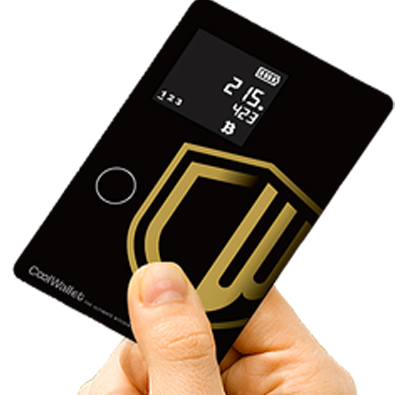
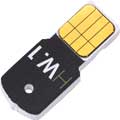
CoolWallet Hardware Wallet – Security When we discuss the security of this device, CoolWallet has got the situation on lock down. The smart device is not only waterproof, but also has a security-focused protection algorithm and features malware-protection mechanisms as well. Furthermore, you also receive 1 year warranty plus a backup of your BitCoin wallet and tokens in it. Furthermore, CoolWallet is also created in order to use private keys for it’s authentication rpocedures, plus OTP (One Time Password) generator, which it uses in order to increase it’s security level as well. In addition to this, CoolWallet also supports seed backup which in addition strenghtents the security level of the data it stores, so that even if the device breaks down, you can get your data out of it swiftly.
CoolWallet Hardware Wallet – Support For the present moment, CoolWallet supports only BitCoin, but the company has plans for other cryptos in the future to be added.
CoolWallet Hardware Wallet – Unique Features
Not only does CoolWallet support a 100% waterproof casing, but the smart device can also be flexed without you having to worry that you will break it, which is definitely something that the competition does not offer, at least in those dimensions. And in addition to this, the wallet also has an e-ink display which makes it easy to oversight your balance. Furhtermore, besides the easy setup, the display of the device also allows it to be more battery efficient, since it does not drain a lot of power. We believe that this device is one of the slimmest hardware wallets out there and if that is not enough, it also supports wireless charging feautres to be probably the most modern of the bunch. And if that is not enough for you, CoolWallet hardware wallet also can connect an app on your smartphone via NFC or BLE connection, making it as clever as it is mobile by being able to be used at absolutely any time and place, as long as you are plugged to the grid.
OpenDime Hardware Wallet Review
What appears to be the cheapest BitCoin hardware wallet for the features it offers this is definitely our best choice for price-value, if you value purely the function of a one-time cold storage that is extremely secure. The OpenDime device does not have any extra features, like a display charging battery, etc, but it does possess one key feature and that is the high level of security at a very affordable price. Started out back in April 2016, the so-called “BitCoin Stick” is able to work with absolutely any device which can support USP connection and it also has it within it’s BitCoin address and QR image plus other text files.
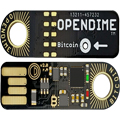
OpenDime Hardware Wallet – Security OpenDime is a simplistic cold storage for cryptocurrencies by design. It stores a private key which is contained well within it and it cannot be seen and figured even by it’s owner. The downside of OpenDime is that if provided to another user, it is similar to giving cash for them, only much more secure. So this device is not for the beginner users and definitely not for you if you lose your flash drives often. In addition to this, OpenDime aslo connects via a standard USB port, via which it can generate a private key. From there the key is completely restricted only to the USB drive, so no other device can use it. After this procedure is done, you can feel free to use your new wallemt, check your balance and perform other actvitities with it, while being anonymous during this time, without a record of transactions.
OpenDime Hardware Wallet – Support OpenDime is a simplistic device which is only restricted to BitCoin at the moment.
OpenDime Hardware Wallet – Unique Features One of the most unique feature of this device is that it’s private key is stored physically as a breakable part of the “BitCoin stick”. When you want to remove the key, which acts as a seal and want to spend all your BitCoins, you have to physically break the seal out of the flash drive. This triggers a procedure which changes the memory on this stick, resulting in the private key appearing and the device remaining no longer secure. Then, you can use this key via importing it into any BitCoin wallet in order to spend your BitCoins the way you desire. Simple one-time spend device which can serve you right if you pay attention and keep it safe.
Digital Bitbox Hardware Wallet Review
Being a part of the USB stick-like BitCoin wallets, the Digital BitBox aims to remain simplistic while maintaining a level of privacy and user friendliness. It’s primary plus over other minimalistic hardware devices is that it has the support of various different tokens, instead of only BitCoin. Furthermore, it also supports MicroSD connectivity which can be used for backup, if something happens. In additiont o this, the device also supports the fast changing between different hardware wallets, with it’s innovative MicroSD solution and it also esnures that the private keys are isolated from your PC, and even if it’s compromised, the hardware wallet would still remain safe.
Digital Bitbox Hardware Wallet – Security Digital Bitbox features two-factor authentication and it also has a lot of features, even though it appears minimalistic by design. The smart devices even has features, such as native language and support of multi-sugnature. Furthermore, the Digital Bitbox is also compatible with security-oriented operating systems, such as TAILS OS as well as Tor browser. It can also make an online back up and features U2F standard for keychaing devices which ensures secure access of web services. Furthermore, Digital Bitbox also can create a second password which can provide you with access to a hidden wallet. This can also work with iOS, Android and other security applications.
Support When it comes to support, Digital Bitbox can work with the following altcoins, besides BitCoin, plus the company has plans to add more in the years to come:
BitCoin Ethereum Ethereum Classic Any ERC20 token.
And they plan to add more in the future.
Digital Bitbox Hardware Wallet – Unique Features 
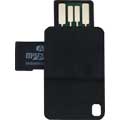
This functional wallet packs a lot of features which can even put some of it’s bravest competition to shame. It features an offline backup option plus anytime recovery via a micro SD card and the smart device also has the ability to keep the Private keys of the wallet on a chip which ahs high-security architecture, lasting over 50 years. Another very interesting feature is that the device also has a protable case which is made of durable materials and features security extras in it as well. In addition, Digital Bitbox as a company has bet on this design in order to avoid attracting attention by prying eyes and this in combination with the swiss ideals and the quality you get makes it a choice to consider.
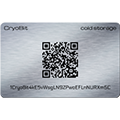
CryoBit Cryo Card Hardware Wallet Review
Being a cold storage, this is definitely a unique device, hence the reason behind the “Sold Out” words written when you visited their site few months from writing this. The Cryo Coin has been created in order to resist salt water and organic solvents and in addition to this the device also sues a ceramic-glass composite which can resists up to 900 degrees differences in temperature. The unique rugged system, puts this wallent among the ones which are the most physically secure and simplistic, which can be used even at extreme conditions.
CryoCard – Security The security of CryoCard is composed by several features, including the AES-256 encrption plus it generates a new Private Key which cannot be known to anyone but you since it’s encrypted. The card is also encoded in the web browsers of users so nobody can monitor the process of transactions. Another strong benefit in terms of security is that the CryoCard is made to be custom for each user, adding extra security when you want it or if you want to focus more on flexibility instead, it can also be done.
Support When we talk about suppot, the Cryo Card can be used with numerous altcoins plus BitCoin:
Litecoin Dogecoin Stealthcoin Other (custom-made)
CryoCard – Unique Features What is the difference between this wallet and other is it’s AMS 5524 stainless steel casing which makes it the most rugged among all of the wallets in this list. Another unique feature of CryoCard is also that the wallet can be based on specific preferences, making it completely customisable according to what you want it to do and to store
Ledger HW.1 Hardware Wallet Review
Being a simplistic flash drive-like devce, the Ledger HW.1 has some advanced features packed. The device has a lot of the same stuff that is in the Nano S and it is created only for BitCoin. In addition to this, it is one of the cheapest here, and if you are looking for essential protection from a hardware wallet, this is the device for you.
Ledger HW.1 – Security The security of the HW.1 include important security features, such as multi-signature support, which gives the possibility for the device to be used with other multi-signature wallets. Another important feature is it’s backup and restore ability, in the event that the device is lost or broken. Furthermore, it also allows for the smart device to be migrated to any compatible wallet on another Ledger device via BIP 39. In addition to this, the device also uses a customly made microchip, suporting a PIN code lock. Another security feature of the HW.1 is that besides two-factor authentication, it also supports usage via a secure application from your Android or iOS devices.
Ledger HW1 – Support Currently, the HW.1 supports only the usage of BitCoin.
Unique Features When we talk about uniqueness, Ledger HW.1 is not a device that has many unique features. However, it is imporant to know that it has 3 different variants – “Classic”, “Multisig” and “Enterprise”. These, if combned, allow you to have the device, based on your requirements. In addition to this, free updatesa re also available, making the device appropriate for the long term use as well. In addition to this, this is one of the lightest and smallest devices when you compare it to the competition, with weight just over 0.3 ounces.
Ventsislav has been covering the latest malware, software and newest tech developments at SensorsTechForum for 3 years now. He started out as a network administrator. Having graduated Marketing as well, Ventsislav also has passion for discovery of new shifts and innovations in cybersecurity that become game changers. After studying Value Chain Management and then Network Administration, he found his passion within cybersecrurity and is a strong believer in basic education of every user towards online safety.
may remain persistent on your system and may re-infect it. We recommend you to download SpyHunter and run free scan to remove all virus files on your PC. This saves you hours of time and effort compared to doing the removal yourself.
Before starting the actual removal process, we recommend that you do the following preparation steps.
Make sure you have these instructions always open and in front of your eyes.
Do a backup of all of your files, even if they could be damaged. You should back up your data with a cloud backup solution and insure your files against any type of loss, even from the most severe threats.
Be patient as this could take a while.
Step 1: Boot Your PC In Safe Mode to isolate and remove
OFFER
Manual Removal Usually Takes Time and You Risk Damaging Your Files If Not Careful!
We Recommend To Scan Your PC with SpyHunter
Keep in mind, that SpyHunter’s scanner is only for malware detection. If SpyHunter detects malware on your PC, you will need to purchase SpyHunter’s malware removal tool to remove the malware threats. Read our SpyHunter 5 review. Click on the corresponding links to check SpyHunter’s EULA, Privacy Policy and Threat Assessment Criteria
1. Hold Windows key()+ R
2. The “Run” Window will appear. In it, type “msconfig” and click OK.
3. Go to the “Boot” tab. There select “Safe Boot”, tick “Network” and then click “Apply” and “OK”.
Tip: Make sure to reverse those changes by unticking Safe Boot after that, because your system will always boot in Safe Boot from now on.
4. When prompted, click on “Restart” to go into Safe Mode.
5. You can recognise Safe Mode by the words written on the corners of your screen.
Step 2: Clean any registries, created by on your computer.
The usually targeted registries of Windows machines are the following:
You can access them by opening the Windows registry editor and deleting any values, created by there. This can happen by following the steps underneath:
1. Open the Run Window again, type “regedit” and click OK.
2. When you open it, you can freely navigate to the Run and RunOnce keys, whose locations are shown above.
3. You can remove the value of the virus by right-clicking on it and removing it.
Tip: To find a virus-created value, you can right-click on it and click “Modify” to see which file it is set to run. If this is the virus file location, remove the value.
Step 3: Find files created by
For Windows 8, 8.1 and 10. For Windows XP, Vista, and 7.
For Newer Windows Operating Systems
1: On your keyboard press + R and write explorer.exe in the Run text box and then click on the Ok button.
2: Click on your PC from the quick access bar. This is usually an icon with a monitor and its name is either “My Computer”, “My PC” or “This PC” or whatever you have named it.
3: Navigate to the search box in the top-right of your PC’s screen and type “fileextension:” and after which type the file extension. If you are looking for malicious executables, an example may be “fileextension:exe”. After doing that, leave a space and type the file name you believe the malware has created. Here is how it may appear if your file has been found:
N.B. We recommend to wait for the green loading bar in the navination box to fill up in case the PC is looking for the file and hasn’t found it yet.
For Older Windows Operating Systems
In older Windows OS’s the conventional approach should be the effective one:
1: Click on the Start Menu icon (usually on your bottom-left) and then choose the Search preference.
2: After the search window appears, choose More Advanced Options from the search assistant box. Another way is by clicking on All Files and Folders.
3: After that type the name of the file you are looking for and click on the Search button. This might take some time after which results will appear. If you have found the malicious file, you may copy or open its location by right-clicking on it.
Now you should be able to discover any file on Windows as long as it is on your hard drive and is not concealed via special software.
IMPORTANT! Before starting “Step 4”, please boot back into Normal mode, in case you are currently in Safe Mode. This will enable you to install and use SpyHunter 5 successfully.
Step 4: Scan for with SpyHunter Anti-Malware Tool
1. Click on the “Download” button to proceed to SpyHunter’s download page.
It is recommended to run a scan before purchasing the full version of the software to make sure that the current version of the malware can be detected by SpyHunter. Click on the corresponding links to check SpyHunter’s EULA, Privacy Policy and Threat Assessment Criteria.
2. After you have installed SpyHunter, wait for it to update automatically.
3. After the update process has finished, click on the ‘Malware/PC Scan’ tab. A new window will appear. Click on ‘Start Scan’.
4. After SpyHunter has finished scanning your PC for any files of the associated threat and found them, you can try to get them removed automatically and permanently by clicking on the ‘Next’ button.
If any threats have been removed, it is highly recommended to restart your PC.
Step 5 (Optional): Try to Restore Files Encrypted by .
Ransomware infections and aim to encrypt your files using an encryption algorithm which may be very difficult to decrypt. This is why we have suggested a data recovery method that may help you go around direct decryption and try to restore your files. Bear in mind that this method may not be 100% effective but may also help you a little or a lot in different situations.
1. Download the reccomended Data Recovery software by clicking on the link underneath:
2. On the download page, click on the “Download” button:
3. Click on “Save File” button:
4. Accept all agreements and click “Next”:
5. After all the “Next” steps, click on “Install” and then wait for the installation to complete:
6.Run the software. Click on the location to scan for missing or deleted files and click on “Scan”:
7. Wait for the scan to complete, it may take some time. Be advised that this scan is not 100% guaranteed to recover all files, but it does have some chance to get your data back:
Ventsislav has been covering the latest malware, software and newest tech developments at SensorsTechForum for 3 years now. He started out as a network administrator. Having graduated Marketing as well, Ventsislav also has passion for discovery of new shifts and innovations in cybersecurity that become game changers. After studying Value Chain Management and then Network Administration, he found his passion within cybersecrurity and is a strong believer in basic education of every user towards online safety.
may remain persistent on your system and may re-infect it. We recommend you to download SpyHunter and run free scan to remove all virus files on your PC. This saves you hours of time and effort compared to doing the removal yourself.
Before starting the actual removal process, we recommend that you do the following preparation steps.
Make sure you have these instructions always open and in front of your eyes.
Do a backup of all of your files, even if they could be damaged. You should back up your data with a cloud backup solution and insure your files against any type of loss, even from the most severe threats.
Be patient as this could take a while.
Step 1: Boot Your PC In Safe Mode to isolate and remove
OFFER
Manual Removal Usually Takes Time and You Risk Damaging Your Files If Not Careful!
We Recommend To Scan Your PC with SpyHunter
Keep in mind, that SpyHunter’s scanner is only for malware detection. If SpyHunter detects malware on your PC, you will need to purchase SpyHunter’s malware removal tool to remove the malware threats. Read our SpyHunter 5 review. Click on the corresponding links to check SpyHunter’s EULA, Privacy Policy and Threat Assessment Criteria
1. Hold Windows key()+ R
2. The “Run” Window will appear. In it, type “msconfig” and click OK.
3. Go to the “Boot” tab. There select “Safe Boot” and then click “Apply” and “OK”.
Tip: Make sure to reverse those changes by unticking Safe Boot after that, because your system will always boot in Safe Boot from now on.
4. When prompted, click on “Restart” to go into Safe Mode.
5. You can recognise Safe Mode by the words written on the corners of your screen.
Step 2: Clean any registries, created by on your computer.
The usually targeted registries of Windows machines are the following:
You can access them by opening the Windows registry editor and deleting any values, created by there. This can happen by following the steps underneath:
1. Open the Run Window again, type “regedit” and click OK.
2. When you open it, you can freely navigate to the Run and RunOnce keys, whose locations are shown above.
3. You can remove the value of the virus by right-clicking on it and removing it.
Tip: To find a virus-created value, you can right-click on it and click “Modify” to see which file it is set to run. If this is the virus file location, remove the value.
Step 3: Find files created by
For Windows 8, 8.1 and 10. For Windows XP, Vista, and 7.
For Newer Windows Operating Systems
1: On your keyboard press + R and write explorer.exe in the Run text box and then click on the Ok button.
2: Click on your PC from the quick access bar. This is usually an icon with a monitor and its name is either “My Computer”, “My PC” or “This PC” or whatever you have named it.
3: Navigate to the search box in the top-right of your PC’s screen and type “fileextension:” and after which type the file extension. If you are looking for malicious executables, an example may be “fileextension:exe”. After doing that, leave a space and type the file name you believe the malware has created. Here is how it may appear if your file has been found:
N.B. We recommend to wait for the green loading bar in the navination box to fill up in case the PC is looking for the file and hasn’t found it yet.
For Older Windows Operating Systems
In older Windows OS’s the conventional approach should be the effective one:
1: Click on the Start Menu icon (usually on your bottom-left) and then choose the Search preference.
2: After the search window appears, choose More Advanced Options from the search assistant box. Another way is by clicking on All Files and Folders.
3: After that type the name of the file you are looking for and click on the Search button. This might take some time after which results will appear. If you have found the malicious file, you may copy or open its location by right-clicking on it.
Now you should be able to discover any file on Windows as long as it is on your hard drive and is not concealed via special software.
IMPORTANT! Before starting “Step 4”, please boot back into Normal mode, in case you are currently in Safe Mode. This will enable you to install and use SpyHunter 5 successfully.
Step 4: Scan for with SpyHunter Anti-Malware Tool
1. Click on the “Download” button to proceed to SpyHunter’s download page.
It is recommended to run a scan before purchasing the full version of the software to make sure that the current version of the malware can be detected by SpyHunter. Click on the corresponding links to check SpyHunter’s EULA, Privacy Policy and Threat Assessment Criteria.
2. After you have installed SpyHunter, wait for it to update automatically.
3. After the update process has finished, click on the ‘Malware/PC Scan’ tab. A new window will appear. Click on ‘Start Scan’.
4. After SpyHunter has finished scanning your PC for any files of the associated threat and found them, you can try to get them removed automatically and permanently by clicking on the ‘Next’ button.
If any threats have been removed, it is highly recommended to restart your PC.
Ventsislav has been covering the latest malware, software and newest tech developments at SensorsTechForum for 3 years now. He started out as a network administrator. Having graduated Marketing as well, Ventsislav also has passion for discovery of new shifts and innovations in cybersecurity that become game changers. After studying Value Chain Management and then Network Administration, he found his passion within cybersecrurity and is a strong believer in basic education of every user towards online safety.
may remain persistent on your system and may re-infect it. We recommend you to download SpyHunter and run free scan to remove all virus files on your PC. This saves you hours of time and effort compared to doing the removal yourself.
Before starting the actual removal process, we recommend that you do the following preparation steps.
Make sure you have these instructions always open and in front of your eyes.
Be patient as this could take a while.
Step 1: Uninstall and related software from Windows
OFFER
Manual Removal Usually Takes Time and You Risk Damaging Your Files If Not Careful!
We Recommend To Scan Your PC with SpyHunter
Keep in mind, that SpyHunter’s scanner is only for malware detection. If SpyHunter detects malware on your PC, you will need to purchase SpyHunter’s malware removal tool to remove the malware threats. Read our SpyHunter 5 review. Click on the corresponding links to check SpyHunter’s EULA, Privacy Policy and Threat Assessment Criteria
Here is a method in few easy steps that should be able to uninstall most programs.No matter if you are using Windows 10, 8, 7, Vista or XP, those steps will get the job done. Dragging the program or its folder to the recycle bin can be a very bad decision. If you do that, bits and pieces of the program are left behind, and that can lead to unstable work of your PC, errors with the file type associations and other unpleasant activities. The proper way to get a program off your computer is to Uninstall it. To do that:
1. Hold the Windows Logo Button and “R” on your keyboard. A Pop-up window will appear.
2. In the field type in “appwiz.cpl” and press ENTER.
3. This will open a window with all the programs installed on the PC. Select the program that you want to remove, and press “Uninstall”
Follow the instructions above and you will successfully uninstall most programs.
Step 2: Clean your Browsers from .
Remove an extension from Mozilla FirefoxRemove an extension from Google Chrome Remove an extension from Internet Explorer Remove an extension from Microsoft Edge
1. Start Mozilla Firefox. Open the menu window
2. Select the “Add-ons” icon from the menu.
3. Select the unwanted extension and click “Remove“
4. After the extension is removed, restart Mozilla Firefox by closing it from the red “X” button at the top right corner and start it again.
1. Start Google Chrome and open the drop menu
2. Move the cursor over “Tools” and then from the extended menu choose “Extensions“
3. From the opened “Extensions” menu locate the unwanted extension and click on its “Remove” button.
4. After the extension is removed, restart Google Chrome by closing it from the red “X” button at the top right corner and start it again.
1. Start Internet Explorer: 2. Click on the gear icon labeled ‘Tools’ to open the drop menu and select ‘Manage Add-ons’
3. In the ‘Manage Add-ons’ window.
4. Select the extension you want to remove and then click ‘Disable’. A pop-up window will appear to inform you that you are about to disable the selected extension, and some more add-ons might be disabled as well. Leave all the boxes checked, and click ‘Disable’.
5. After the unwanted extension has been removed, restart Internet Explorer by closing it from the red ‘X’ button located at the top right corner and start it again.
1. Start Edge
2. Open the drop menu by clicking on the icon at the top right corner.
3. From the drop menu select “Extensions”.
4. Choose the suspected malicious extension you want to remove and then click on the gear icon.
5. Remove the malicious extension by scrolling down and then clicking on Uninstall.
Step 3: Clean any registries, created by on your computer.
The usually targeted registries of Windows machines are the following:
You can access them by opening the Windows registry editor and deleting any values, created by there. This can happen by following the steps underneath:
1. Open the Run Window again, type “regedit” and click OK.
2. When you open it, you can freely navigate to the Run and RunOnce keys, whose locations are shown above.
3. You can remove the value of the virus by right-clicking on it and removing it.
Tip: To find a virus-created value, you can right-click on it and click “Modify” to see which file it is set to run. If this is the virus file location, remove the value.
IMPORTANT! Before starting “Step 4”, please boot back into Normal mode, in case you are currently in Safe Mode. This will enable you to install and use SpyHunter 5 successfully.
Step 4: Scan for with SpyHunter Anti-Malware Tool
1. Click on the “Download” button to proceed to SpyHunter’s download page.
It is recommended to run a scan before purchasing the full version of the software to make sure that the current version of the malware can be detected by SpyHunter. Click on the corresponding links to check SpyHunter’s EULA, Privacy Policy and Threat Assessment Criteria.
2. After you have installed SpyHunter, wait for it to update automatically.
3. After the update process has finished, click on the ‘Malware/PC Scan’ tab. A new window will appear. Click on ‘Start Scan’.
4. After SpyHunter has finished scanning your PC for any files of the associated threat and found them, you can try to get them removed automatically and permanently by clicking on the ‘Next’ button.
If any threats have been removed, it is highly recommended to restart your PC.
Ventsislav has been covering the latest malware, software and newest tech developments at SensorsTechForum for 3 years now. He started out as a network administrator. Having graduated Marketing as well, Ventsislav also has passion for discovery of new shifts and innovations in cybersecurity that become game changers. After studying Value Chain Management and then Network Administration, he found his passion within cybersecrurity and is a strong believer in basic education of every user towards online safety.
may remain persistent on your system and may re-infect it. We recommend you to download Combo Cleaner and run free scan to remove all virus files on your Mac. This saves you hours of time and effort compared to doing the removal yourself.
Combo Cleaner’s scanner is free but the paid version is needed to remove the malware threats. Read Combo Cleaner’s EULA and Privacy Policy
Preparation Phase:
Before starting to follow the steps below, be advised that you should first do the following preparations:
Backup your files in case the worst happens.
Make sure to have a device with these instructions on standy.
Arm yourself with patience.
Step 1: Uninstall and remove related files and objects
OFFER
Manual Removal Usually Takes Time and You Risk Damaging Your Files If Not Careful!
We Recommend To Scan Your Mac with Combo Cleaner
Keep in mind, that Combo Cleaner needs to purchased to remove the malware threats. Click on the corresponding links to check Combo Cleaner’s EULA and Privacy Policy
1. Hit the ⇧+⌘+U keys to open Utilities. Another way is to click on “Go” and then click “Utilities”, like the image below shows:
2. Find Activity Monitor and double-click it:
3. In the Activity Monitor look for any suspicious processes, belonging or related to :
Tip: To quit a process completely, choose the “Force Quit” option.
4. Click on the “Go” button again, but this time select Applications. Another way is with the ⇧+⌘+A buttons.
5. In the Applications menu, look for any suspicious app or an app with a name, similar or identical to . If you find it, right-click on the app and select “Move to Trash”.
6. Select Accounts, after which click on the Login Items preference. Your Mac will then show you a list of items that start automatically when you log in. Look for any suspicious apps identical or similar to . Check the app you want to stop from running automatically and then select on the Minus (“–“) icon to hide it.
7. Remove any left-over files that might be related to this threat manually by following the sub-steps below:
Go to Finder.
In the search bar type the name of the app that you want to remove.
Above the search bar change the two drop down menus to “System Files” and “Are Included” so that you can see all of the files associated with the application you want to remove. Bear in mind that some of the files may not be related to the app so be very careful which files you delete.
If all of the files are related, hold the ⌘+A buttons to select them and then drive them to “Trash”.
In case you cannot remove via Step 1 above:
In case you cannot find the virus files and objects in your Applications or other places we have shown above, you can manually look for them in the Libraries of your Mac. But before doing this, please read the disclaimer below:
Disclaimer! If you are about to tamper with Library files on Mac, be sure to know the name of the virus file, because if you delete the wrong file, it may cause irreversible damage to your MacOS. Continue on your own responsibility!
1. Click on “Go” and Then “Go to Folder” as shown underneath:
2. Type in “/Library/LauchAgents/” and click Ok:
3. Delete all of the virus files that have similar or the same name as . If you believe there is no such file, do not delete anything.
You can repeat the same procedure with the following other Library directories:
→ ~/Library/LaunchAgents /Library/LaunchDaemons
Tip: ~ is there on purpose, because it leads to more LaunchAgents.
Step 2: Remove – related extensions from Safari / Chrome / Firefox
Remove an extension from Safari and reset it.Remove a toolbar from Google Chrome Remove a toolbar from Mozilla Firefox
1. Start Safari
2. After hovering your mouse cursor to the top of the screen, click on the Safari text to open its drop down menu.
3. From the menu, click on “Preferences“
4. After that, select the ‘Extensions’ Tab
5. Click once on the extension you want to remove.
6. Click ‘Uninstall’
A pop-up window will appear asking for confirmation to uninstall the extension. Select ‘Uninstall’ again, and the will be removed.
How to Reset Safari
IMPORTANT: Before resetting Safari make sure you back up all your saved passwords within the browser in case you forget them.
Start Safari and then click on the gear leaver icon.
Click the Reset Safari button and you will reset the browser.
1. Start Google Chrome and open the drop menu
2. Move the cursor over “Tools” and then from the extended menu choose “Extensions“
3. From the opened “Extensions” menu locate the add-on and click on the garbage bin icon on the right of it.
4. After the extension is removed, restart Google Chrome by closing it from the red “X” in the top right corner and start it again.
1. Start Mozilla Firefox. Open the menu window
2. Select the “Add-ons” icon from the menu.
3. Select the Extension and click “Remove“
4. After the extension is removed, restart Mozilla Firefox by closing it from the red “X” in the top right corner and start it again.
Step 3: Scan for and remove files from your Mac
When you are facing problems on your Mac as a result of unwanted scripts and programs such as , the recommended way of eliminating the threat is by using an anti-malware program. Combo Cleaner offers advanced security features along with other modules that will improve your Mac’s security and protect it in the future.
Ventsislav has been covering the latest malware, software and newest tech developments at SensorsTechForum for 3 years now. He started out as a network administrator. Having graduated Marketing as well, Ventsislav also has passion for discovery of new shifts and innovations in cybersecurity that become game changers. After studying Value Chain Management and then Network Administration, he found his passion within cybersecrurity and is a strong believer in basic education of every user towards online safety.
It’s funny that the Case is part of a 2018 review. To my knowledge they didn’t sell any devices for years. And in the fall of 2017 they shut down the backend. That renders the devices useless in 2018. It’s a pitty. I really liked my Case.