
In 2024, the ingenuity of email scams has hit a new peak, with Geek Squad email scams drawing particular attention for their cunning ability to mimic the communications of the well-respected tech support service. These scams, which play on the trust and reputation of the Geek Squad brand, are deceiving individuals into handing over personal information or money for services that simply don’t exist.
So, what should you know about the Geek Squad email scam? This article is a detailed guide that will provide you with all the answers regarding Geek Squad email scams.
Geek Squad E-Mail Scam Summary
| Name | Geek Squad |
| Type | Phishing, PUP, Scam, Malware |
| Short Description | Phishing e-mail messages trying to trick you into providing personal and financial information. |
| Symptoms | You receive an e-mail message that looks legitimate. |
| Distribution Method | Phishing Emails, Pop-up messages, Browser Redirects |
| Removal Tool |
See If Your System Has Been Affected by malware
Download
Malware Removal Tool
|
Geek Squad Email Scams in 2024
In 2024, Geek Squad email scams have become increasingly sophisticated, targeting individuals with emails that appear to come from Geek Squad, a reputable tech support service. These deceptive emails often lure victims into providing personal information or making payments for services they never subscribed to. Understanding the mechanics behind these scams is crucial for avoiding becoming a victim.
What Exactly Is the Geek Squad Email Scam?
The Geek Squad email scam is a form of phishing where fraudsters impersonate Geek Squad support to trick people into revealing sensitive information or paying for non-existent services. Scammers craft convincing emails, complete with fake invoices and renewal notices for subscription services, that many recipients might believe are real. The goal is to exploit the recipients’ trust in the Geek Squad brand to commit fraud.
Variations of Geek Squad Scams: from Auto-renewals to Fake Support
Scammers have developed various tactics to make their fraudulent activities more successful. Below are some common variations:
- Auto-renewal Scams: Victims receive emails claiming their service subscription will auto-renew at a high rate, urging them to take action if they wish to cancel. This often leads to a scam where victims are tricked into giving away payment information.
- Technical Support Scams: Here, scammers pretend to offer help for nonexistent computer problems, convincing individuals to grant remote access to their devices or to download malware that steals personal information.
- Fake Refund and Overpayment Scams: Victims are informed they’ve been charged a certain amount and are eligible for a refund. During the refund process, they’re tricked into providing bank details or making a payment to the scammer.
- Phishing for Personal Information: Scammers may also seek direct personal information under the guise of verifying identities, supposedly to process a refund or cancel a service, putting the victim’s data at risk of identity theft.
To protect yourself, be skeptical of unsolicited emails, verify the source before responding, and never share personal information through email or over the phone. If you suspect you’ve received a Geek Squad email scam, contact the official Geek Squad support directly using contact information from their official website, not the information provided in the suspicious email.
For an added layer of protection, consider using reputable security software like SpyHunter to safeguard your devices and personal information against malware and other threats that might stem from accidentally engaging with scam emails.
How to Spot a Geek Squad Email Scam
Email scams cleverly impersonate trusted companies like Geek Squad to deceive recipients. Recognizing these scams requires awareness of certain warning signs. First, watch out for impersonal greetings such as “Dear Sir/Madam” which show a lack of direct communication with you:
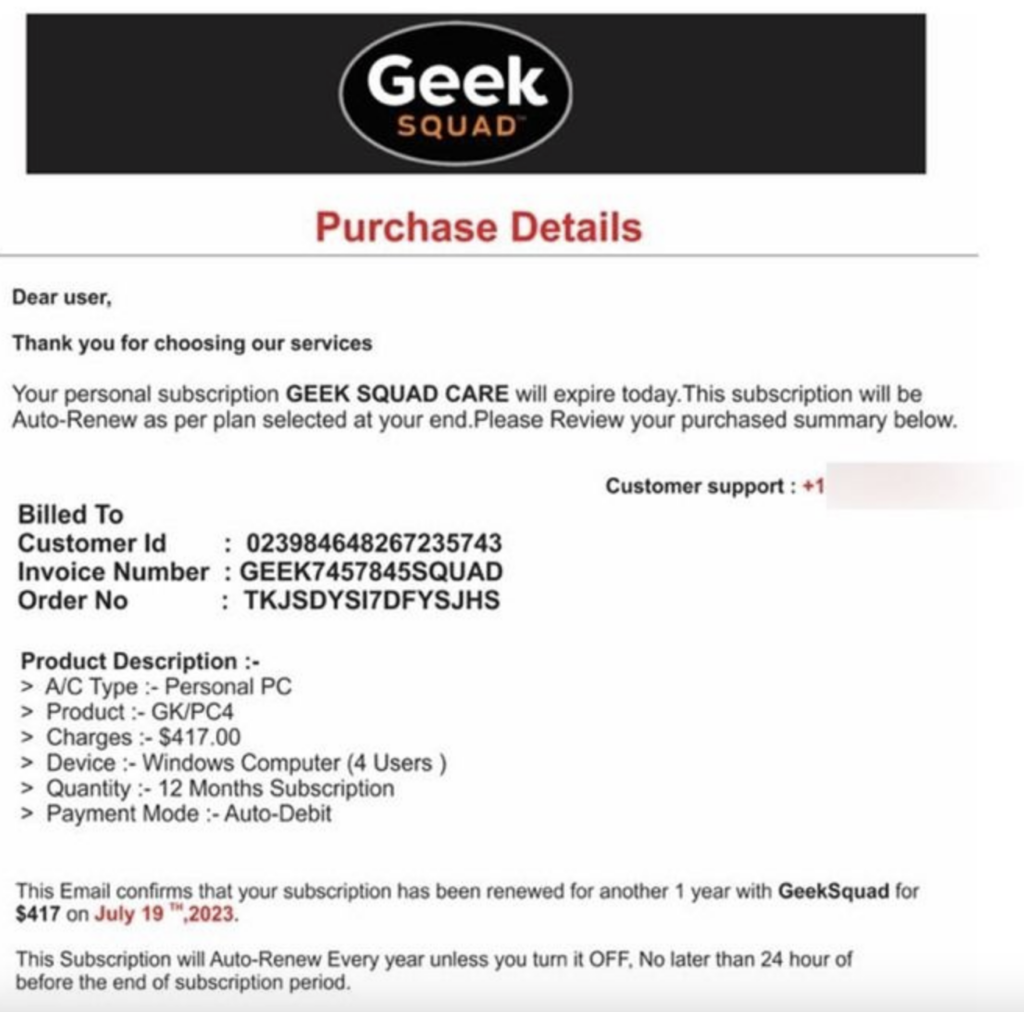
Scammers often send bulk emails, avoiding personalization to reach as many victims as possible. Verify the sender’s email address; a genuine Geek Squad email will have an official domain name, not a generic or suspiciously altered one. Furthermore, unexpected solicitations for your personal or payment information, especially if you haven’t recently interacted with Best Buy or Geek Squad, should immediately raise suspicions.
Be skeptical of emails filled with spelling and grammatical errors. Professional organizations like Geek Squad ensure their communications are polished and free of such mistakes. Also, if the email contains threats or pressures you with urgency, it’s a tactic scammers use to bypass your rational thinking.
Lastly, genuine companies do not ask for payments in gift cards or use public domain emails (@gmail.com, @yahoo.com) for official communications. If you encounter these signs, the email is likely not from Geek Squad.
Urgent Requests and Unfamiliar Links: Prime Indicators of Fraud
Scammers exploit urgency, pressuring you to act fast on their fraudulent requests. They might claim that an immediate response is necessary to avoid a fee or to secure a refund. This tactic aims to derail logical thinking, pushing you to act out of haste rather than judgment. Always pause and think before acting on such emails, as urgency is a common tool in a scammer’s kit.
Also, be wary of emails that contain unfamiliar or suspicious links. Scammers often disguise these links to look legitimate, hoping you’ll click without second thought. These links may lead to fake websites designed to steal your information. Before clicking, hover over the link to preview the URL. Remember, if something in the email urges rapid action or the links seem odd, it’s a strong sign of a scam. For peace of mind, verify suspicious links with tools like VirusTotal, which can confirm their safety.
Too Good to Be True Offers: Fake Discounts and Refunds
Offers that seem too generous or come out of the blue should trigger skepticism. Scammers often dangle enticing deals, such as significant discounts or unexpected refunds from Geek Squad, to lure in victims. It’s important to question the validity of such offers. Legitimate businesses, including Geek Squad, would not offer discounts or process refunds without a clear, documented reason or without direct action from the customer.
If you’re presented with an offer requiring you to provide personal information or make an upfront payment to receive a service or refund, it’s almost certainly a scam. Remember, authentic communications should align with your real transactions and subscriptions. When in doubt, contact Geek Squad directly using contact information sourced from their official website, not from the suspicious email. This step ensures you’re engaging with the real company and not a scammer pretending to be from Geek Squad.
Steps to Take If You Encounter a Geek Squad Scam
If you suspect an email claiming to be from Geek Squad is fraudulent, taking appropriate action immediately can prevent potential harm. Here’s what to do.
Do Not Engage: Safe Practices When Receiving a Suspicious Email
Upon receiving a doubtful email, the safest route is to avoid interacting with it. Here’s how:
- Do not respond or click on any links: Engaging with the email validates your address to the sender and may encourage further scams.
- Avoid downloading attachments: Files may contain malware designed to compromise your computer’s security.
- Block the sender: Prevent any more potentially harmful emails from reaching you by blocking the sender through your email provider.
- Report as spam: Mark the email as spam. This not only removes the email from your inbox but also helps your email provider improve scam detection.
Protecting yourself involves more than just ignoring a scam email. We recommend installing reliable security software like SpyHunter to scan for and remove threats.
Reporting Scam Emails: How and Where to Report Them
Reporting fraudulent emails can help combat these scams by raising awareness and preventing others from becoming victims. Here’s how you can report them:
- Contact Official Support: If the email pretends to be from Geek Squad, report it to their official support to alert them to the scam.
- Forward to Authorities: In the US, fraudulent emails can be forwarded to the Federal Trade Commission (FTC) at spam@uce.gov, or you can report it via the FTC’s complaint website.
- Notify Your Email Provider: Email services often have a way to report phishing or scam emails directly within the email client. Look for a “Report phishing” or “Report spam” option.
- Use Reporting Websites: Websites like Scamwatch or the Anti-Phishing Working Group allow you to report scam emails and contribute to databases that track scams.
After reporting the scam, implementing safety measures in your digital life is crucial. Regularly update your passwords, use two-factor authentication, and ensure your antivirus software, such as SpyHunter, is up to date for enhanced protection against new threats.
How to Avoid Falling for Email Scams
Email scams have become a common threat to individual and organizational security. By understanding how to proactively defend against these threats, you can significantly reduce the risk of falling victim to online fraud. One effective strategy is maintaining good email hygiene and implementing robust security measures.
The Importance of Email Hygiene and Security Measures
Email hygiene is critical in protecting against scams. This involves being selective about the emails you open and the links or attachments you choose to engage with. To start, always verify the sender’s credentials before responding to any requests for personal or financial information. If an email feels suspicious, it’s better to err on the side of caution and delete it.
Other important security measures include updating your computer and software regularly to patch vulnerabilities that scammers could exploit. Using complex passwords and enabling two-factor authentication (2FA) can also provide an added layer of security for your online accounts. Furthermore, educating yourself and your network on recognizing phishing attempts is paramount. Look out for misspelled words, urgent requests for information, and unfamiliar email addresses, which are telltale signs of email scams.
Enhancing Your Cybersecurity with Anti-Malware Software
For those seeking additional protection, leveraging security software like SpyHunter can offer comprehensive defense against malware and phishing attempts. SpyHunter is designed to identify and remove malware, as well as protect against real-time threats. It scans for vulnerabilities and provides alerts on potentially malicious websites, downloads, and phishing emails, adding an essential layer of defense to your cybersecurity strategy.
Furthermore, SpyHunter’s easy-to-navigate interface makes it accessible to users of all technology levels, ensuring that you can secure your digital environment without needing to decipher complex jargon. By integrating SpyHunter into your cybersecurity routine, you can fortify your defenses against the ever-increasing threats of email scams.
What to Do If You’ve Already Responded to a Geek Squad Scam Email
Realizing you’ve interacted with a scam can evoke a mix of feelings, from embarrassment to concern. If you’ve accidentally responded to a Geek Squad scam email, taking swift, decisive action is critical to safeguarding your information and minimizing potential damage.
Immediate Actions to Secure Your Information
The moment you suspect that you’ve fallen for a scam, your priority should be securing any potentially compromised information. Here’s what you need to do:
- Change Your Passwords: Start with the accounts you know were directly compromised, then consider updating other significant accounts (such as your email and bank accounts) as a precaution.
- Contact Your Bank: If you’ve shared financial details, inform your bank immediately. They can monitor your account for suspicious activity and, if necessary, freeze your account to prevent unauthorized transactions.
- Report the Scam: Informing the real Geek Squad or the Federal Trade Commission (FTC) about the incident can help them alert other users and possibly take action against the scammers.
- Enable Multi-Factor Authentication (MFA): Where available, activate MFA on your accounts. This adds an extra security layer, making it harder for scammers to gain unauthorized access.
After securing your online presence, it’s crucial to address any potential threats that may have been introduced to your device.
Using SpyHunter to Remove Any Potential Threats
In response to the sophisticated tactics employed by cybercriminals, utilizing a dedicated anti-malware tool like SpyHunter can provide robust protection against further attacks. Here’s how SpyHunter can assist in mitigating the consequences of interacting with a Geek Squad scam email:
- Detects and Removes Malware: SpyHunter scans your device for any malware or spyware that might have been installed without your knowledge, ensuring thorough removal of these threats.
- Real-Time Protection: Offering real-time monitoring, SpyHunter effectively blocks new threats, preventing them from causing harm to your system.
- User-Friendly Interface: Designed with user experience in mind, SpyHunter offers an intuitive interface that simplifies the process of detecting and eliminating cyber threats.
- Regular Updates: To counter the latest malware techniques, SpyHunter regularly updates its threat database, ensuring your device remains protected against new and evolving threats.
By combining these steps with the proactive use of SpyHunter, you can significantly enhance your digital security posture, reducing the likelihood of enduring lasting effects from a Geek Squad scam email interaction.
Conclusion and Key Takeaways from the 2024 Geek Squad Email Scam Guide
Falling victim to the Geek Squad email scam can be both distressing and damaging. However, by being informed and cautious, you can significantly reduce your risk of becoming a target. Here are the crucial takeaways from our guide on how to protect yourself from the Geek Squad email scam in 2024:
- Stay Alert to Phishing Tactics: Recognize the signs of a scam. These can include unsolicited emails, suspicious links, and requests for personal information. Remember, legitimate companies like Geek Squad will never ask for sensitive details through insecure channels.
- Verify Before You Trust: Always check the authenticity of an email or phone call. If you receive a message from Geek Squad or any other tech support service, verify its legitimacy directly through their official channels before taking any action.
- Use Protective Software: Install reputable antivirus software on your devices. A trusted tool like SpyHunter not only helps detect and remove malware but also offers real-time protection against potential threats.
- Exercise Online Safety Practices: Never click on links or download attachments from unknown sources. These could expose your device to malware. Instead, directly navigate to official websites by typing the address into your browser.
- Enhance Your Cybersecurity Knowledge: Understanding the common tactics used by scammers can make you a harder target. Educate yourself on the latest phishing techniques and share this knowledge with friends and family.
- Report Suspected Scams: If you encounter what appears to be a Geek Squad scam, report it. By notifying the appropriate authorities or companies, you help prevent others from falling victim.
Additional Guidelines to Recognize and Combat Scam Emails
How Can I Tell if an Email Is Legitimately From Geek Squad?
Identifying a legitimate email from Geek Squad requires attention to detail. First, compare the sender’s email address with the official Geek Squad support email; any deviation could signify a scam. Look for common red flags like spelling and grammatical errors, as these are uncommon in official communications. Real Geek Squad emails will address you by name, not with generic greetings such as “Dear customer”. They also won’t ask for personal or financial information via email. Checking the consistency in the details mentioned, like service terms, currency, and transaction history with your records can also give you clues. If still in doubt, directly contact Geek Squad through official channels to verify the authenticity of the email.
What Should I Do if I Accidentally Provided Personal Information?
If you’ve unintentionally shared personal information with a scammer, acting swiftly is crucial. First, reach out to the institution that the information pertains to, such as your bank or the official Geek Squad, and notify them of the potential data breach. They can guide you on the next steps, like monitoring your accounts for suspicious activities or replacing your credit cards. Secondly, change all compromised passwords immediately. Consider using a password manager for stronger, unique passwords. Next, report the incident to relevant authorities or fraud reporting websites to help prevent others from falling victim to the same scam. Installing reputable antivirus software, like SpyHunter, can add an extra layer of security by identifying and eliminating malware that may have been installed on your device through scam links or attachments.
How Often Should I Update My Security Software?
Regular updates are the backbone of effective antivirus software. It is wise to set your security software to update automatically whenever new patches are available. These updates often include fixes for vulnerabilities that cybercriminals exploit and enhanced detection capabilities for the latest malware. If automatic updates aren’t possible, develop a routine to manually check for software updates at least once a week. Remember, an updated antivirus software, such as SpyHunter, strengthens your defense against the continuously evolving threats in the online world.
Ventsislav Krastev
Ventsislav is a cybersecurity expert at SensorsTechForum since 2015. He has been researching, covering, helping victims with the latest malware infections plus testing and reviewing software and the newest tech developments. Having graduated Marketing as well, Ventsislav also has passion for learning new shifts and innovations in cybersecurity that become game changers. After studying Value Chain Management, Network Administration and Computer Administration of System Applications, he found his true calling within the cybersecrurity industry and is a strong believer in the education of every user towards online safety and security.
Follow Me:
- Windows
- Mac OS X
- Google Chrome
- Mozilla Firefox
- Microsoft Edge
- Safari
- Internet Explorer
- Stop Push Pop-ups
How to Remove Geek Squad from Windows.
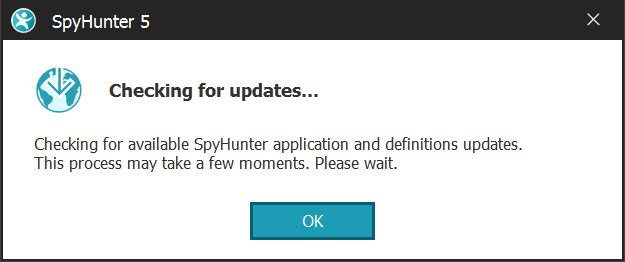
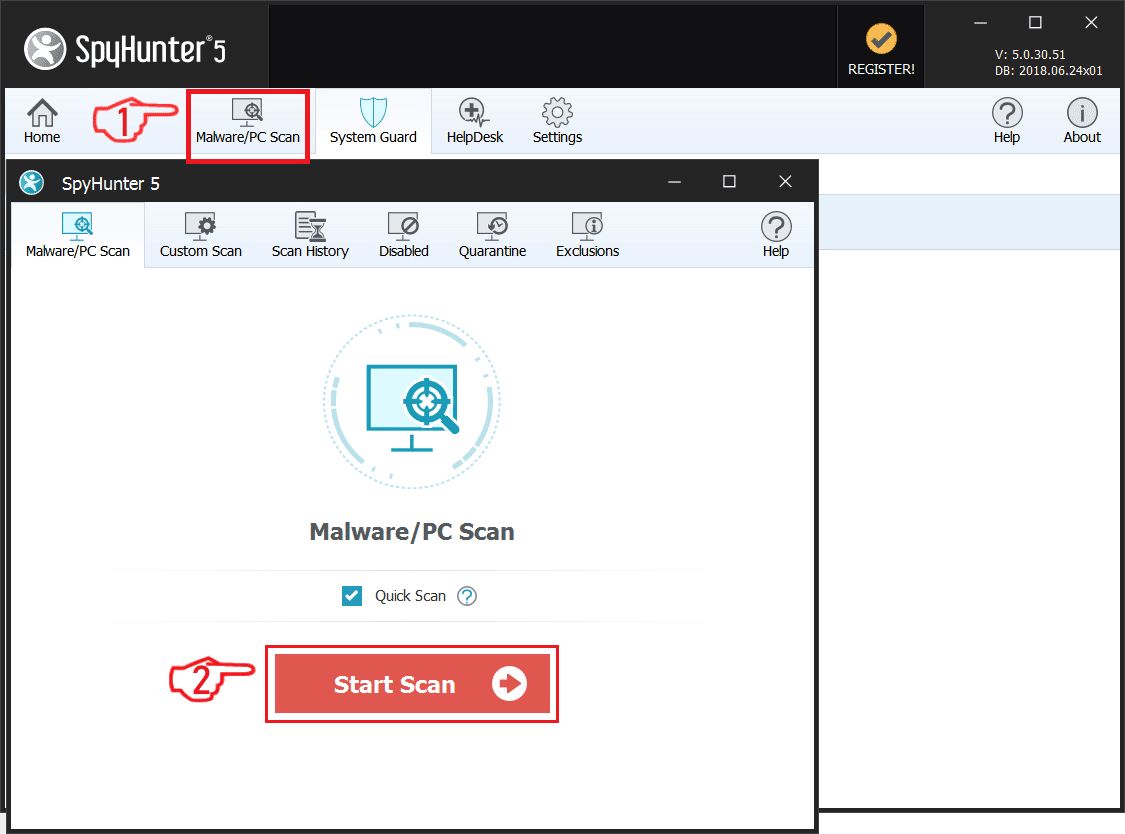
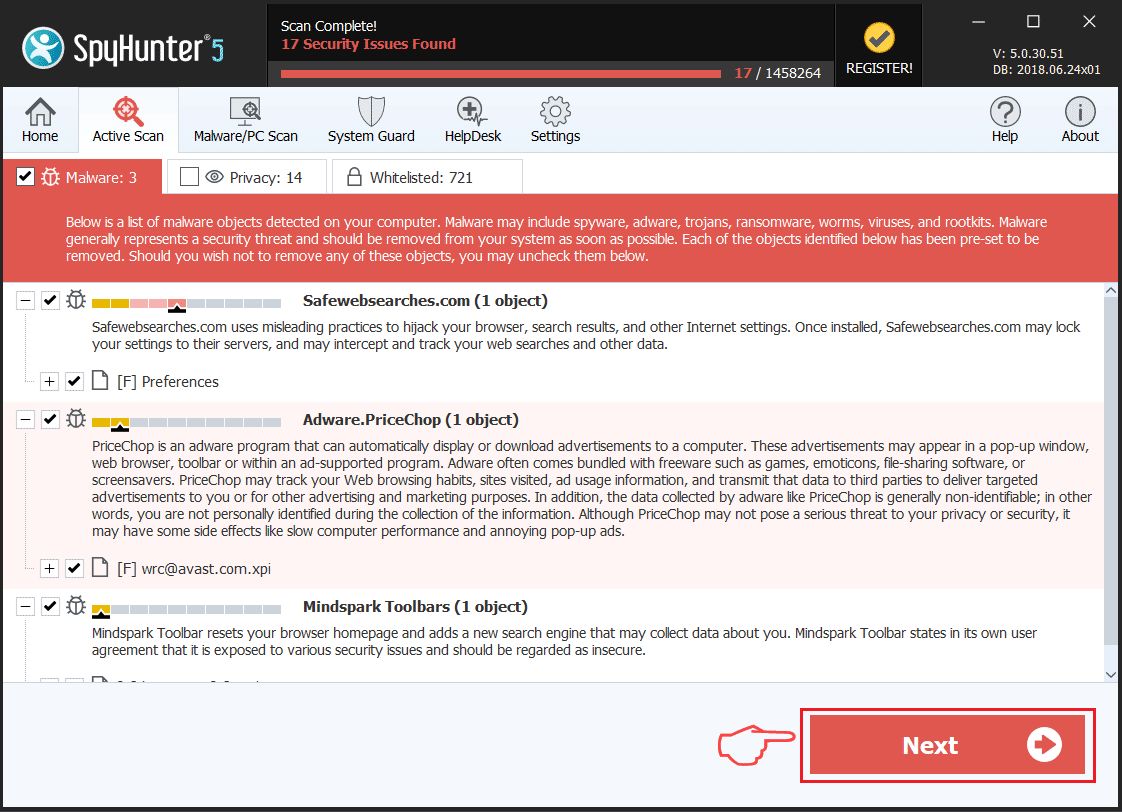
Step 1: Scan for Geek Squad with SpyHunter Anti-Malware Tool
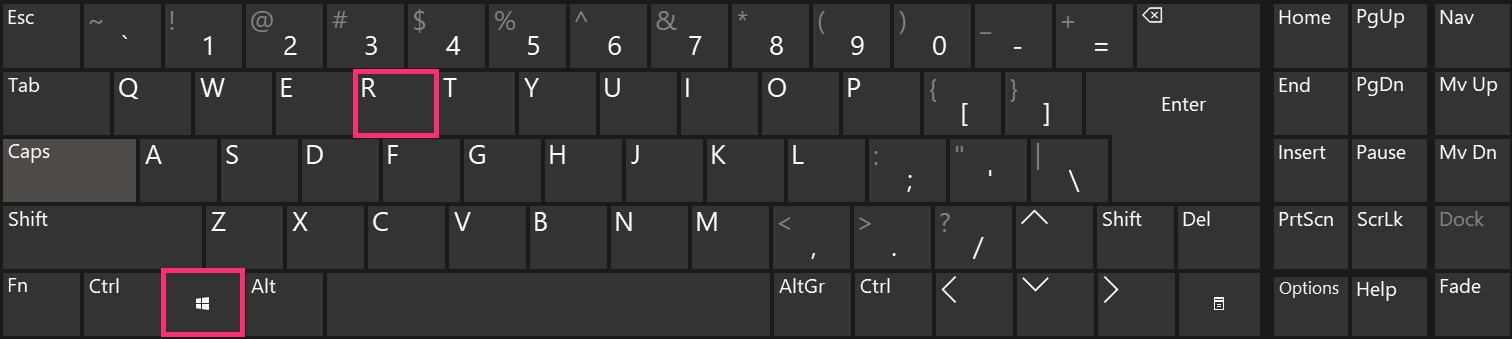
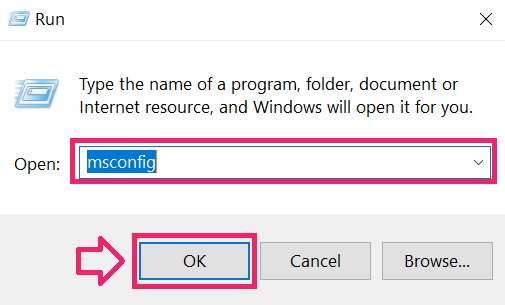
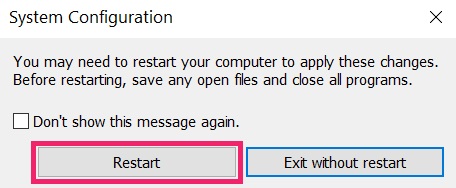
Step 2: Boot Your PC In Safe Mode

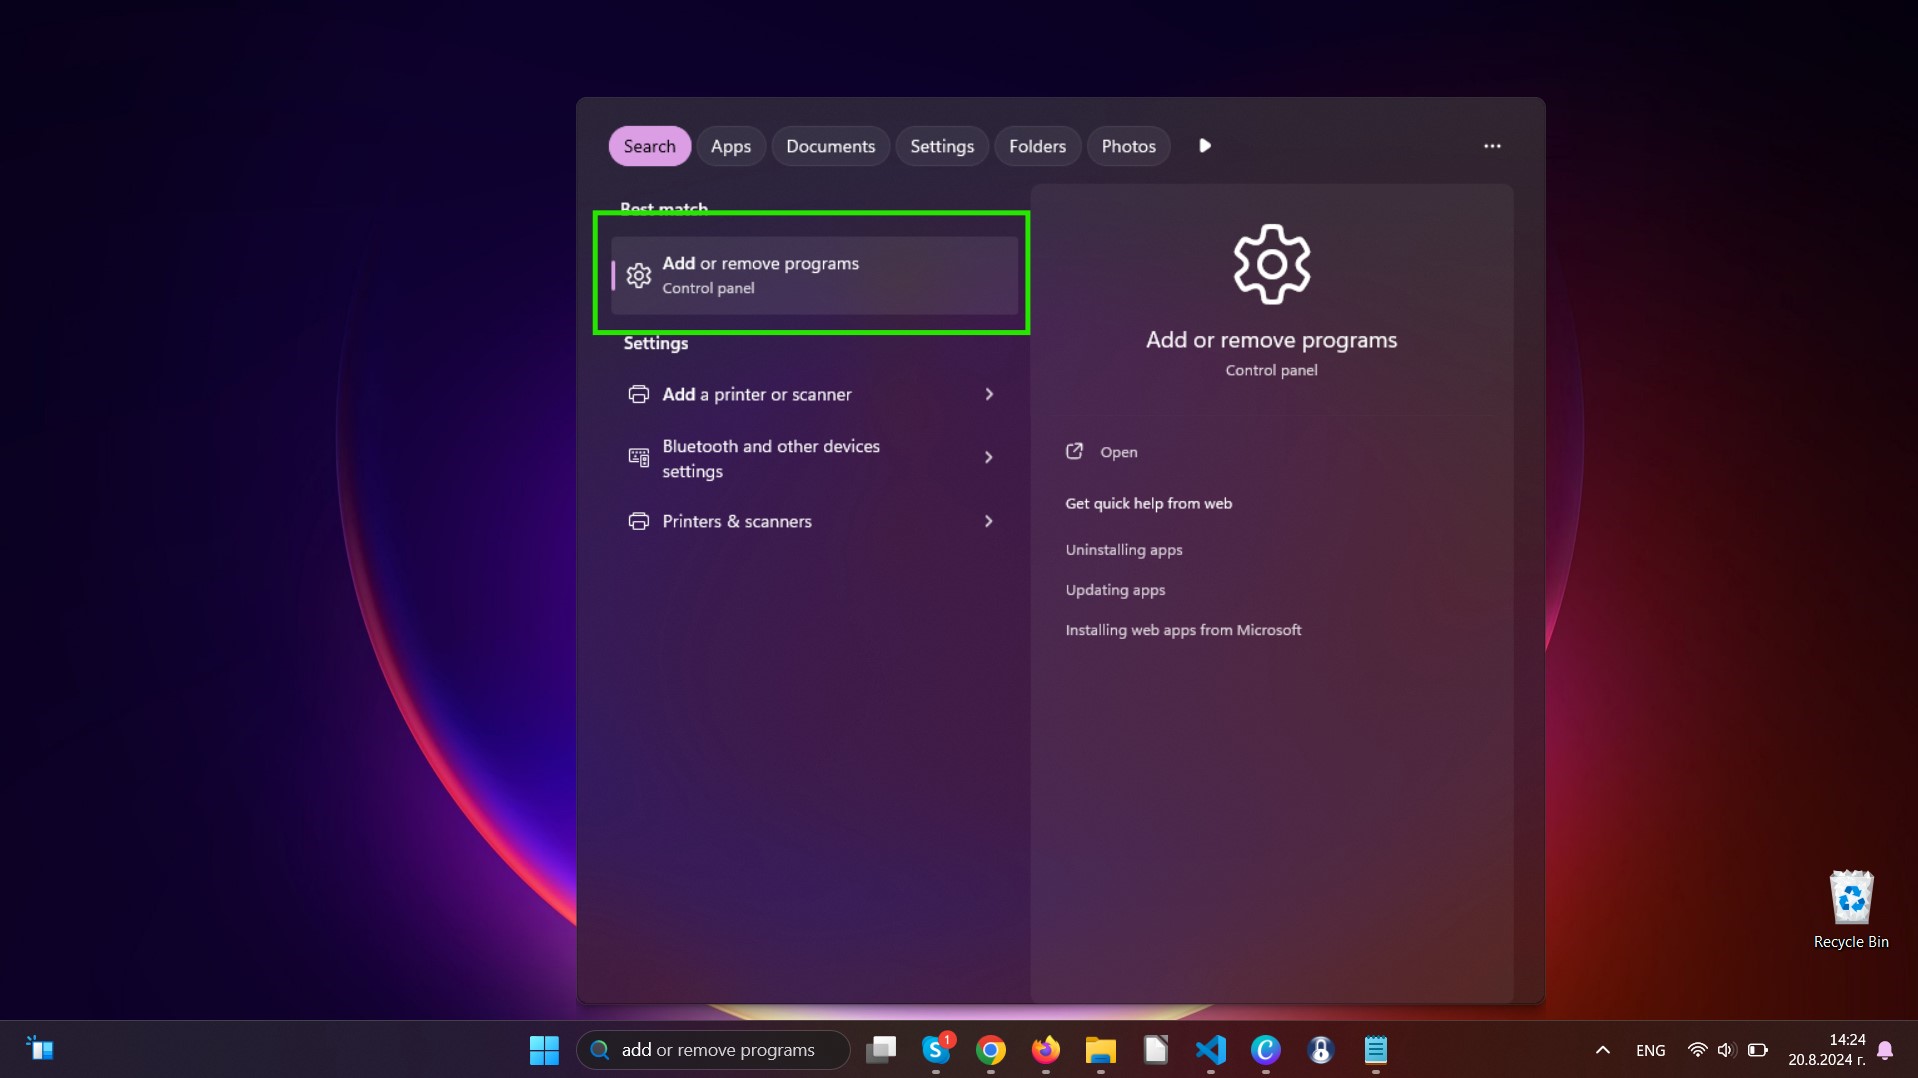
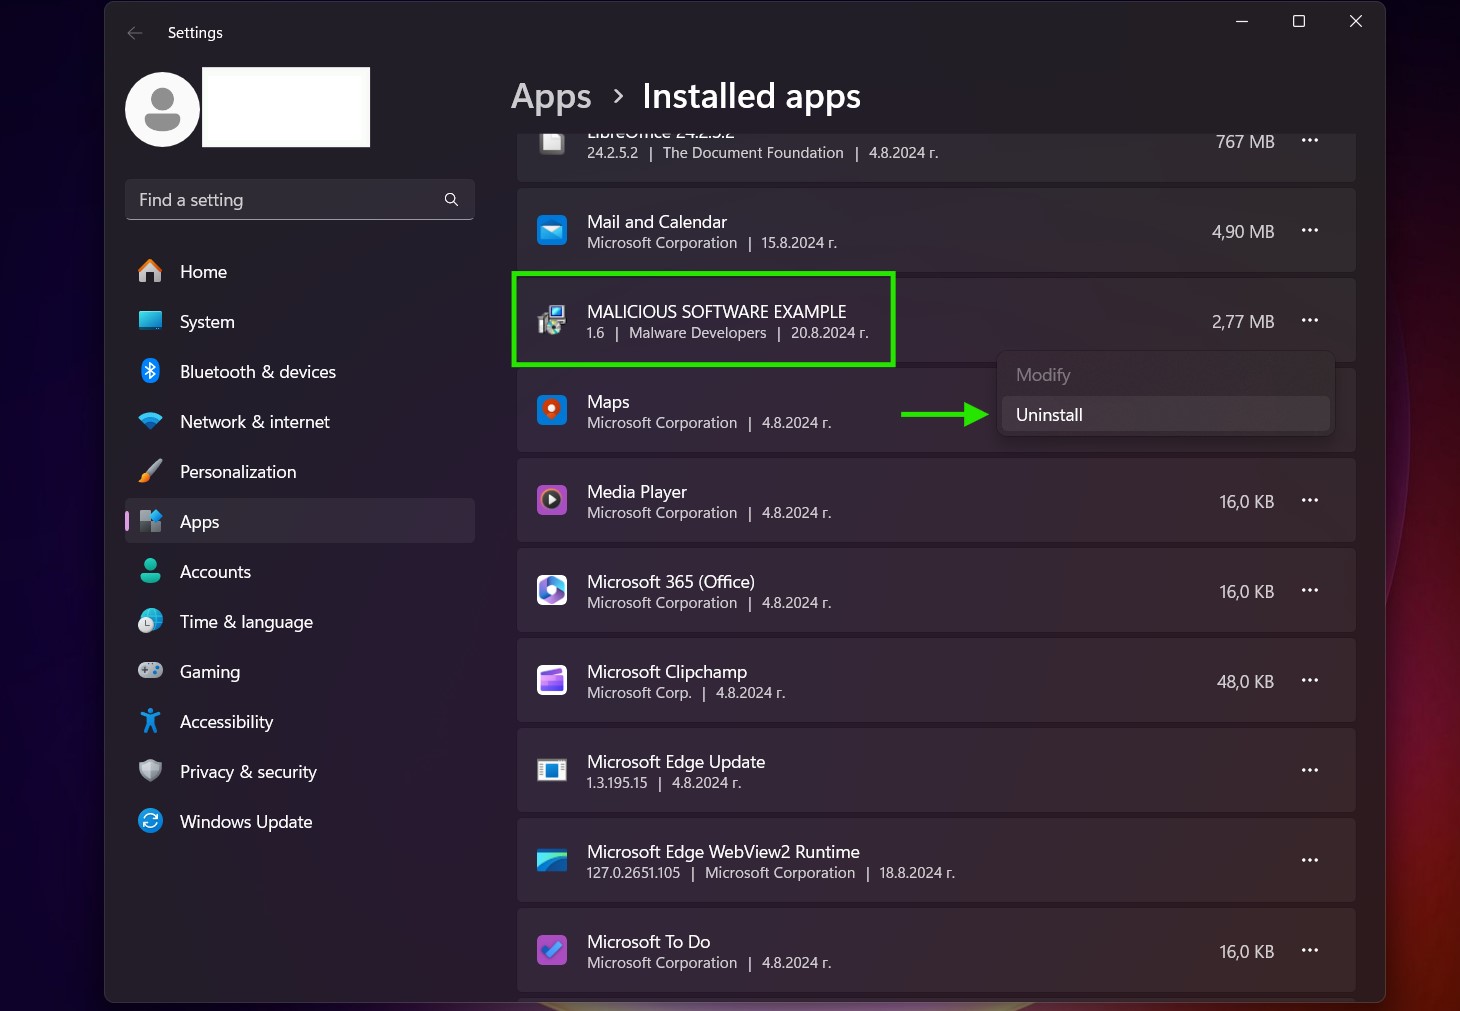
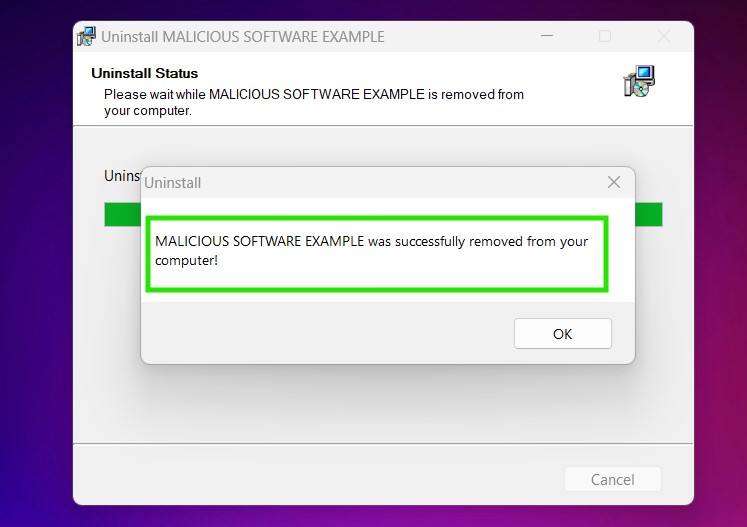
Step 3: Uninstall Geek Squad and related software from Windows
Uninstall Steps for Windows 11
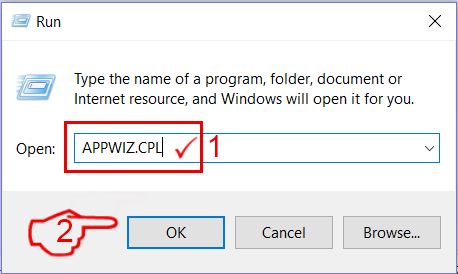
Uninstall Steps for Windows 10 and Older Versions
Here is a method in few easy steps that should be able to uninstall most programs. No matter if you are using Windows 10, 8, 7, Vista or XP, those steps will get the job done. Dragging the program or its folder to the recycle bin can be a very bad decision. If you do that, bits and pieces of the program are left behind, and that can lead to unstable work of your PC, errors with the file type associations and other unpleasant activities. The proper way to get a program off your computer is to Uninstall it. To do that:
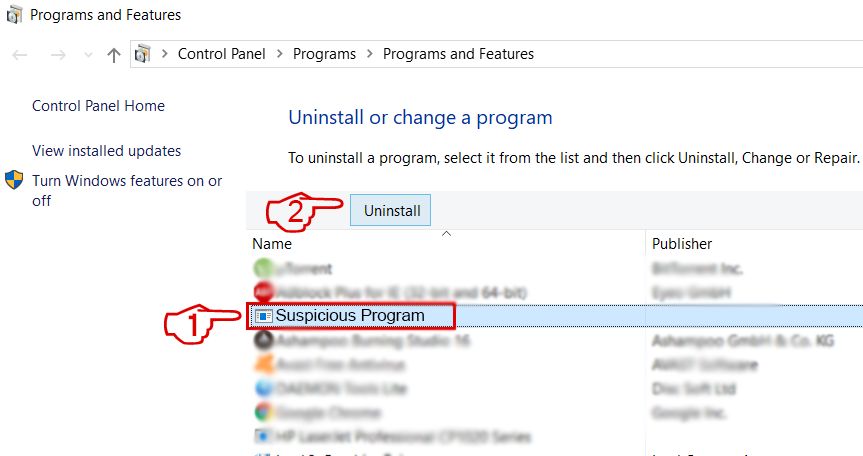 Follow the instructions above and you will successfully uninstall most programs.
Step 4: Clean Any registries, Created by Geek Squad on Your PC.
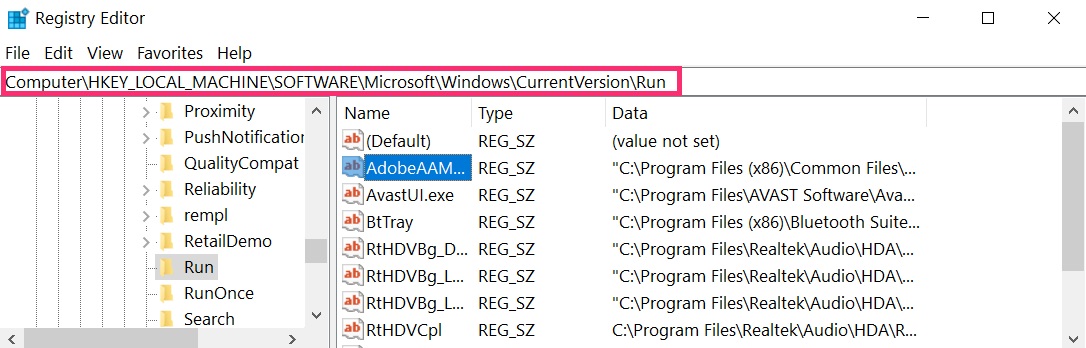
The usually targeted registries of Windows machines are the following:
- HKEY_LOCAL_MACHINE\Software\Microsoft\Windows\CurrentVersion\Run
- HKEY_CURRENT_USER\Software\Microsoft\Windows\CurrentVersion\Run
- HKEY_LOCAL_MACHINE\Software\Microsoft\Windows\CurrentVersion\RunOnce
- HKEY_CURRENT_USER\Software\Microsoft\Windows\CurrentVersion\RunOnce
You can access them by opening the Windows registry editor and deleting any values, created by Geek Squad there. This can happen by following the steps underneath:
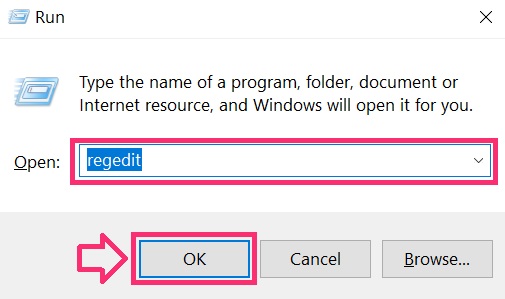
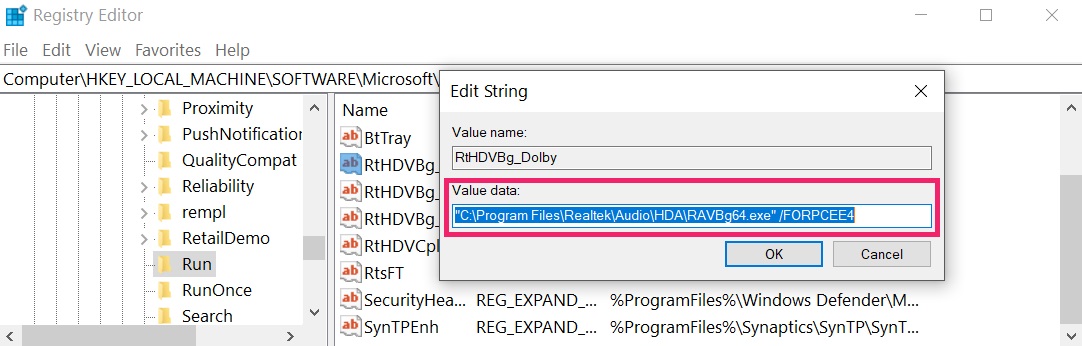 Tip: To find a virus-created value, you can right-click on it and click "Modify" to see which file it is set to run. If this is the virus file location, remove the value.
Video Removal Guide for Geek Squad (Windows).
Get rid of Geek Squad from Mac OS X.
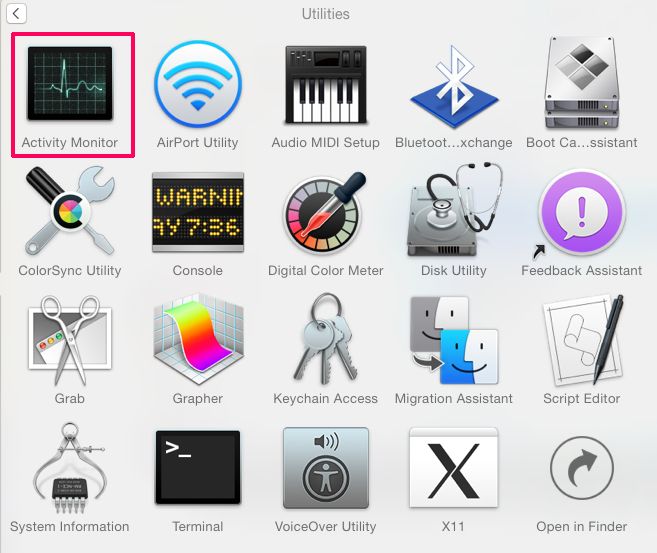
Step 1: Uninstall Geek Squad and remove related files and objects
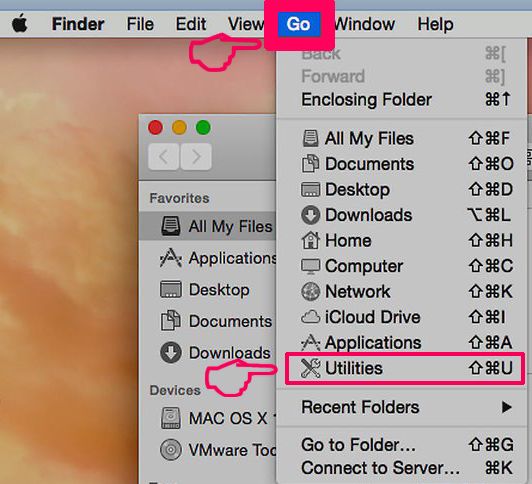

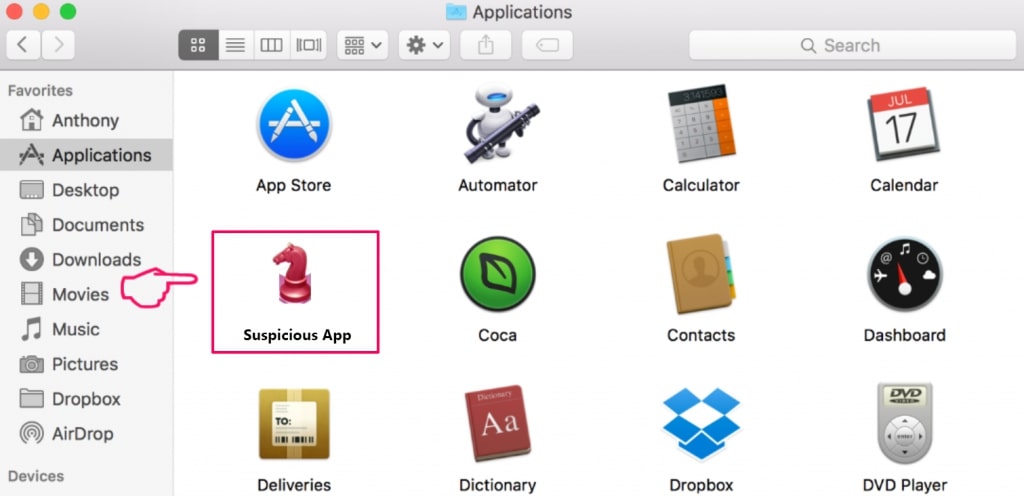
Your Mac will then show you a list of items that start automatically when you log in. Look for any suspicious apps identical or similar to Geek Squad. Check the app you want to stop from running automatically and then select on the Minus (“-“) icon to hide it.
- Go to Finder.
- In the search bar type the name of the app that you want to remove.
- Above the search bar change the two drop down menus to “System Files” and “Are Included” so that you can see all of the files associated with the application you want to remove. Bear in mind that some of the files may not be related to the app so be very careful which files you delete.
- If all of the files are related, hold the ⌘+A buttons to select them and then drive them to “Trash”.
In case you cannot remove Geek Squad via Step 1 above:
In case you cannot find the virus files and objects in your Applications or other places we have shown above, you can manually look for them in the Libraries of your Mac. But before doing this, please read the disclaimer below:
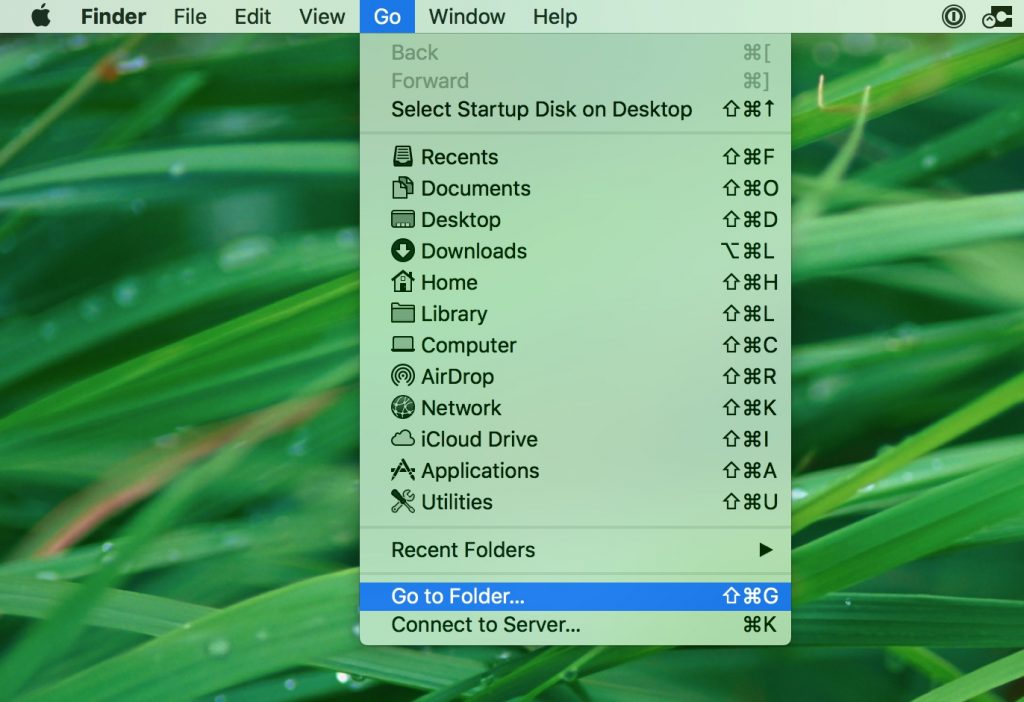
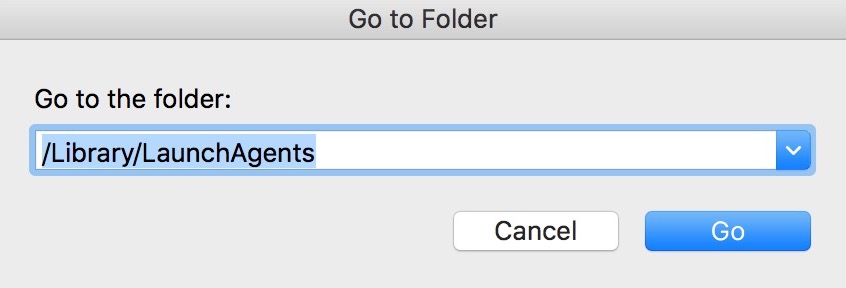
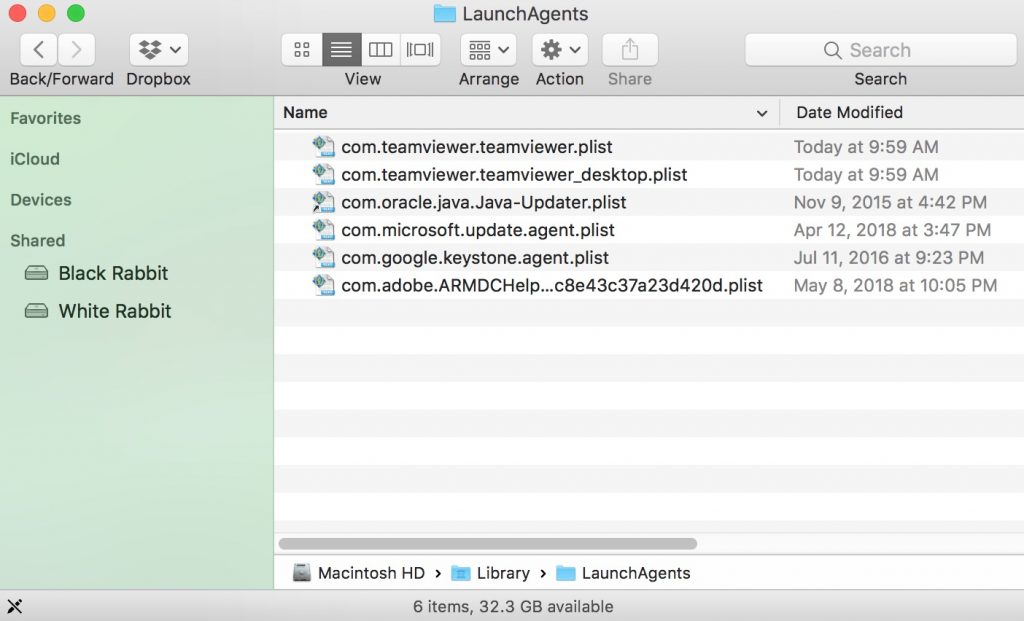
You can repeat the same procedure with the following other Library directories:
→ ~/Library/LaunchAgents
/Library/LaunchDaemons
Tip: ~ is there on purpose, because it leads to more LaunchAgents.
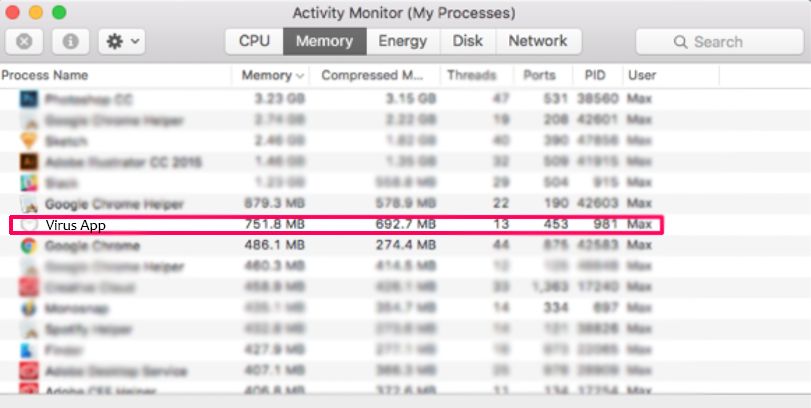
Step 2: Scan for and remove Geek Squad files from your Mac
When you are facing problems on your Mac as a result of unwanted scripts and programs such as Geek Squad, the recommended way of eliminating the threat is by using an anti-malware program. SpyHunter for Mac offers advanced security features along with other modules that will improve your Mac’s security and protect it in the future.
Video Removal Guide for Geek Squad (Mac)
Remove Geek Squad from Google Chrome.
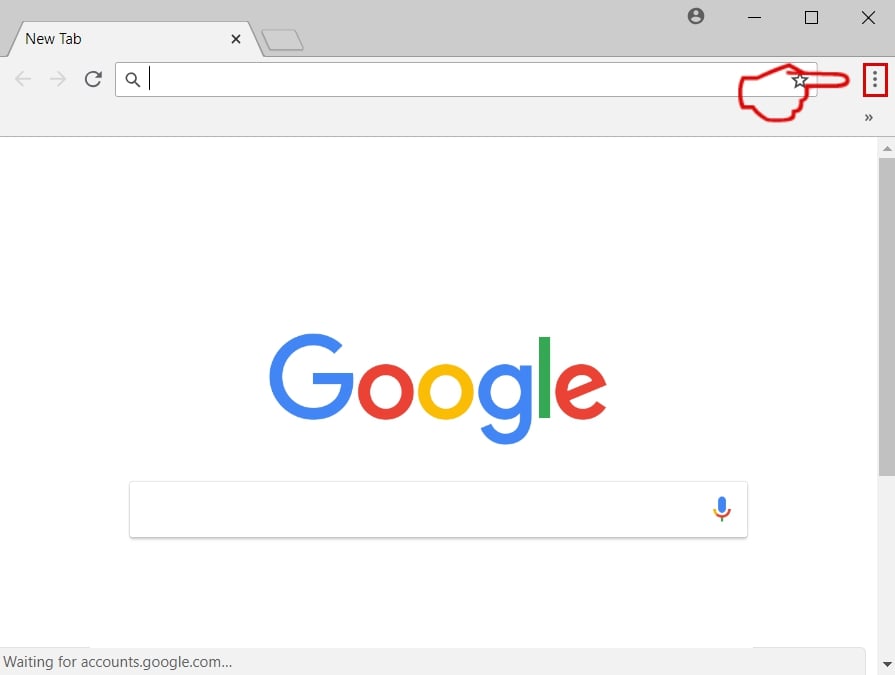
Step 1: Start Google Chrome and open the drop menu
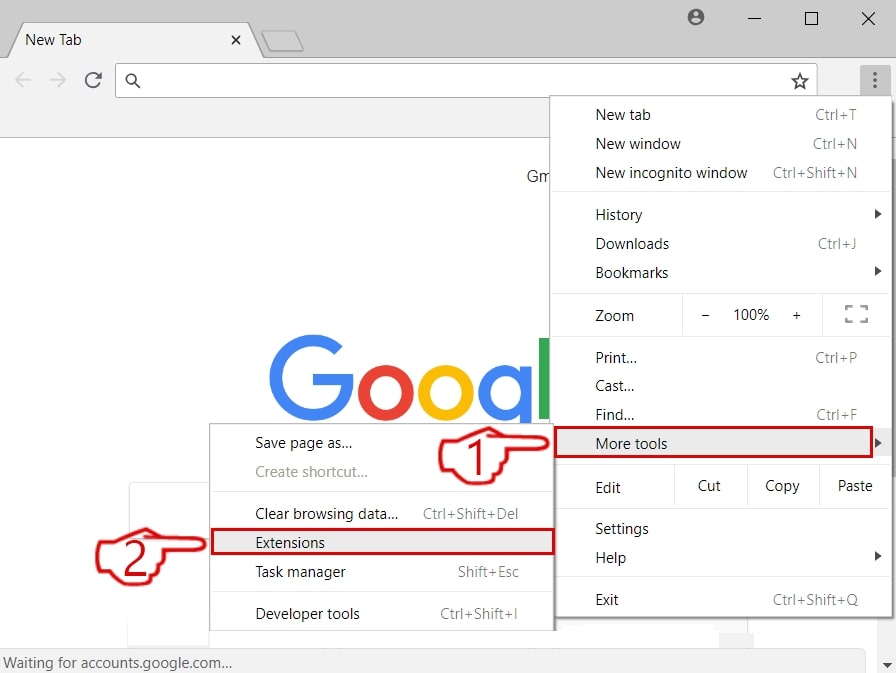
Step 2: Move the cursor over "Tools" and then from the extended menu choose "Extensions"
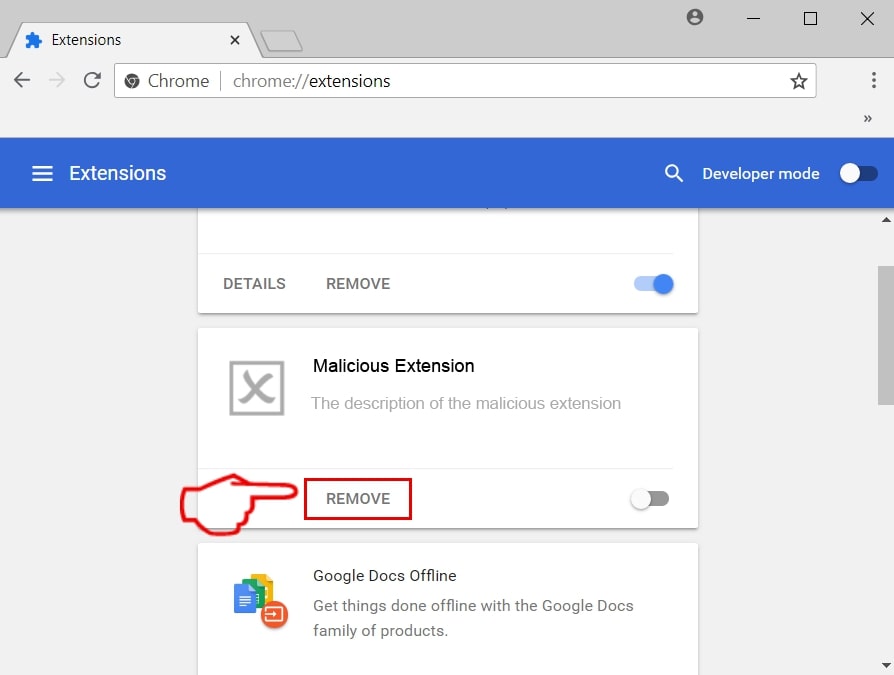
Step 3: From the opened "Extensions" menu locate the unwanted extension and click on its "Remove" button.
Step 4: After the extension is removed, restart Google Chrome by closing it from the red "X" button at the top right corner and start it again.
Erase Geek Squad from Mozilla Firefox.
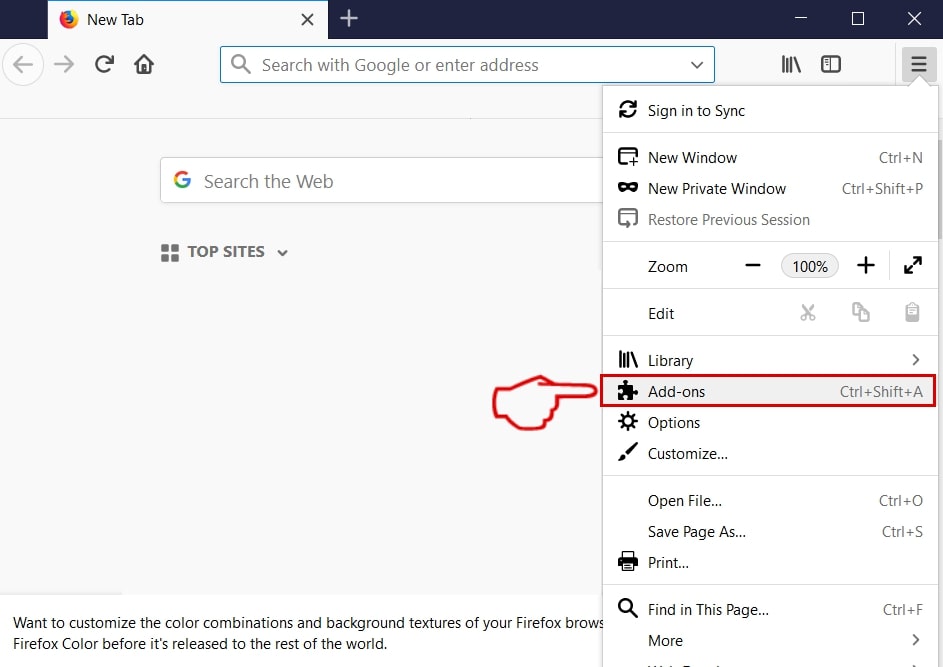
Step 1: Start Mozilla Firefox. Open the menu window:

Step 2: Select the "Add-ons" icon from the menu.
Step 3: Select the unwanted extension and click "Remove"

Step 4: After the extension is removed, restart Mozilla Firefox by closing it from the red "X" button at the top right corner and start it again.
Uninstall Geek Squad from Microsoft Edge.
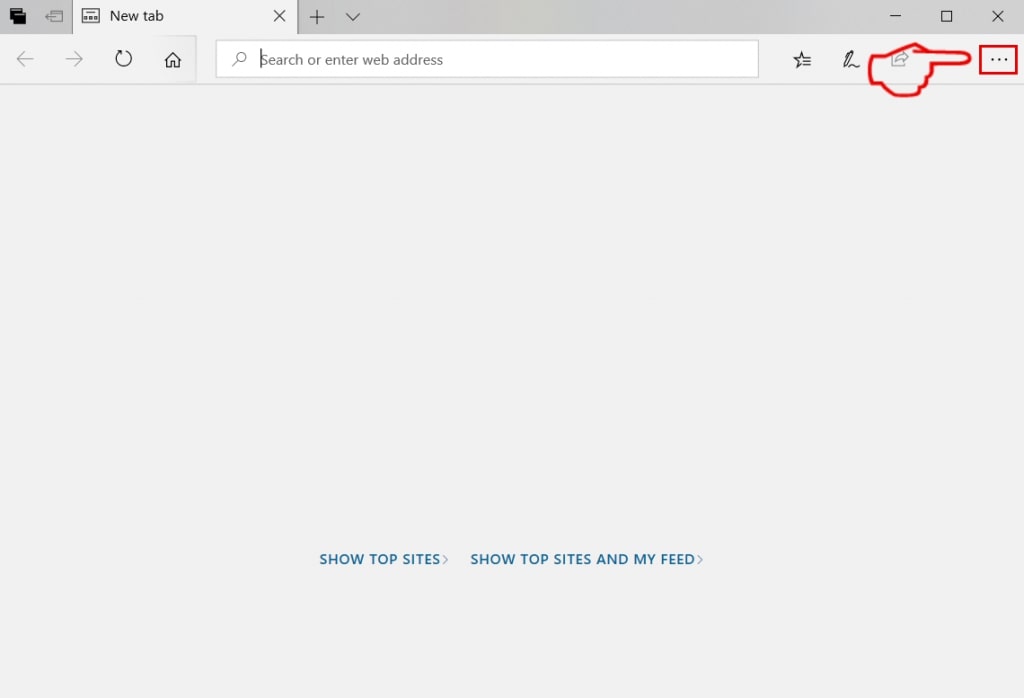
Step 1: Start Edge browser.
Step 2: Open the drop menu by clicking on the icon at the top right corner.
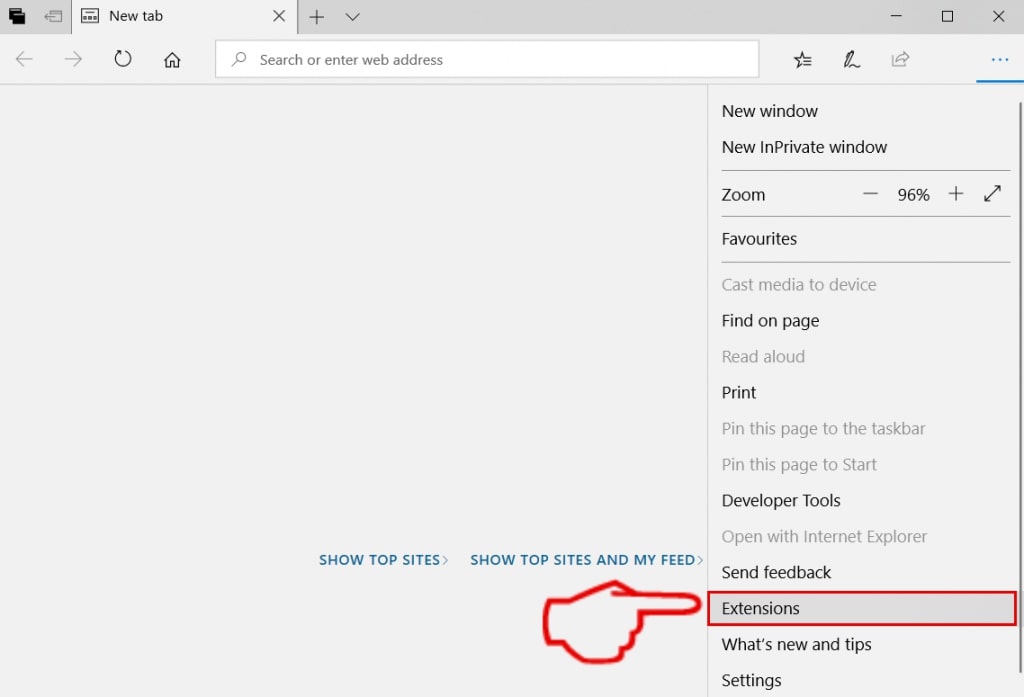
Step 3: From the drop menu select "Extensions".
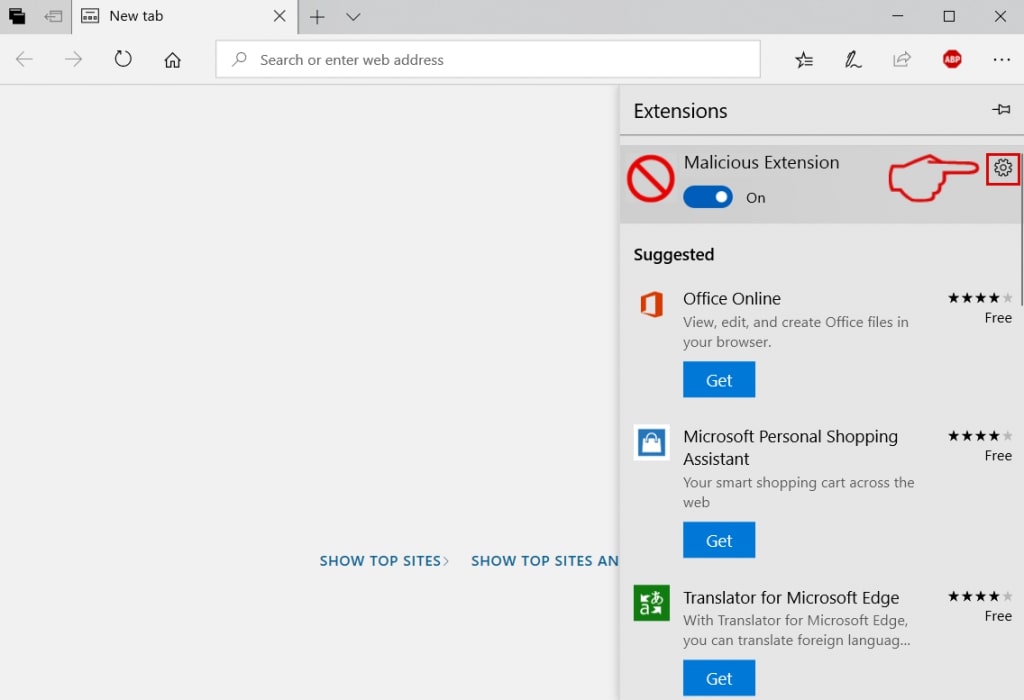
Step 4: Choose the suspected malicious extension you want to remove and then click on the gear icon.
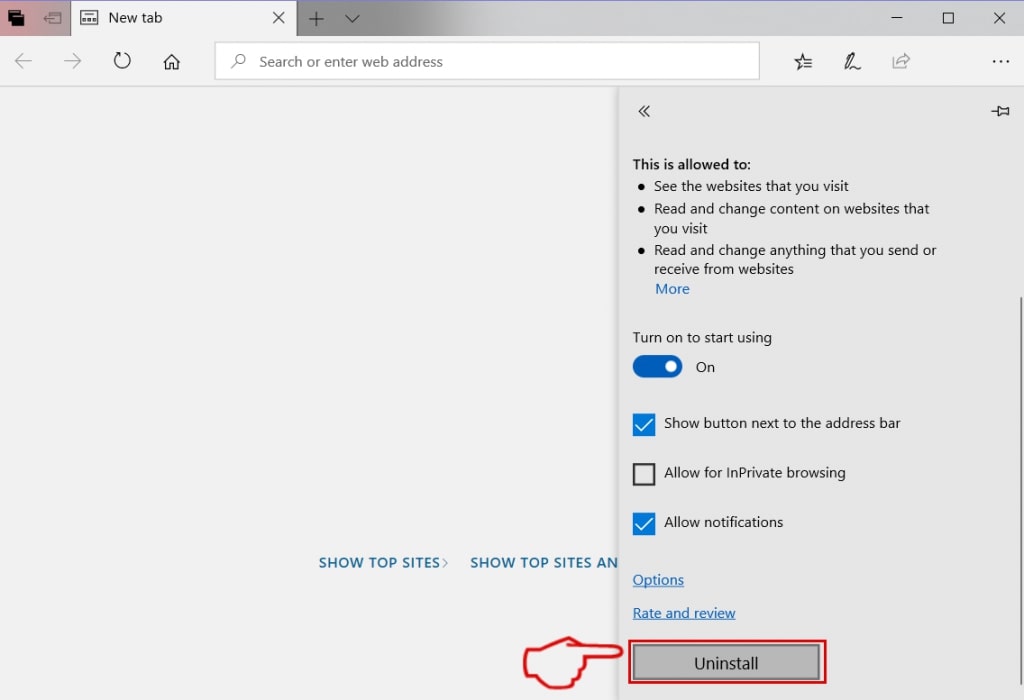
Step 5: Remove the malicious extension by scrolling down and then clicking on Uninstall.
Remove Geek Squad from Safari
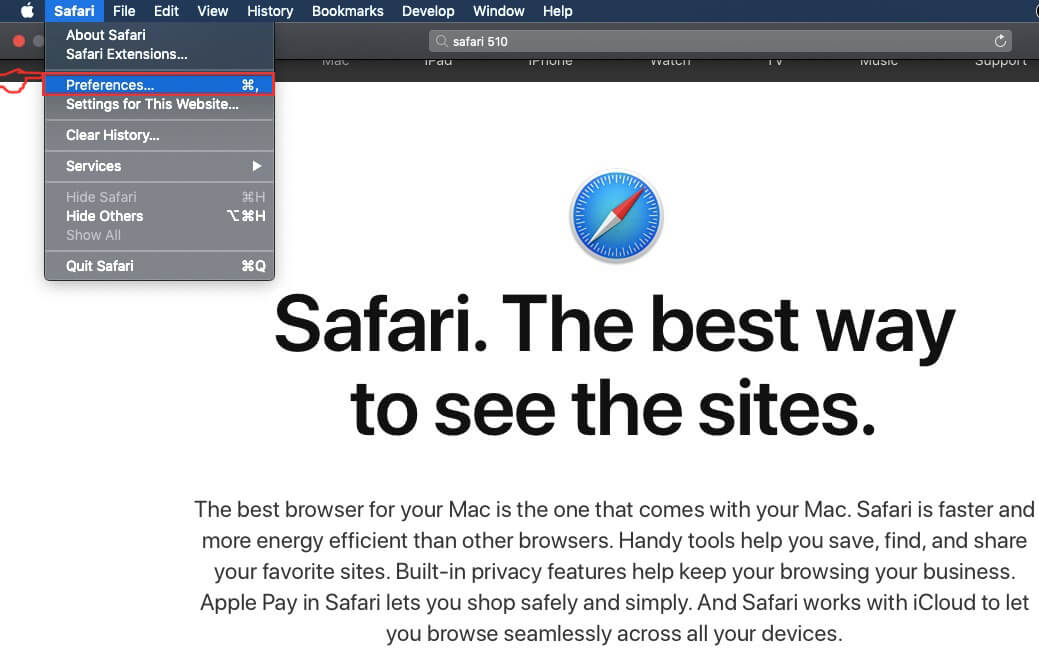
Step 1: Start the Safari app.
Step 2: After hovering your mouse cursor to the top of the screen, click on the Safari text to open its drop down menu.
Step 3: From the menu, click on "Preferences".
Step 4: After that, select the 'Extensions' Tab.

Step 5: Click once on the extension you want to remove.
Step 6: Click 'Uninstall'.
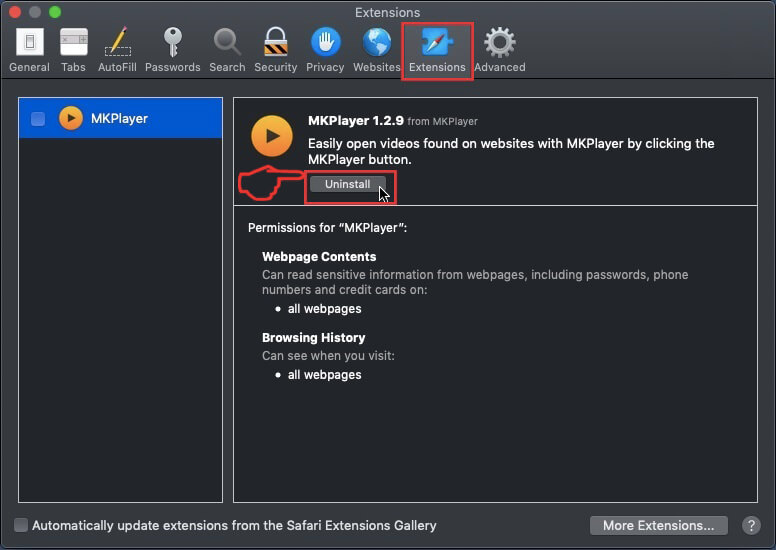
A pop-up window will appear asking for confirmation to uninstall the extension. Select 'Uninstall' again, and the Geek Squad will be removed.
Eliminate Geek Squad from Internet Explorer.
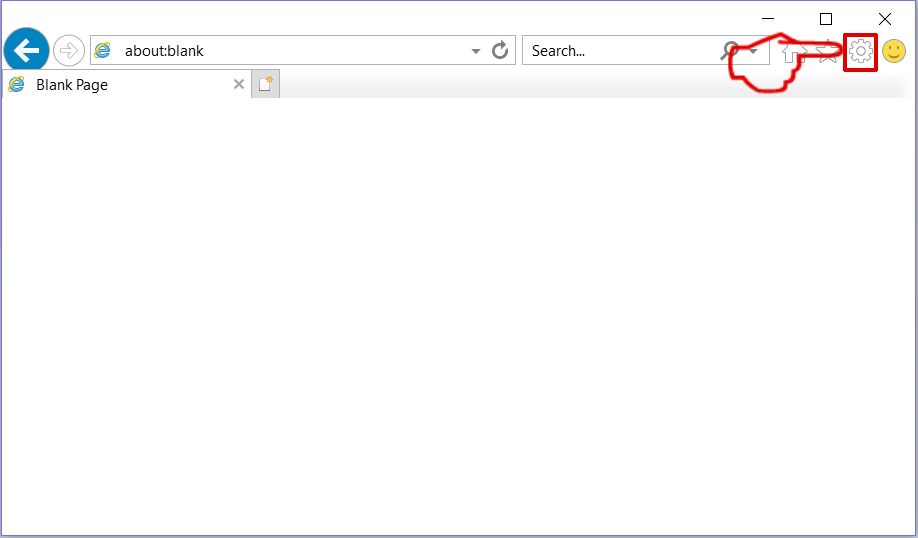
Step 1: Start Internet Explorer.
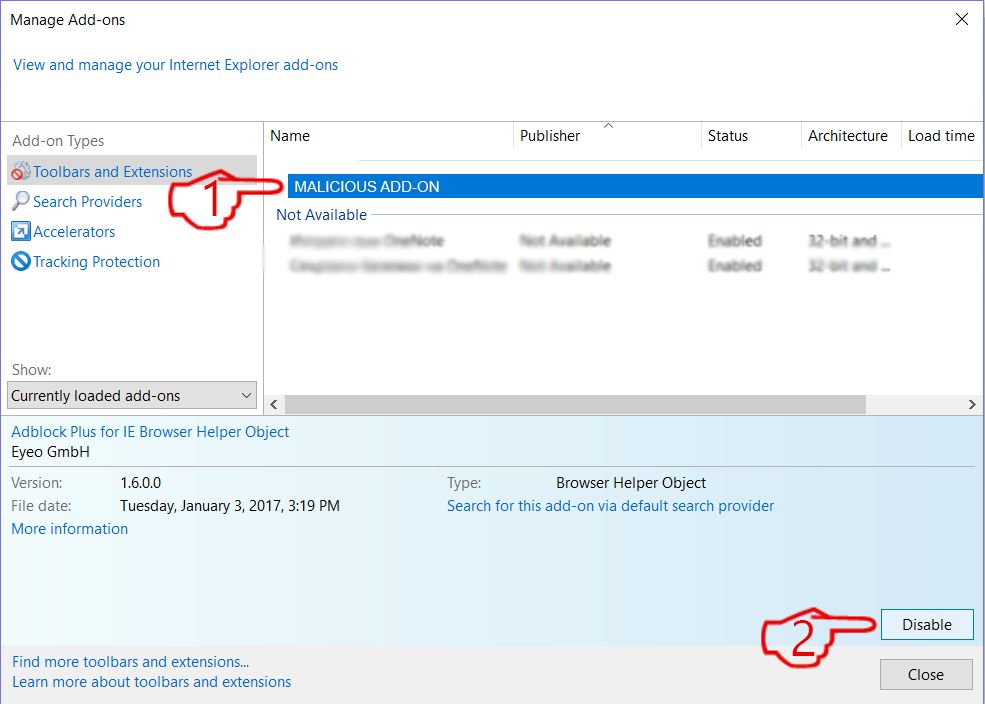
Step 2: Click on the gear icon labeled 'Tools' to open the drop menu and select 'Manage Add-ons'
Step 3: In the 'Manage Add-ons' window.
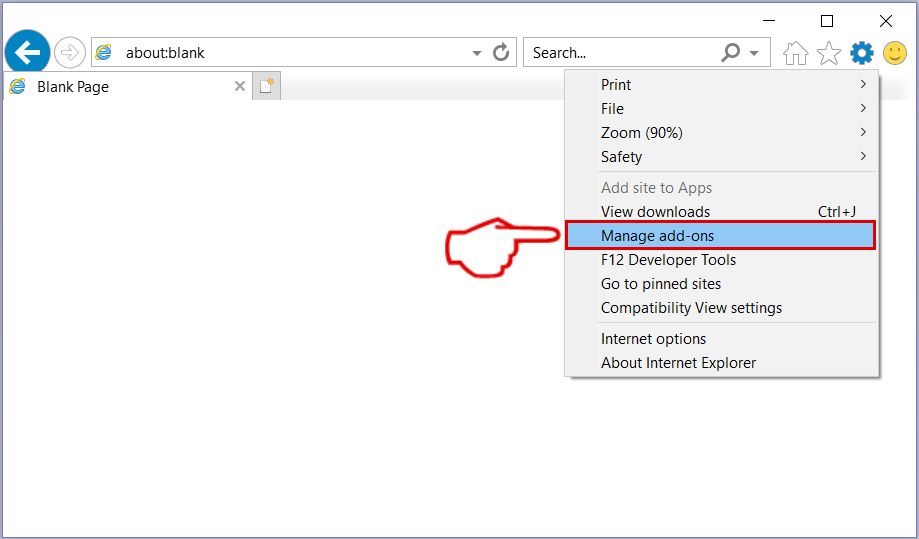
Step 4: Select the extension you want to remove and then click 'Disable'. A pop-up window will appear to inform you that you are about to disable the selected extension, and some more add-ons might be disabled as well. Leave all the boxes checked, and click 'Disable'.
Step 5: After the unwanted extension has been removed, restart Internet Explorer by closing it from the red 'X' button located at the top right corner and start it again.
Remove Push Notifications from Your Browsers
Turn Off Push Notifications from Google Chrome
To disable any Push Notices from Google Chrome browser, please follow the steps below:
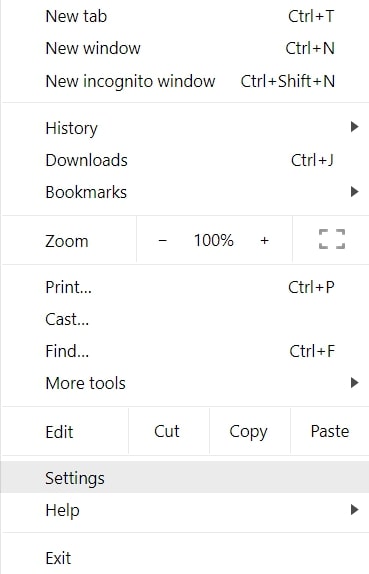
Step 1: Go to Settings in Chrome.
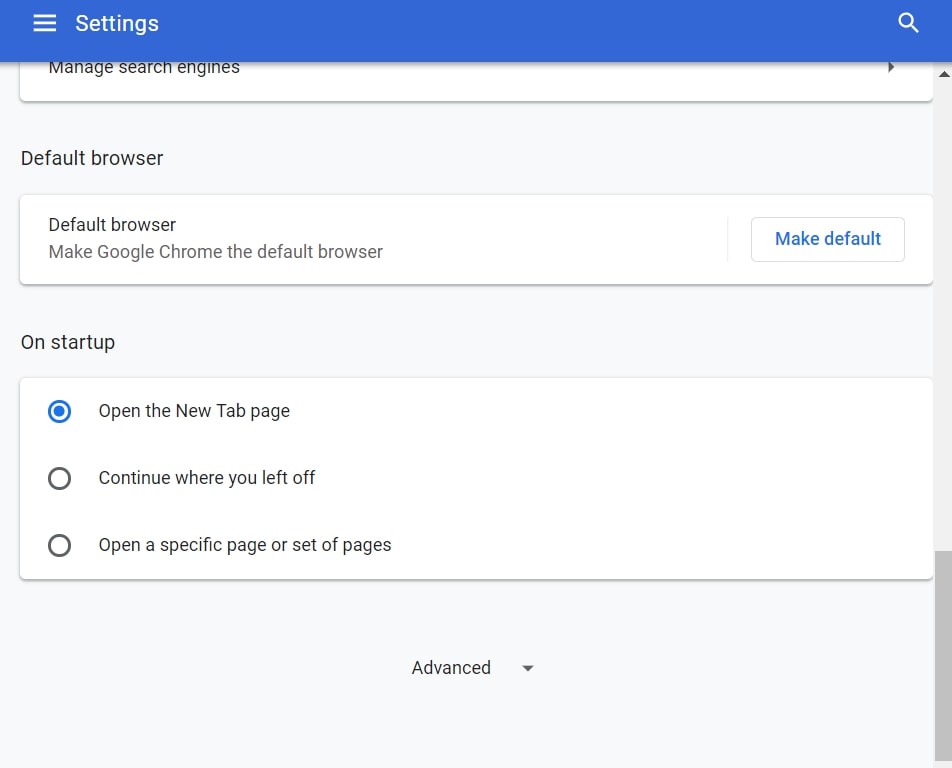
Step 2: In Settings, select “Advanced Settings”:
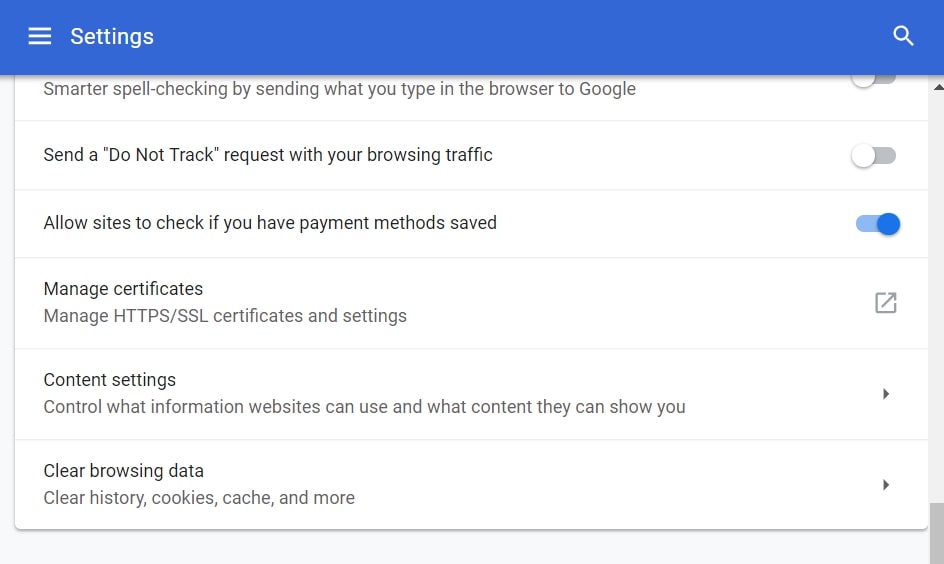
Step 3: Click “Content Settings”:
Step 4: Open “Notifications”:
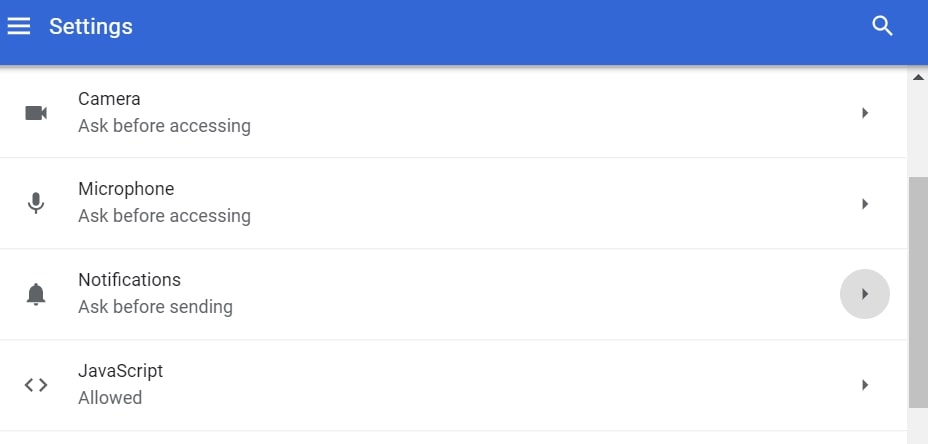
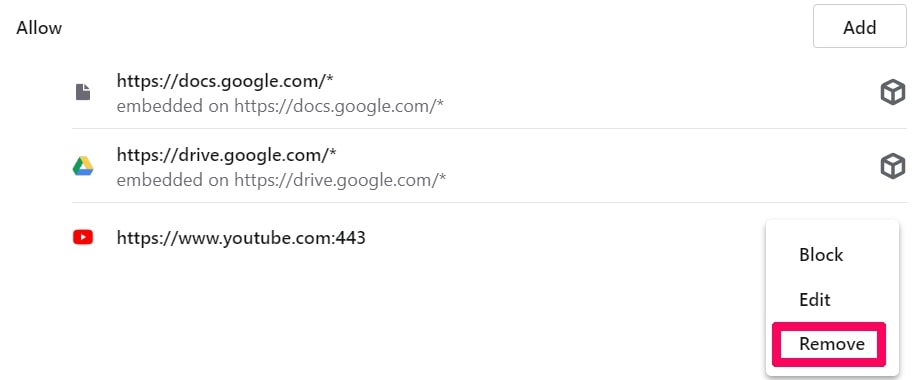
Step 5: Click the three dots and choose Block, Edit or Remove options:

Remove Push Notifications on Firefox
Step 1: Go to Firefox Options.
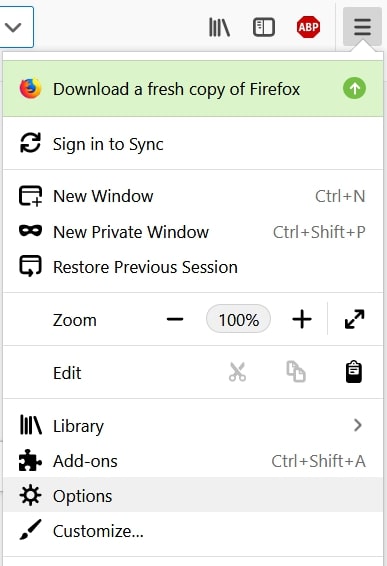
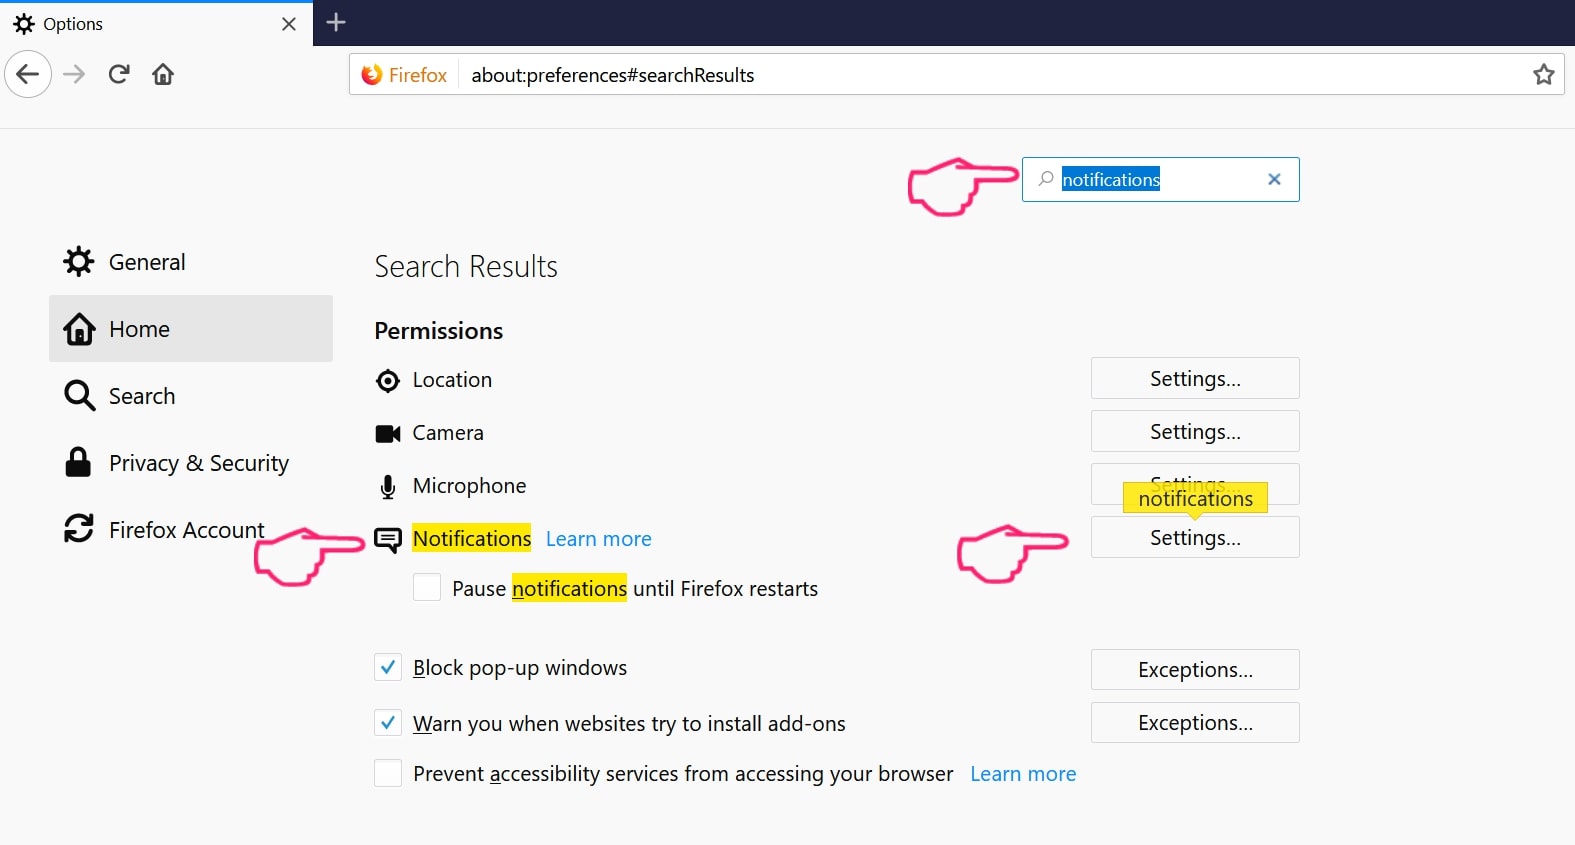
Step 2: Go to “Settings”, type “notifications” in the search bar and click "Settings":
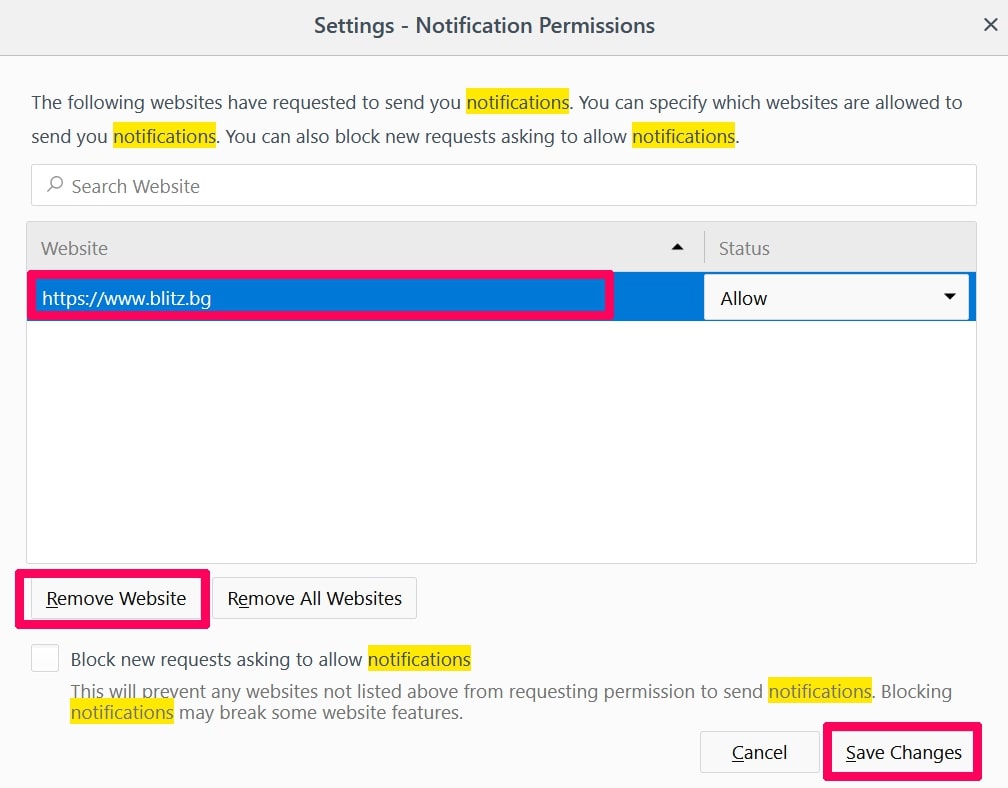
Step 3: Click “Remove” on any site you wish notifications gone and click “Save Changes”
Stop Push Notifications on Opera
Step 1: In Opera, press ALT+P to go to Settings.
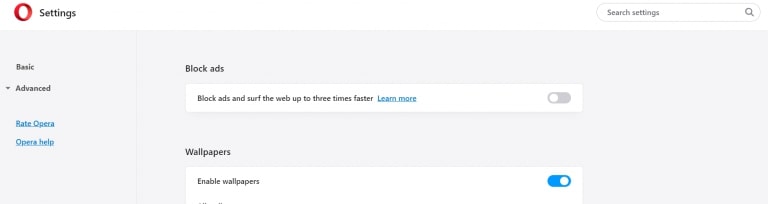
Step 2: In Setting search, type “Content” to go to Content Settings.
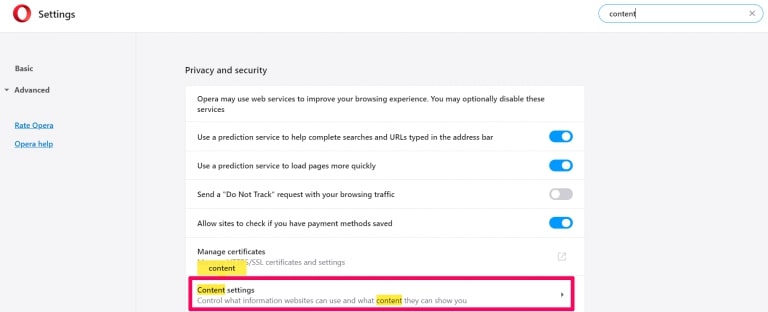
Step 3: Open Notifications:
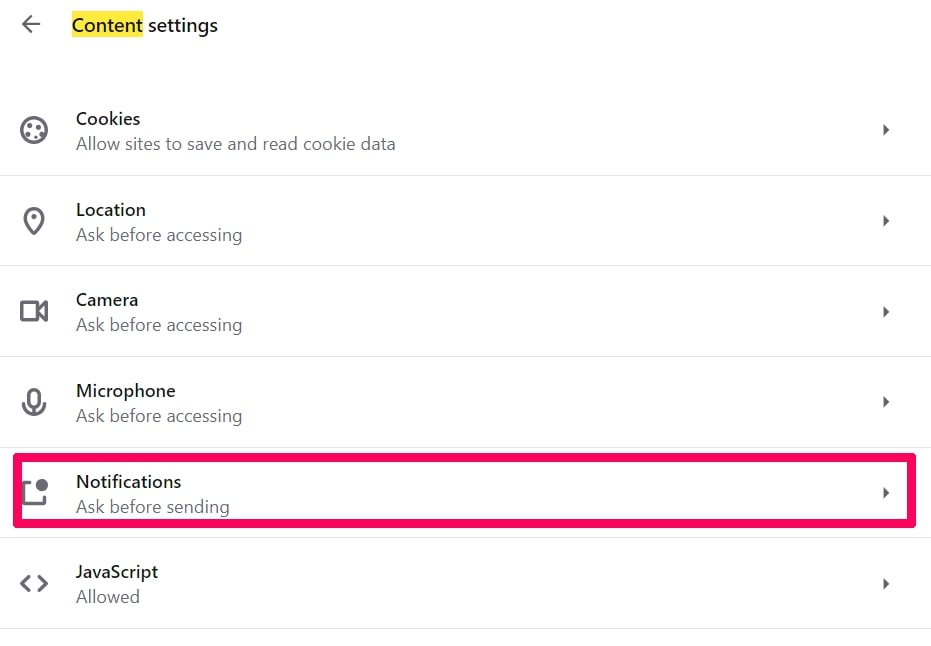
Step 4: Do the same as you did with Google Chrome (explained below):
Eliminate Push Notifications on Safari
Step 1: Open Safari Preferences.
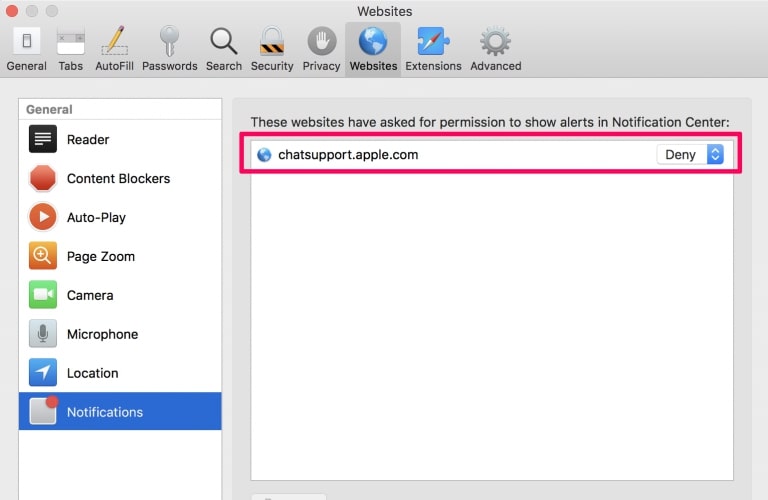
Step 2: Choose the domain from where you like push pop-ups gone and change to "Deny" from "Allow".
Geek Squad-FAQ
What Is Geek Squad?
The Geek Squad threat is adware or browser redirect virus.
It may slow your computer down significantly and display advertisements. The main idea is for your information to likely get stolen or more ads to appear on your device.
The creators of such unwanted apps work with pay-per-click schemes to get your computer to visit risky or different types of websites that may generate them funds. This is why they do not even care what types of websites show up on the ads. This makes their unwanted software indirectly risky for your OS.
What Are the Symptoms of Geek Squad?
There are several symptoms to look for when this particular threat and also unwanted apps in general are active:
Symptom #1: Your computer may become slow and have poor performance in general.
Symptom #2: You have toolbars, add-ons or extensions on your web browsers that you don't remember adding.
Symptom #3: You see all types of ads, like ad-supported search results, pop-ups and redirects to randomly appear.
Symptom #4: You see installed apps on your Mac running automatically and you do not remember installing them.
Symptom #5: You see suspicious processes running in your Task Manager.
If you see one or more of those symptoms, then security experts recommend that you check your computer for viruses.
What Types of Unwanted Programs Are There?
According to most malware researchers and cyber-security experts, the threats that can currently affect your device can be rogue antivirus software, adware, browser hijackers, clickers, fake optimizers and any forms of PUPs.
What to Do If I Have a "virus" like Geek Squad?
With few simple actions. First and foremost, it is imperative that you follow these steps:
Step 1: Find a safe computer and connect it to another network, not the one that your Mac was infected in.
Step 2: Change all of your passwords, starting from your email passwords.
Step 3: Enable two-factor authentication for protection of your important accounts.
Step 4: Call your bank to change your credit card details (secret code, etc.) if you have saved your credit card for online shopping or have done online activities with your card.
Step 5: Make sure to call your ISP (Internet provider or carrier) and ask them to change your IP address.
Step 6: Change your Wi-Fi password.
Step 7: (Optional): Make sure to scan all of the devices connected to your network for viruses and repeat these steps for them if they are affected.
Step 8: Install anti-malware software with real-time protection on every device you have.
Step 9: Try not to download software from sites you know nothing about and stay away from low-reputation websites in general.
If you follow these recommendations, your network and all devices will become significantly more secure against any threats or information invasive software and be virus free and protected in the future too.
How Does Geek Squad Work?
Once installed, Geek Squad can collect data using trackers. This data is about your web browsing habits, such as the websites you visit and the search terms you use. It is then used to target you with ads or to sell your information to third parties.
Geek Squad can also download other malicious software onto your computer, such as viruses and spyware, which can be used to steal your personal information and show risky ads, that may redirect to virus sites or scams.
Is Geek Squad Malware?
The truth is that PUPs (adware, browser hijackers) are not viruses, but may be just as dangerous since they may show you and redirect you to malware websites and scam pages.
Many security experts classify potentially unwanted programs as malware. This is because of the unwanted effects that PUPs can cause, such as displaying intrusive ads and collecting user data without the user’s knowledge or consent.
About the Geek Squad Research
The content we publish on SensorsTechForum.com, this Geek Squad how-to removal guide included, is the outcome of extensive research, hard work and our team’s devotion to help you remove the specific, adware-related problem, and restore your browser and computer system.
How did we conduct the research on Geek Squad?
Please note that our research is based on independent investigation. We are in contact with independent security researchers, thanks to which we receive daily updates on the latest malware, adware, and browser hijacker definitions.
Furthermore, the research behind the Geek Squad threat is backed with VirusTotal.
To better understand this online threat, please refer to the following articles which provide knowledgeable details.