 A lot of users have been asking on forums to downgrade to their previous Windows versions for various reasons. Such reasons may be the lack of control regarding some Windows security updates or simply because they are used to the old OS. Whatever the reason may be, users need to have an adequate knowledge of the safest way to downgrade from Windows 10 to Windows 8.1, 8 or 7. This is why we have provided a simple tutorial on a good way to do it.
Windows 10 To Older OS Downgrading Manual
This manual is divided in several steps with screenshots between them. Please refer to those screenshots while doing the downgrading for an easier process.
Phase 1: Backup Your Data.
To do this you can use the Windows Feature itself, or you can just copy the files you need to backup to an external HDD, SSD, Memory Stick, CD/DVD disk or a USB Flash Stick.
The other way to do this is via Windows. This way is for more tech-savvy users since it holds data on the computer. For more information on how to restore data from such backup in case something goes wrong, we recommend reading this(HL). In it there is a Windows System Image recovery option that can restore your files using a backup system image that you can create, using this manual:
1-Press the WIN button + R together.
2-A small box will appear. In it type ‘filehistory’ and press Enter
3-Click on ‘Configure File history settings’ on the window that will appear.
4-The configuration menu for File History will appear. Click on ‘Turn On’. After its on, click on Select Drive to select the backup drive. It is recommended to choose an external HDD, SSD or a USB stick whose memory capacity is corresponding to the size of the files you want to backup.
5-Select the drive then click on ‘Ok’ to set up file backup and protect your data.
For simplicity purposes, we recommend just to copy the files you need to an external memory carrier and always use it when you work on them. You should never store them in the computer directly because there is always the probability of unfortunate events occurring that may affect your data. Another advice is to make two copies of your data in case one of them gets lost or anything else.
Phase 2: Initiate Downgrade.
Ok, so now that we gotten your information out of our way, it is time for action:
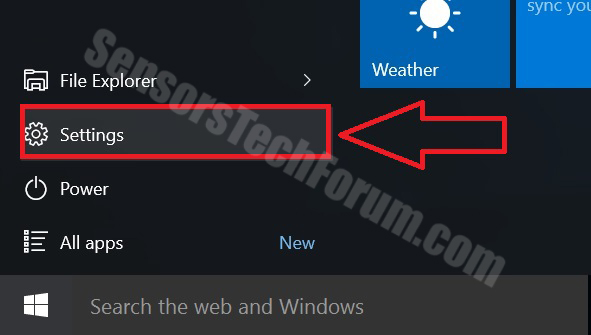
1- Open the Windows 10 start menu.
2- Click on Settings.
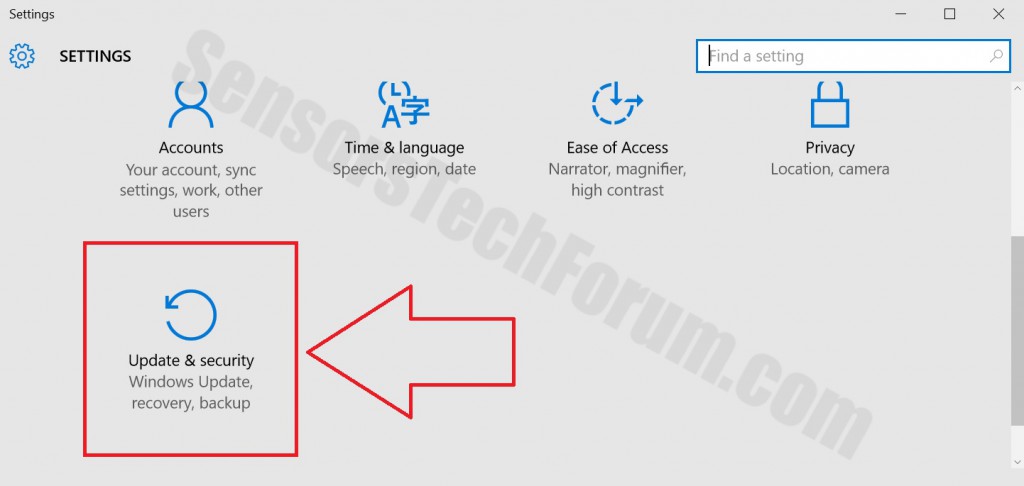
3- From the Settings menu choose Update and Security.
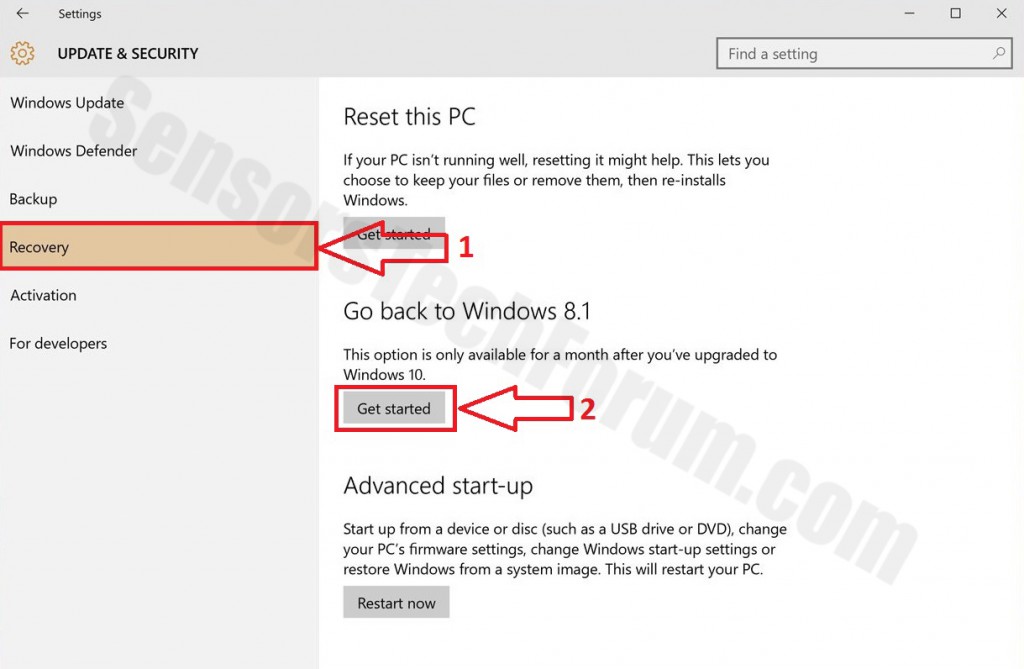
4- After that an expanded menu will appear with the preferences on the left. In it choose Recovery.
5- From the Recovery menu, under the ‘Go Back To Windows’ 8.1/8/7 click on the ‘Get Started’.
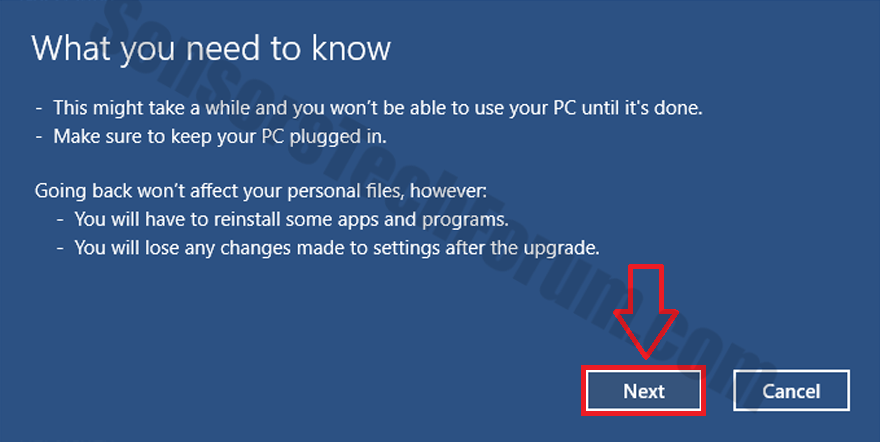
6- After this your computer will restart, entering the Downgrade Setup.
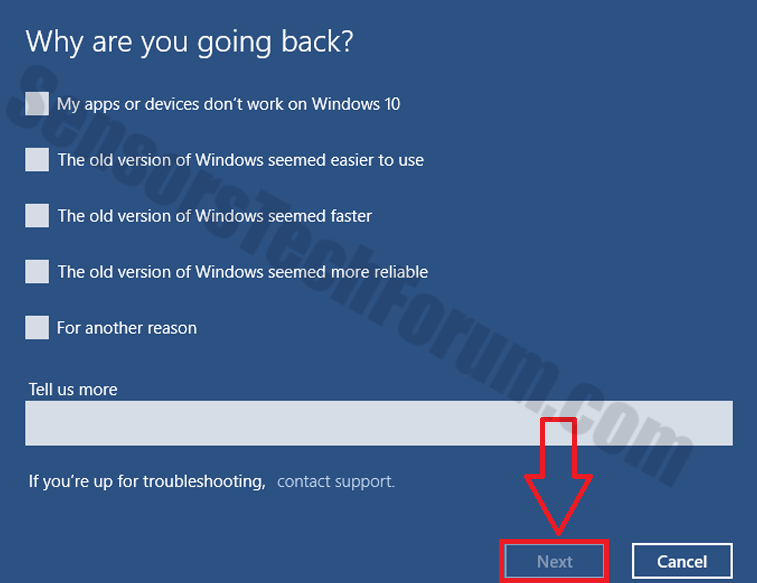
7- In it, choose Next, choose a reason for the downgrade, and then click Next again and the download and installation of your older OS will commence.
IMPORTANT: Make sure your device is plugged into the power supply and has a stable internet connection. the
After your PC has downgraded to an older OS, you will need to make sure you:
-Have all the drivers for your machine from Windows Device Manager and if not install them from the support section of your Device Retailer. (example: sony.com/support)
-Enable Updating and Windows Firewall.
-Download and install advanced anti-malware program.

Spy Hunter scanner will only detect the threat. If you want the threat to be automatically removed, you need to purchase the full version of the anti-malware tool.Find Out More About SpyHunter Anti-Malware Tool / How to Uninstall SpyHunter
-Download and install a reputable antivirus program.
Be sure to be cautious and take your time and read what the windows prompt you to do. Good luck with your downgrade!


