 How to fix the microphone not working error in Windows 10? How to make sure that Windows 10 has Microphone always on? How to enable microphone?
This article has been created to help explain to you how to fix your microphone. Usually, most operating systems have different settings to disable and enable Microphones, but for this tutorial we will be focusing on Windows 10. Windows operating systems often require drivers to activate microphones, but with Windows 10, the drivers get downloaded automatically with your updates. There are several things that can happen to cause your Microphone to stop working:
- A program installed on your computer.
- A virus taking control over your Microphone.
- You stopping it yourself.
- An error with the audio driver.
- A hardware problem with the microphone your computer has.
So, before you follow the instructions below, you have to make sure that your microphone works. For laptops, there is no way to check it, since the Mic itself is embedded, but if you have an external microphone, you can try using it on another Windows machine to see if all is in order. Other than that, to try to enable your microphone, you should follow the steps below.
Spy Hunter scanner will only detect the threat. If you want the threat to be automatically removed, you need to purchase the full version of the anti-malware tool.Find Out More About SpyHunter Anti-Malware Tool / How to Uninstall SpyHunter
How to Enable the Microphone in Windows 10
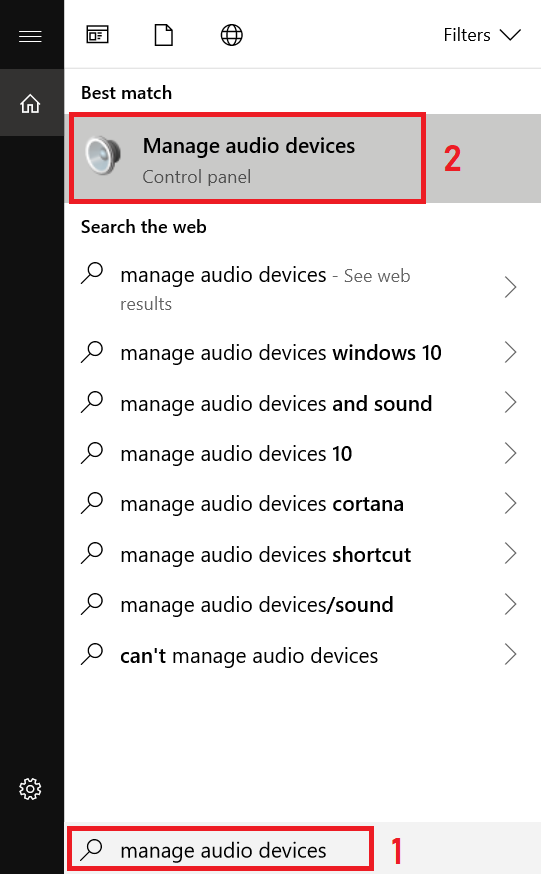
Step 1: Open Windows Search and type “Manage Audio Devices” in the bar. The following should appear:
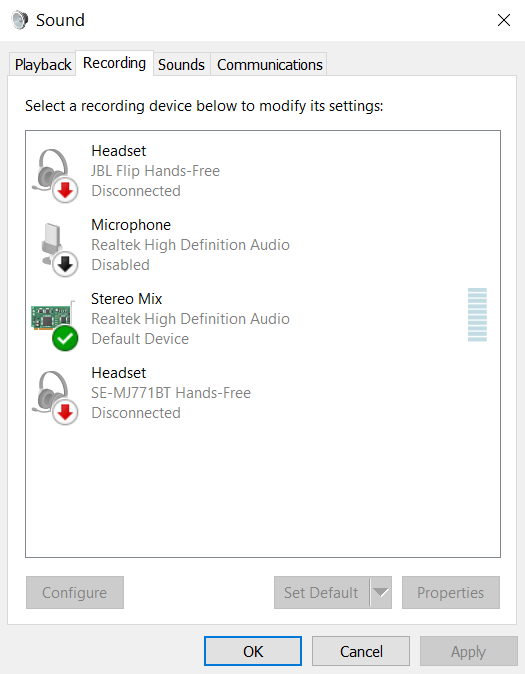
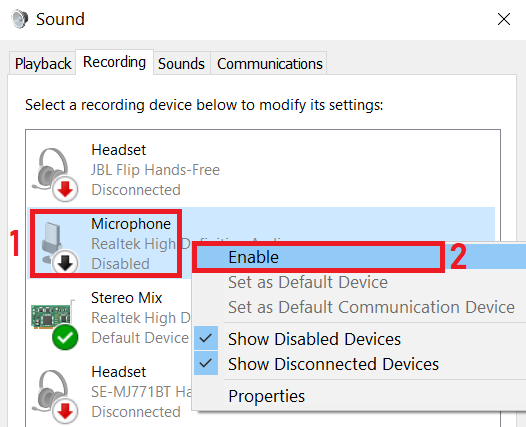
Step 2: Go to the “Recording” panel and locate “Microphone” and enable it.
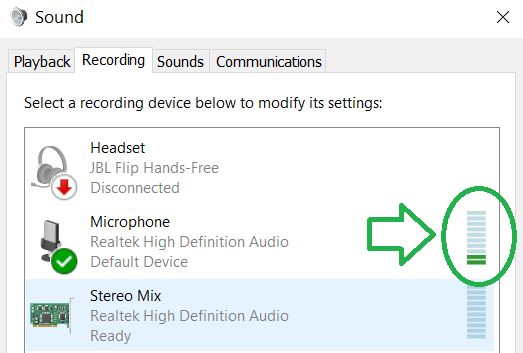
Step 3: You can test the microphone by talking to it and seeing If the bar on the right of the “Microphone” icon will move:
If Enabling the Microphone Does Not Work
In case enabling your microphone does not seem to give any results, you can reinstall it’s driver. With Windows 10, this can happen automatically by following these steps:
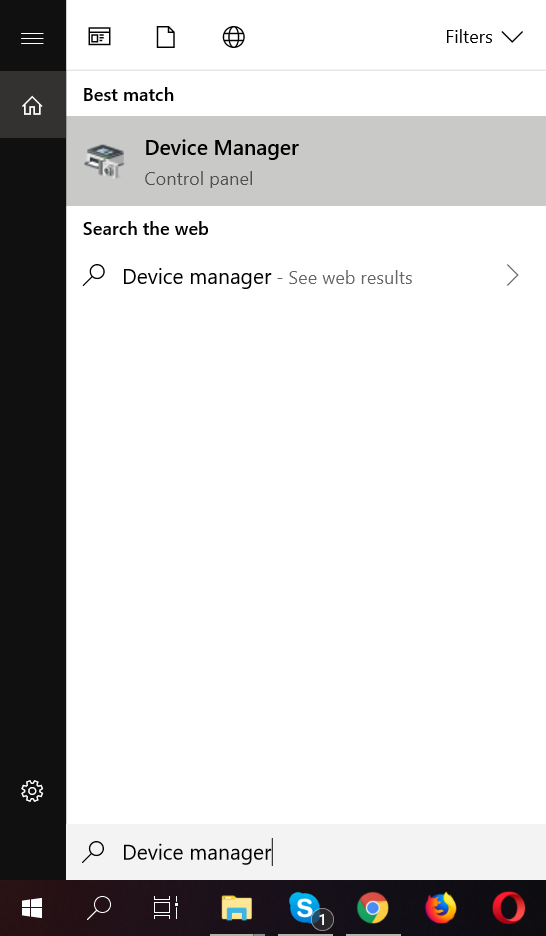
Step 1: Open search and type “Device Manager” and open it.
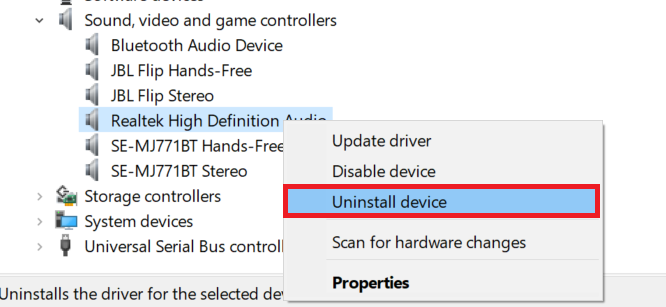
Step 2: Go to your microphone and right click it and then click “Uninstall”.
Step 3: After this, right click anywhere or on the “Sound” category and click on “Scan for hardware changes”. It should relocate and reinstall your driver.
How to Use the Troubleshooter if All The Above Do Not Work
The Windows troubleshooter is always a good tool that can help identify or fix problems. Follow the steps below to try using the troubleshooter to fix your problems:
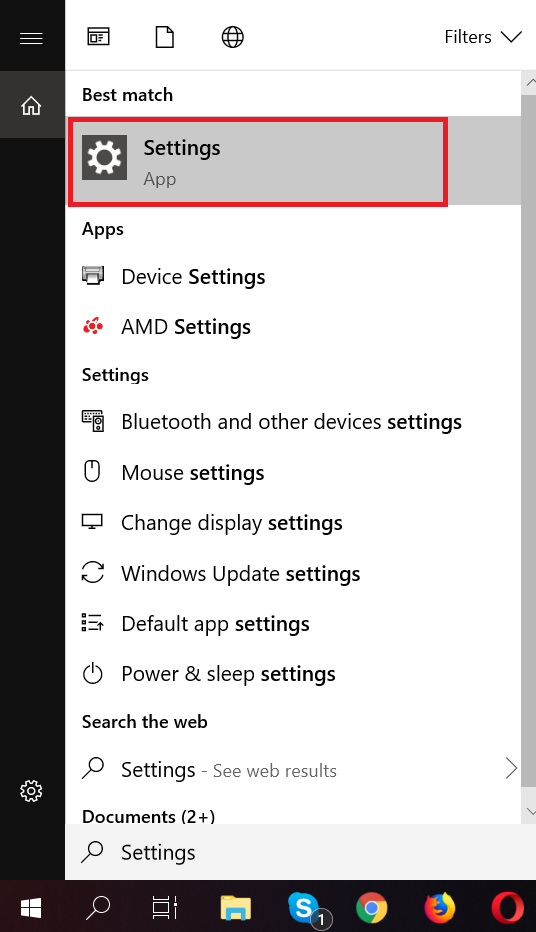
Step 1: Open “Settings”:
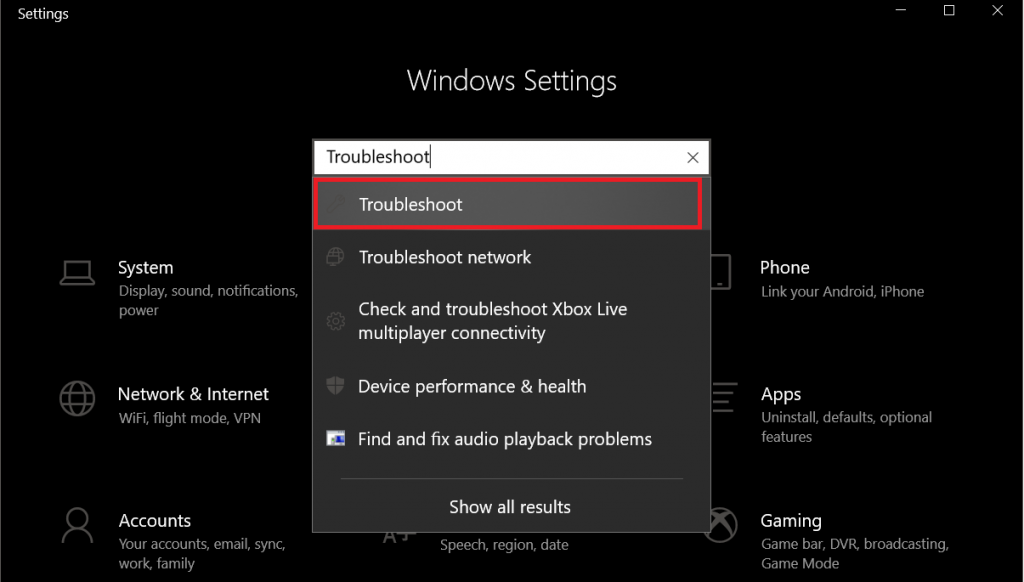
Step 2: On the search bar of “Settings” search for “Troubleshoot”.
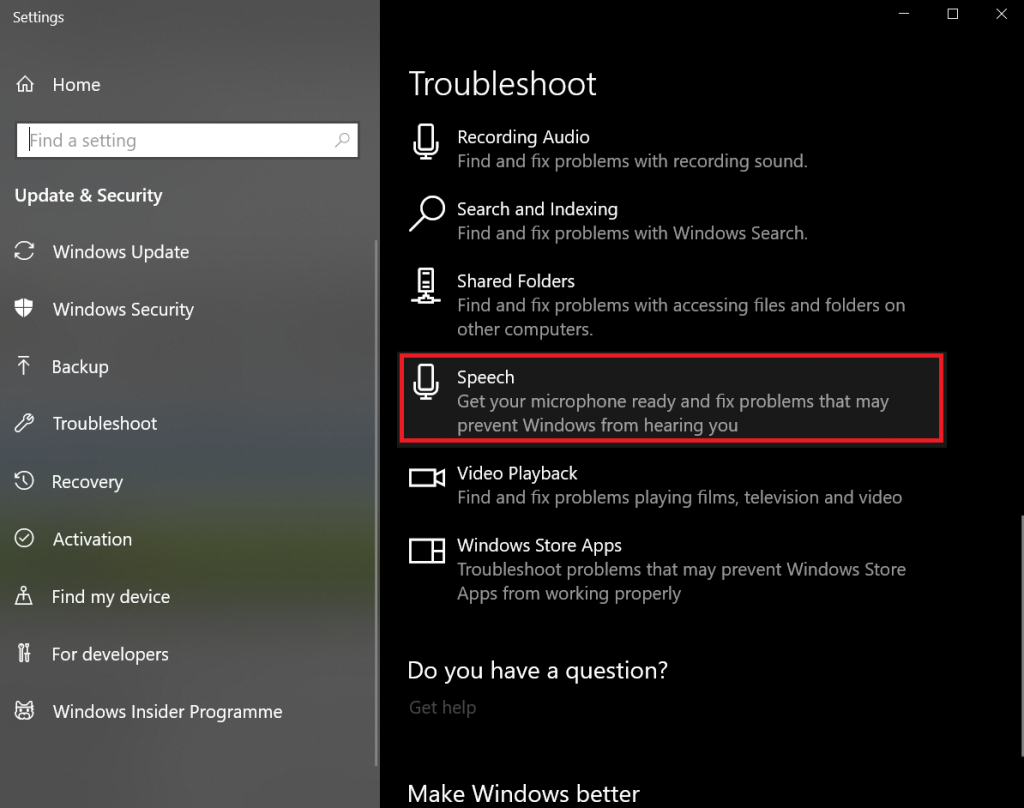
Step 3: On “Troubleshoot” search for and locate “Speech”
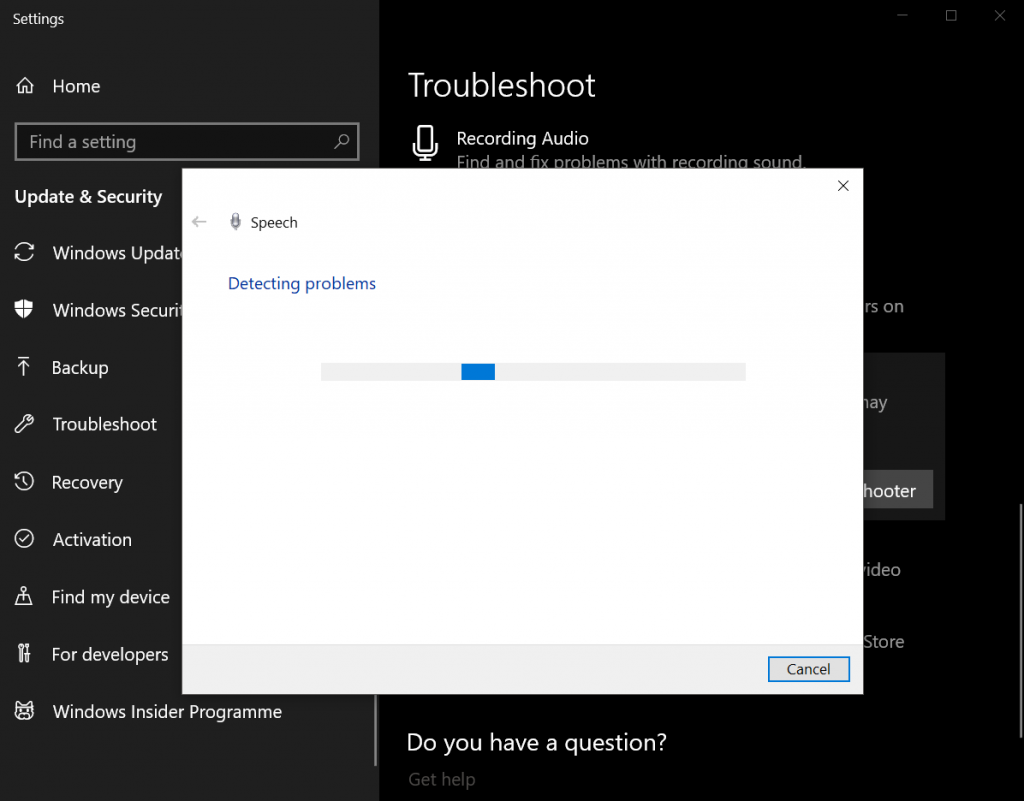
When you click on “Run Troubleshooter”, the troubleshooter should begin looking for problems. Be patient and when it’s ready apply all the fixes.


