
 This article is created with the purpose to help you run Windows software from a Debian-based Linux distribution.
Many beginner Linux users are experimenting different methods on how to run Windows software to fulfill their needs, while using the security and speed of their Linux-based distribution. If you are one of them, chance is that you have discovered what is Wine and how to use it to get Windows programs to run on your Linux machine. But as you may well be aware, Wine may contain some bugs and may not run if configured properly, so it takes some time to get used to it. This is the main reason why we have decided to reveal to you yet another universal and well known not so tech-savvy method which you can use to run not only all Windows applications, but also the entire OS’s – virtual drives and virtualization software. We will show you how to easily setup VMWare VirtualBox for Debian Linux OS’s.
VMWare VirtualBox Installation Instructions
The simplest method to install VirtualBox on Linux is to simply open the command line Terminal and then type the following command:
→ sudo apt-get install virtualbox
After doing so, the software will ask you if you want to continue with a [Y/N] prompt. Simply type “y” and hit Enter. From then, the installation process will begin. It may take different times, depending on the speed of your Internet connection as well as the technical specifications of your machine.
But in order for your VirtualBox to run on your computer, it is recommended to also add the additions of the software. Think of the additions as drivers for your VirtualBox. Yes, they do represent a security risk, so it is not mandatory to add them, but if you secure your Virtual Drive, you should be fine, since an extremely little portion of Windows malwares run on Linux systems, not to mention slither through VirtualBox, especially if you have secured your Linux properly.
So, the command for the VirtualBox additions installation is the following:
→ sudo apt install virtualbox-ext-pack
sudo apt install virtualbox virtualbox-ext-pack (Works on Xenial 16.04)
Then simply follow the instructions that will appear on your screen.
How to Set up VirtualBox
If you have installed VirtualBox, simply go to your Linux distribution’s search and type VirtualBox, after which open it. You should see the following screen:

At this point, you will need to have a Windows image file. If you do not know how to download such an image file onto your computer, simply download ready image files from torrent websites, by typing the Windows version you want to install and looking for ISO files. If you lack Windows image file, you can also create one by using the following tutorial.
When you have an image file, simply go the VirtualBox and then click on the “New” button, which will lead you to the following web page:
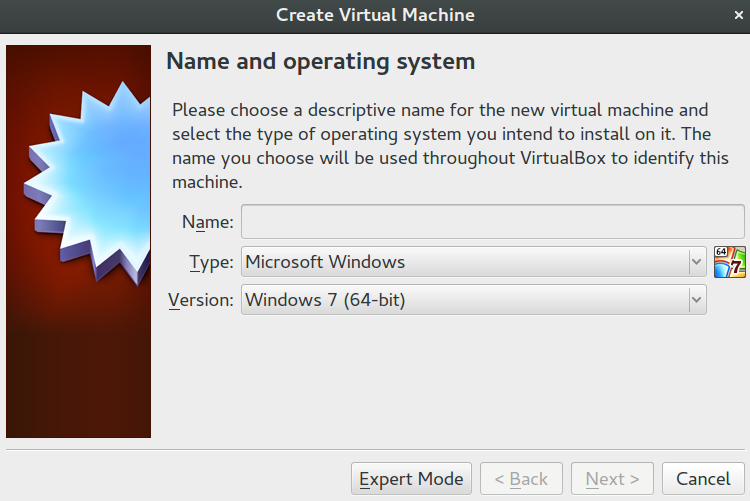
From there simply type any name that you can remember, for example, Test Windows, then on the Type select Microsoft Windows and on Version select the same or as similar version to your ISO Windows as possible. It is important for the ISO file to match the version, because the setup parameters vary for each Windows version. When you are ready, click “Next”.
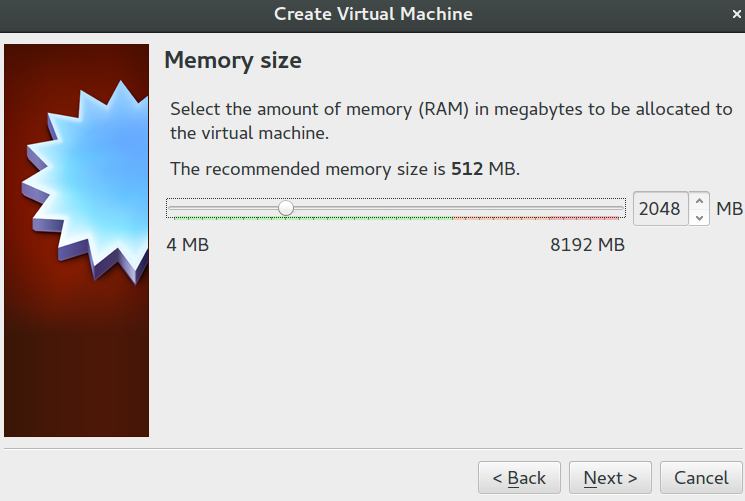
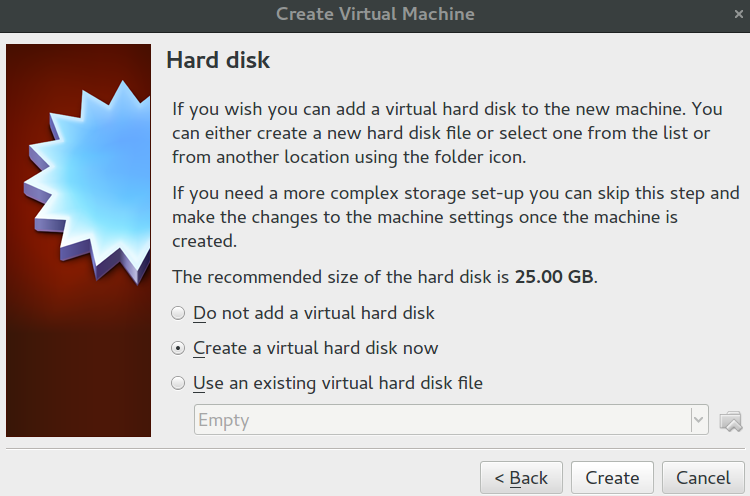
Then, you will see the memory screen. From it, select how much RAM you are able to allocate from your total available for the Virtual Drive. Note that the more you select, the better drive performance will be, but it will also take RAM out of your Linux OS, while it is running. So choose wisely. I would go for somewhere in the first quarter. For example, if I have a total of ~8 GB of RAM, I would use 2 to 4 GB for the OS. This leaves me with extra 4 GB for the Linux OS, which is not very RAM demanding. After you have set the RAM, click on “Next”and then choose “Create a virtual hard disk now”. If you have a virtual drive (.vmdk) file, you can click on “Use an existing virtual hard disk file”
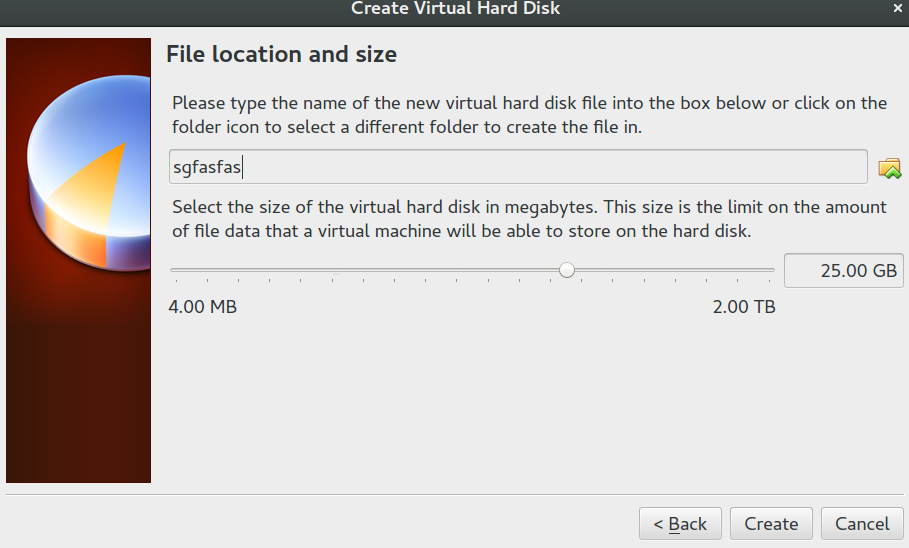
Then choose the format of your virtual drive’s hard disk and click on “Next” again. You will be taken to the “Storage on physical hard disk” menu, from which we advise to choose a “Fixed size” and then after clicking “Next again” to choose the size you Wish to allocate. Again, I recommend choosing wisely on how much memory you want to spare, because it will be taken away from you:
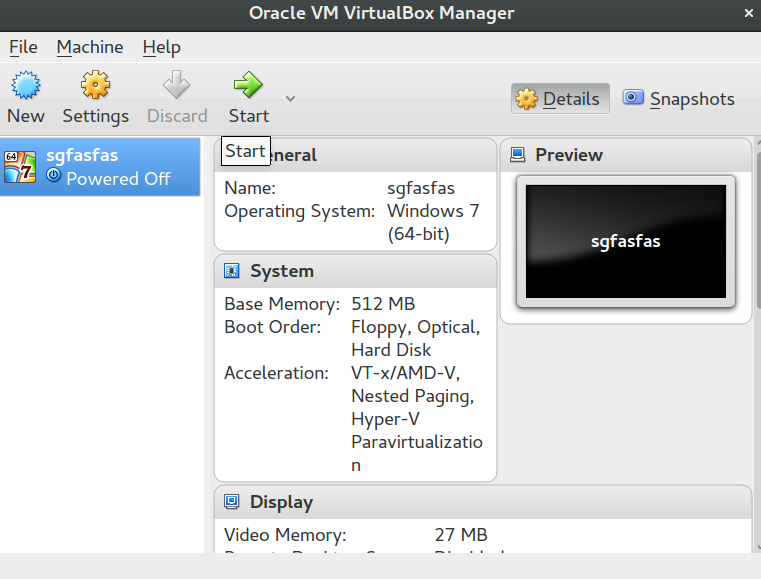
After having done this, you will end up With the following screen below, where you must simply power on your virtual machine and install your operating system as if you are normally installing Windows.
For more information on how to install different versions of Windows (old + new), please check up on the following related article:
→Related:How to Install Windows OS’s (Instructions when you scroll down)
Important Tip! Since Windows is often attacked by most computer viruses out there, we strongly recommend securing your virtual operating system with an advanced anti-malware program which will protect your computer in real-time from any ransomware, worms, botnets, trojans, adware as well as other unwanted threats.
Spy Hunter scanner will only detect the threat. If you want the threat to be automatically removed, you need to purchase the full version of the anti-malware tool.Find Out More About SpyHunter Anti-Malware Tool / How to Uninstall SpyHunter
Ventsislav Krastev
Ventsislav is a cybersecurity expert at SensorsTechForum since 2015. He has been researching, covering, helping victims with the latest malware infections plus testing and reviewing software and the newest tech developments. Having graduated Marketing as well, Ventsislav also has passion for learning new shifts and innovations in cybersecurity that become game changers. After studying Value Chain Management, Network Administration and Computer Administration of System Applications, he found his true calling within the cybersecrurity industry and is a strong believer in the education of every user towards online safety and security.
Follow Me: