
Android ads are a growing security problem. There is a large quantity of different adware apps for Android that can cause a lot of ads on your Phone and slow it down. More so, over 90% of adware is made for Android devices, and this is not a very pretty picture, provided the fact that many ads tend to lead to viruses that exploit weaknesses in your smartphone. If you happen to see sudden ads appearing on your smartphone, we recommend that you read this article to learn how to remove unwanted ads or even malware completely from your Andorid device.

Android Virus & Ads – How to Clear Your Android Phone
Preparation before clearing Android adware and malware.
Before starting the actual removal process, we recommend that you do the following preparation steps.
- Backup all your phone contacts to your SIM card.
- Backup all your account information and passwords.
- Backup the files on your device.
Step 1: Back up the data on your device.
CAUTION! Before attempting any removals and drive formatting on your device, you should know that it is essential to save all your important contacts and files from your phone. There are several methods to backup your files:
Method I: Using online backup software or a memory card if the device supports it.
Method II: Connecting to another device and copying the data directly.
This is a bit risky option since the device may have malware on it. This is why, first you need to enter the device’s Safe Mode:
For RAZR Droid Devices:
1.Switch off the smartphone and remove the battery for a few seconds then plug it back in.
2.Switch the phone on.
3.You should see a Motorola Dual Core screen appearing. You should press and hold the Volume up, and Volume Down keys on the side of the smartphone. Hold them until the lock screen shows up with ‘Safe Mode’ written in the lower corner.
For HTC Devices:
1.Switch off the smartphone and remove the battery for a few seconds then plug it back in.
2.Turn on your phone while simultaneously holding down the Menu Button. When it starts, keep pressing the Menu Button until you see ‘Safe Mode’ menu appearing in the lower corner.
For Nexus devices:
1.Switch off the smartphone and remove the battery for a few seconds then plug it back in.
2.Turn on the phone.
3.When the welcome Logo Screen shows up, hold the trackball while pressing it until a lock screen shows up, or you see ‘Safe Mode’ written in the bottom corner.
For Other Motorola Devices:
1.Switch off the smartphone and remove the battery for a few seconds then plug it back in.
2.Hold down the Menu Button after you press it while turning on the phone. When it boots, hold the button down upon seeing the lock screen or feeling the phone vibrate.
For Moto G Devices:
1.Press the Power Button and hold it on until the list with options pop-up.
2.Hold the Power off button and wait for a ‘Reboot to Safe Mode’ option to appear.
3.Tap it and let the phone reset.
For Samsung Galaxy Devices:
1.While the device is on, hold down the Power Button and wait for the Options List.
2.Wait for a ‘Restart to Safe Mode’ option to appear.
3.Choose this setting. The device will restart.
For Apple Devices:
1. While your device is locked, hold down the Power Button and the Home Button until you see a white Apple logo.
2. Once you see the logo, let go from those buttons and start holding the Volume Up button. (Give it a little time to boot up)
3. Now the phone should boot in Safe Mode without any third-parties running.
And now it is time to proceed by doing the actual backup:
Apple iOS
1. Connect your device and select it in iTunes.
2. From the Backups section go to Manually Back Up and Restore and tap on Back Up Now.
Android
1. Connect your device via USB to a computer and select Use as a Media Device. You may also see use as file transfer option.
2. Go to your phone from My Computer and copy all the files you need.
3. If the phone has an option to install its drivers onto your computer, select it and install them since this will simplify the process of copying your contact list on your computer.
Step 2: Hard-reset your device and remove all adware.
For Android Devices:
After you have backed up your files, you should perform a clean wipe-out of your phone. This can happen either via one of the options in Safe Mode or by entering your device’s Recovery Mode. Several methods exist in order to enter Recovery Mode of your device:
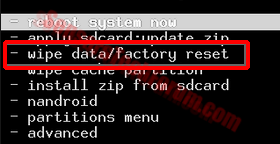
For Nexus Devices: – Hold the Volume Down + Volume Up + Power button until a Recovery menu appears. After that, you should select the Wipe Data/Factory reset option. Nexus 4 may work with Volume Up + Power + Volume Down.
For Samsung Devices: – Hold the Volume Up + Power Button + Home Button until a Recovery menu appears. After that, you should select the Wipe Data/Factory reset option.
For Motorola Droid X Devices: Hold the Home Button + Power Button until a Recovery menu appears. After that, you should select the Wipe Data/Factory reset setting.
For other devices with camera buttons on them: Hold the Volume Up + Camera Button until a Recovery Menu appears. After this, you should choose the Wipe Data/Factory reset option.
Also in case you have backed up your device in a Google Account, you will be able to restore your data after a complete wipe-out by just logging into your Google Account with you email and password.
Step 3: Restore missing or corrupt files using special file restoration software.
1. Connect your phone via a USB cable. You should see it in “My Computer”
2. Use different file recovery software to scan for and recover the files in its drive. Examples of programs we have tested are provided below:
- Stellar Phoenix Data Recovery Technicians License(Pro version with more features)
- Stellar Phoenix Windows Data Recovery
- Stellar Phoenix Photo Recovery
- Android Data Recovery Pro
(Optional)For Apple iPhone and iPad Devices:
Option I: Via the device
1.Back up your data using iCloud or another backup method.
2. Go to the Settings menu and go to General.
3. On the bottom, tap on Reset.
4. Tap on Erase All Content and Settings.
5. Confirm it by tapping on the red Erase button and then type your password.
Option II: Via iTunes
1. Connect your device and open iTunes.
2. Click on the device‘s name and model to open the dialog box.
3. From there, click on the button “Restore”
Android Virus – How to Stop Seeing Ads In The Future
If you are running an Android for some time, you should be aware that it is a highly customizable operating system. This attracts a lot of developers to create applications, like DNS66, that allow us to block ads by changing different DNS and network parameters on your Android device. Here is how to do this:
The software which we will be using for this tutorial is named DNS66. It’s primary purpose is to stop adverts on your non-rooted android device without draining excess battery. The application is completely free and you can download it from it’s official repository.
To download DNS66, simply tap with your Android device on the button below:
The latest version (0.5.8) is compatible with versions of Android 5.0 and newer. Due to the newer operating system implementations the app asks for several permissions which are the following:
- android.permission.INTERNET
- android.permission.ACCESS_NETWORK_STATE
- android.permission.RECEIVE_BOOT_COMPLETED
- android.permission.WRITE_EXTERNAL_STORAGE
- android.permission.READ_EXTERNAL_STORAGE
Any other instances may be malware copies or fake apps distributed by hackers.
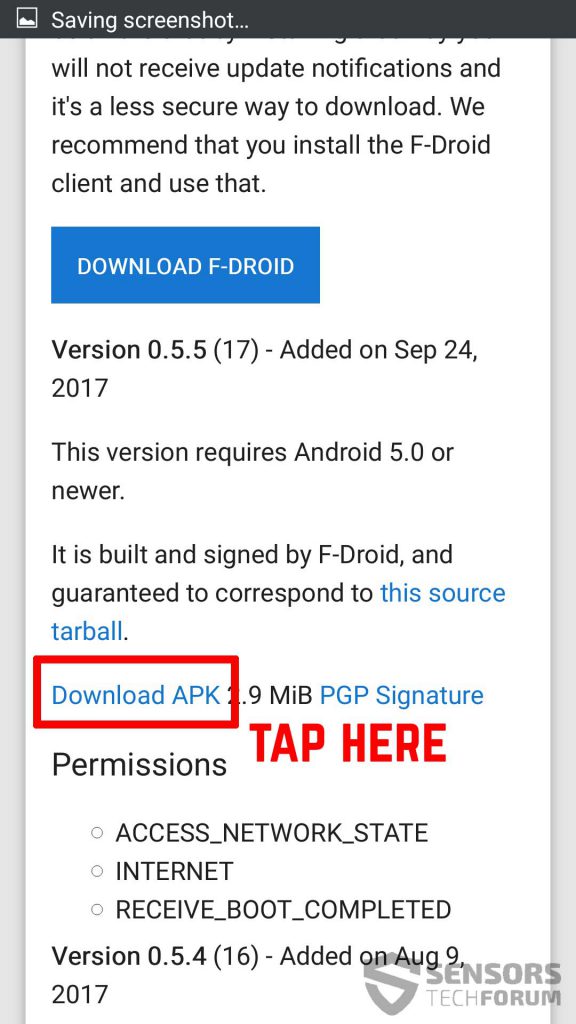
When you visit the web page, simply scroll down and you will find a highlighted text, called download.apk, like the image below shows. Simply tap on it to download it.
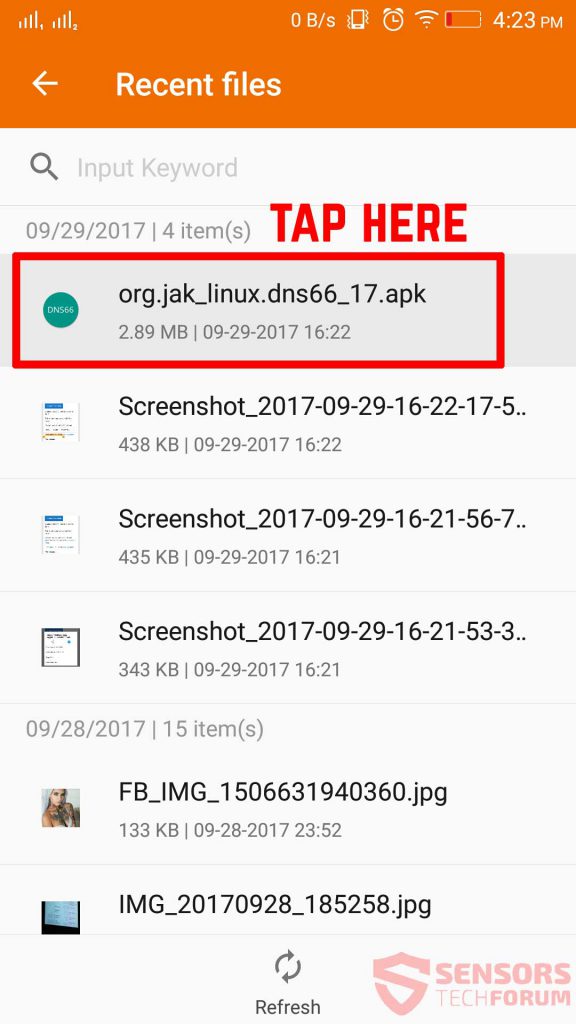
When the download is complete, either open it from your notifications or locate the following file in your File Browser of your smartphone or tablet:
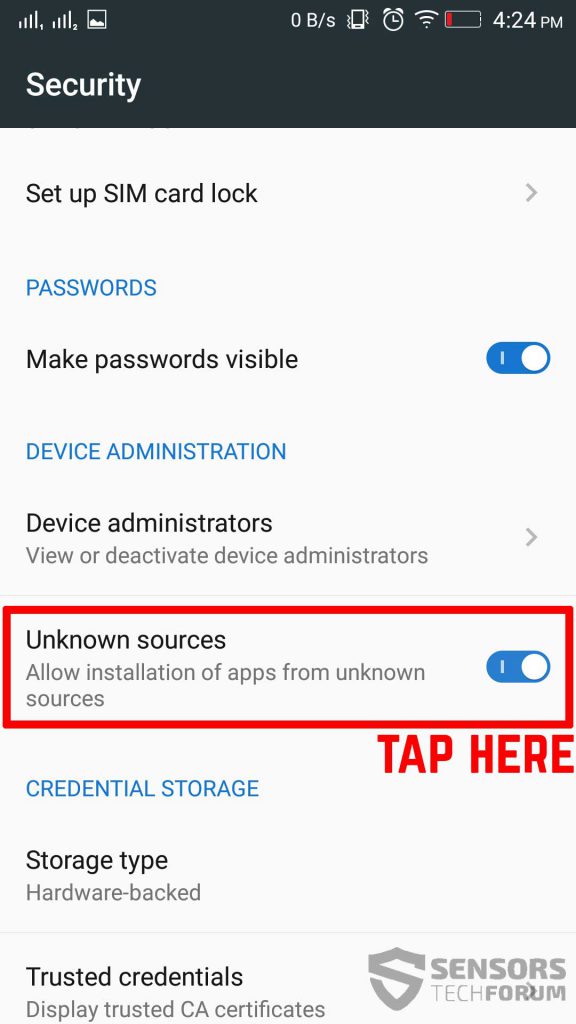
Since the file will not be installed, because it Is not featured in Google Play store, you should go to your Settings-Security and from there enable installation from unknown sources. Only then you can install the app:
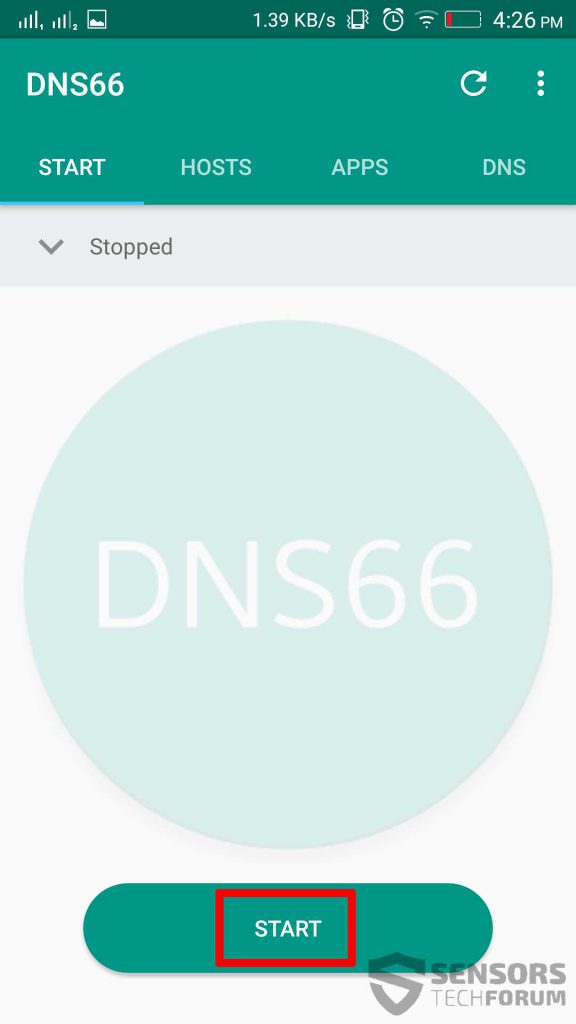
Then simply open the app again and tap on Install after which wait for the installation process to complete. After the process is completed and you open the DNS66 app, you will see a Start button along with some settings which you can tamper with, according to your preferences. Simply tap on the start button to begin the operation of ad-blocking:
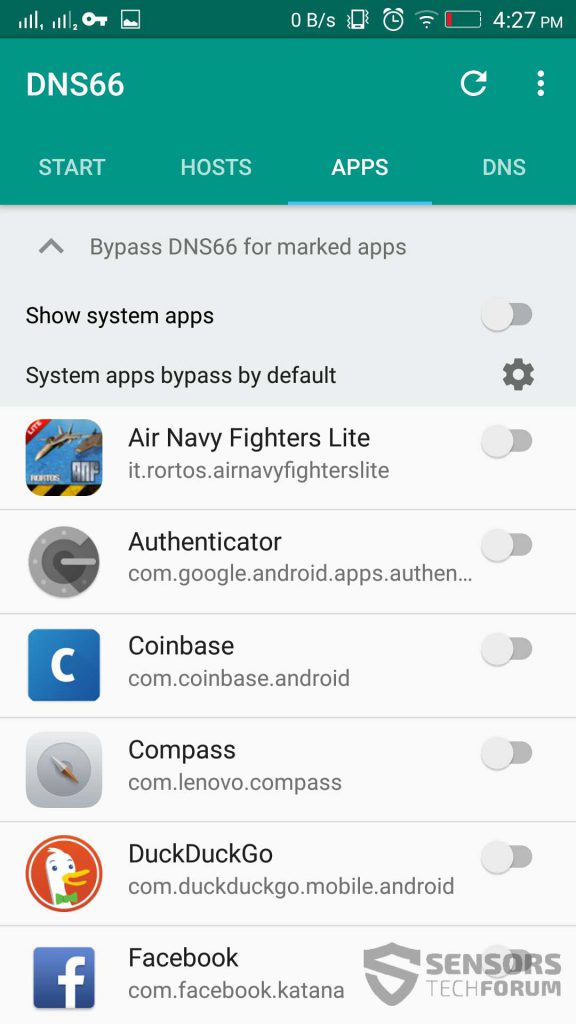
Be advised that the app may also ask you to download a hosts file that enables you to block ads. This will appear in the form of a pop-up. To do this, simply accept it and download the hosts file and the service will start immediately. Be advised that you can also set which system apps to exclude from ad-blocking as well:
You can recognize that the DNS66 program is running on your computer by the key icon on the top of your Android device. It looks like the following:
![]()
Android Virus & Ads – Conclusion
This application did well on our tests since we have downloaded multiple apps that have a lot of ads which pop-out automatically in the form of banners at the bottom of the screen, videos and many other types. The app was successful in blocking those, which is exactly what we were going for. We hope this tutorial has helped you and if you have any suggestions, recommendations or advices for the usage of other apps for ad-blocking, please comment in the comment section below, or discuss DNS66 in our forum.
Ventsislav Krastev
Ventsislav is a cybersecurity expert at SensorsTechForum since 2015. He has been researching, covering, helping victims with the latest malware infections plus testing and reviewing software and the newest tech developments. Having graduated Marketing as well, Ventsislav also has passion for learning new shifts and innovations in cybersecurity that become game changers. After studying Value Chain Management, Network Administration and Computer Administration of System Applications, he found his true calling within the cybersecrurity industry and is a strong believer in the education of every user towards online safety and security.
Follow Me:
Preparation before removal of malware.
Before starting the actual removal process, we recommend that you do the following preparation steps.
- Turn off your phone until you know how bad is the virus infection.
- Open these steps on another, safe device.
- Make sure to take out your SIM card, as the virus could corrupt it in some rare cases.
Step 1: Shut Down your phone to win some time
Shutting down your phone can be done by pressing and holding its power button and choosing shut down.
In case the virus does not let you do this, you can also try to remove the battery.
In case your battery is non-removable, you can try to drain it as fast as possible if you still have control over it.
Notes: This gives you time to see how bad the situation is and to be able to take out your SIM card safely, without the numbers in it to be erased. If the virus is on your computer, it is espeically dangerous to keep the sim card there.
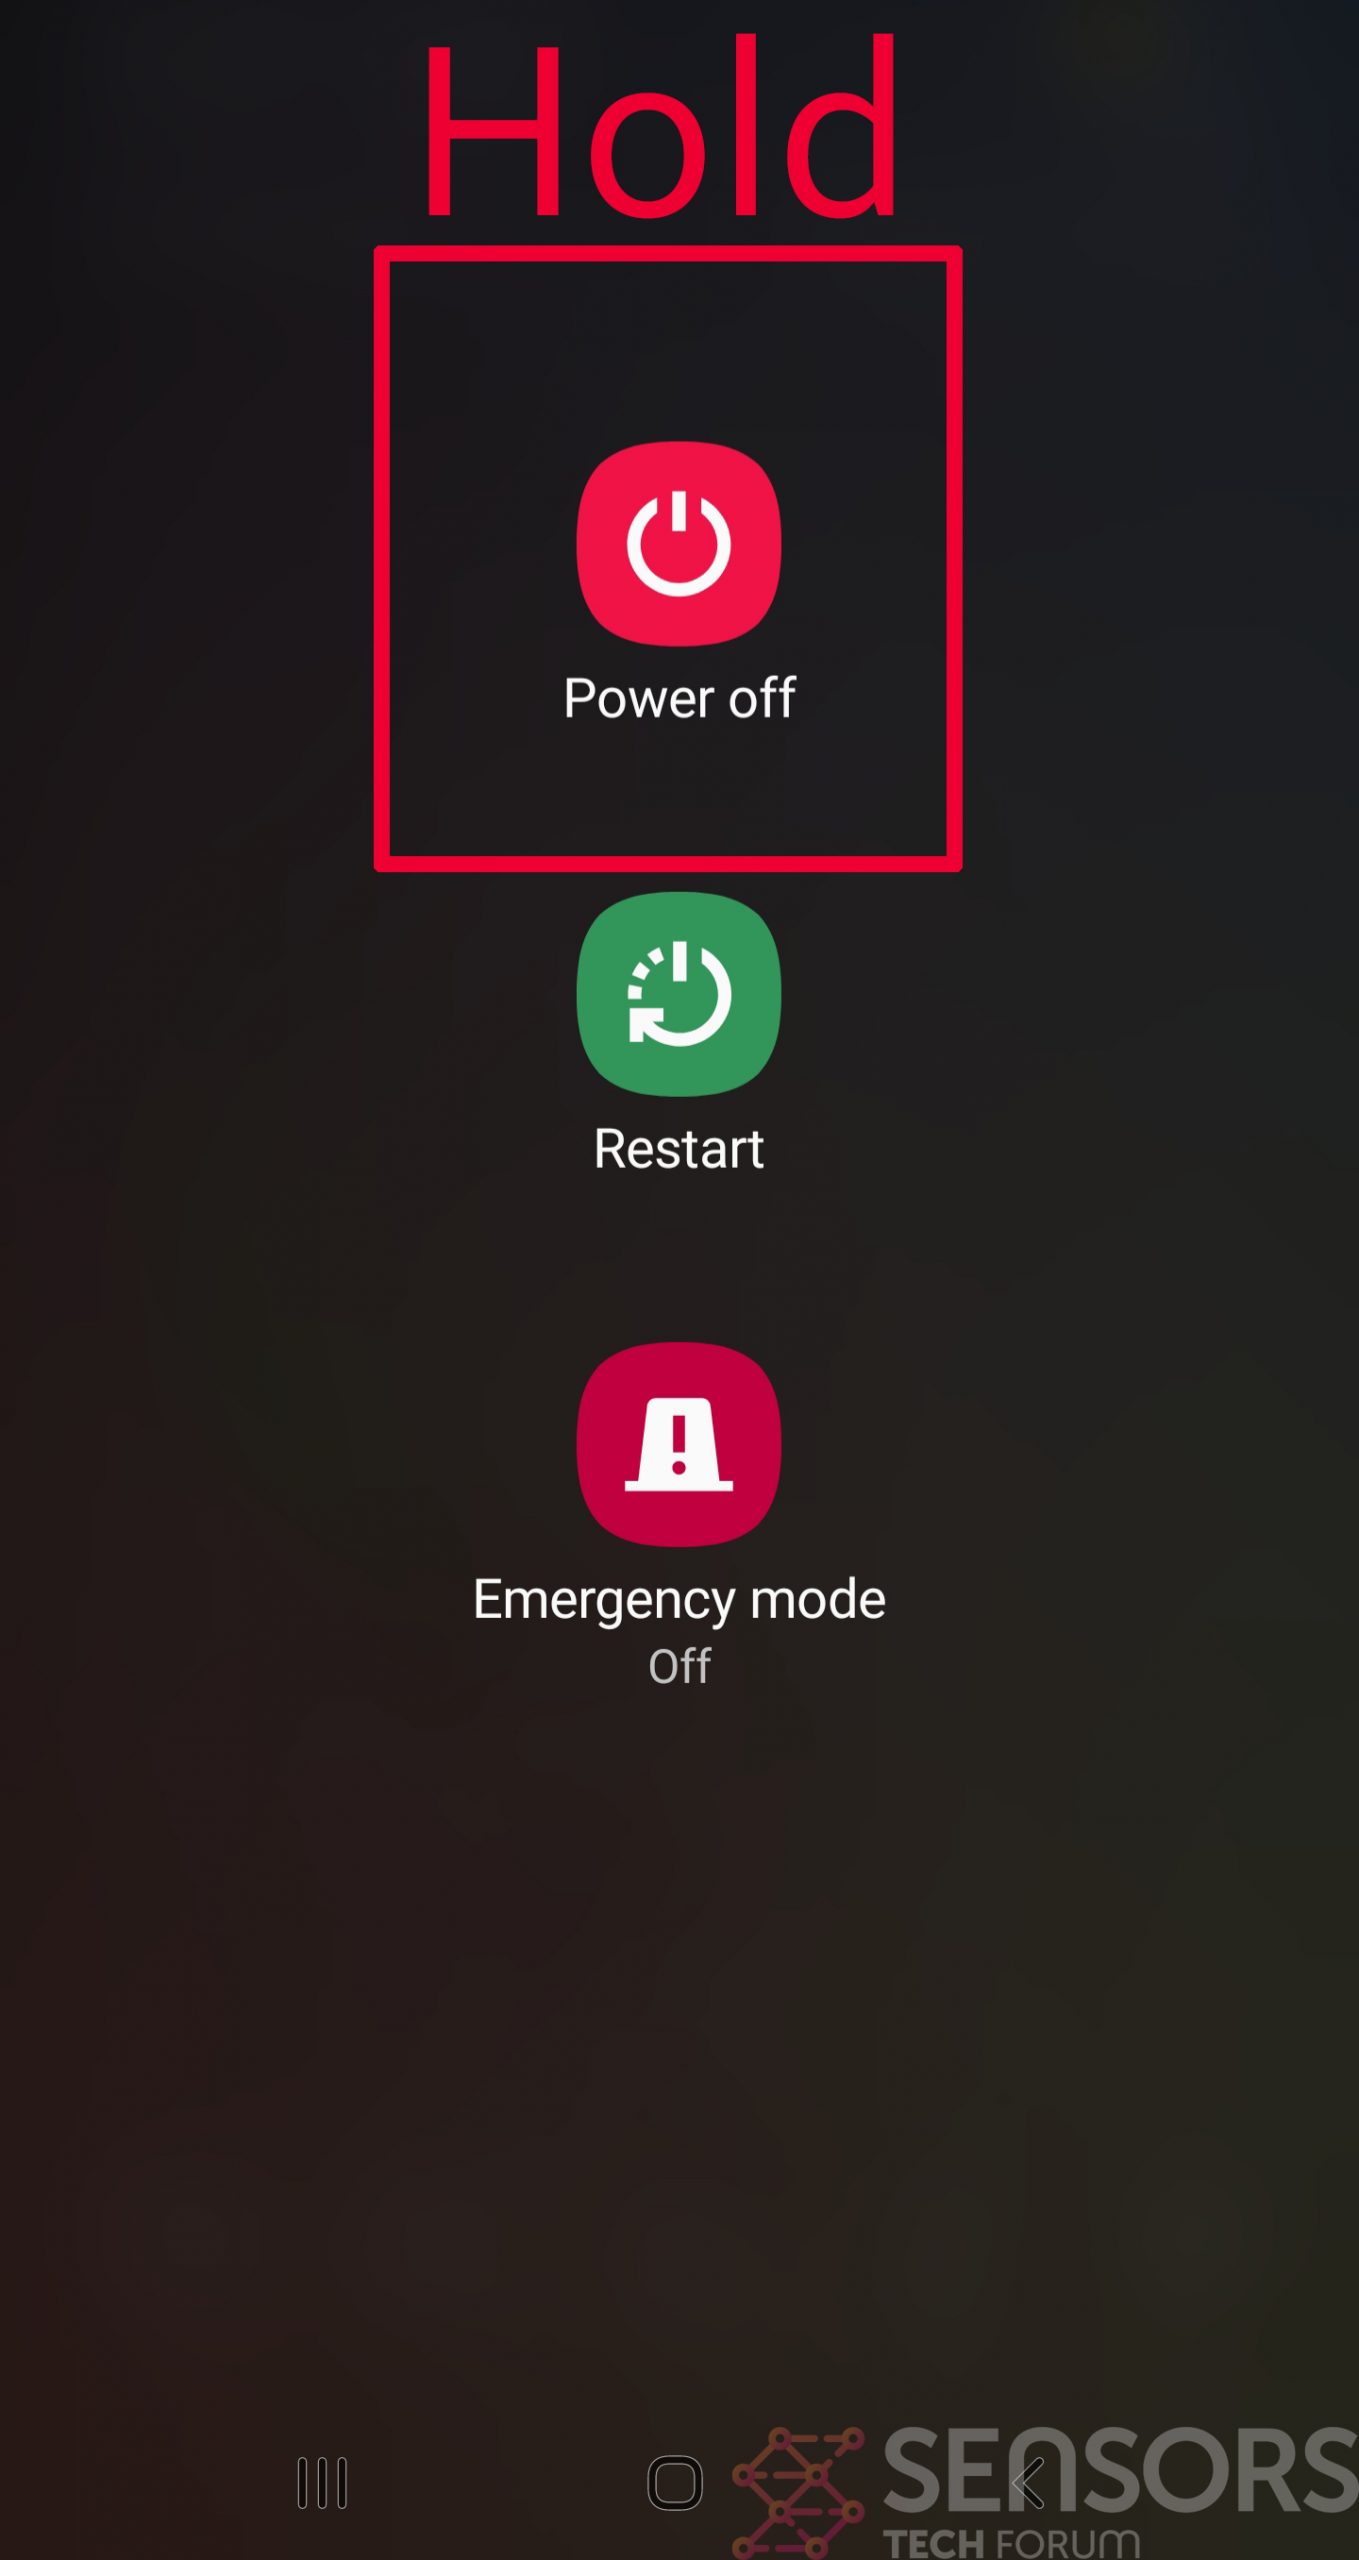
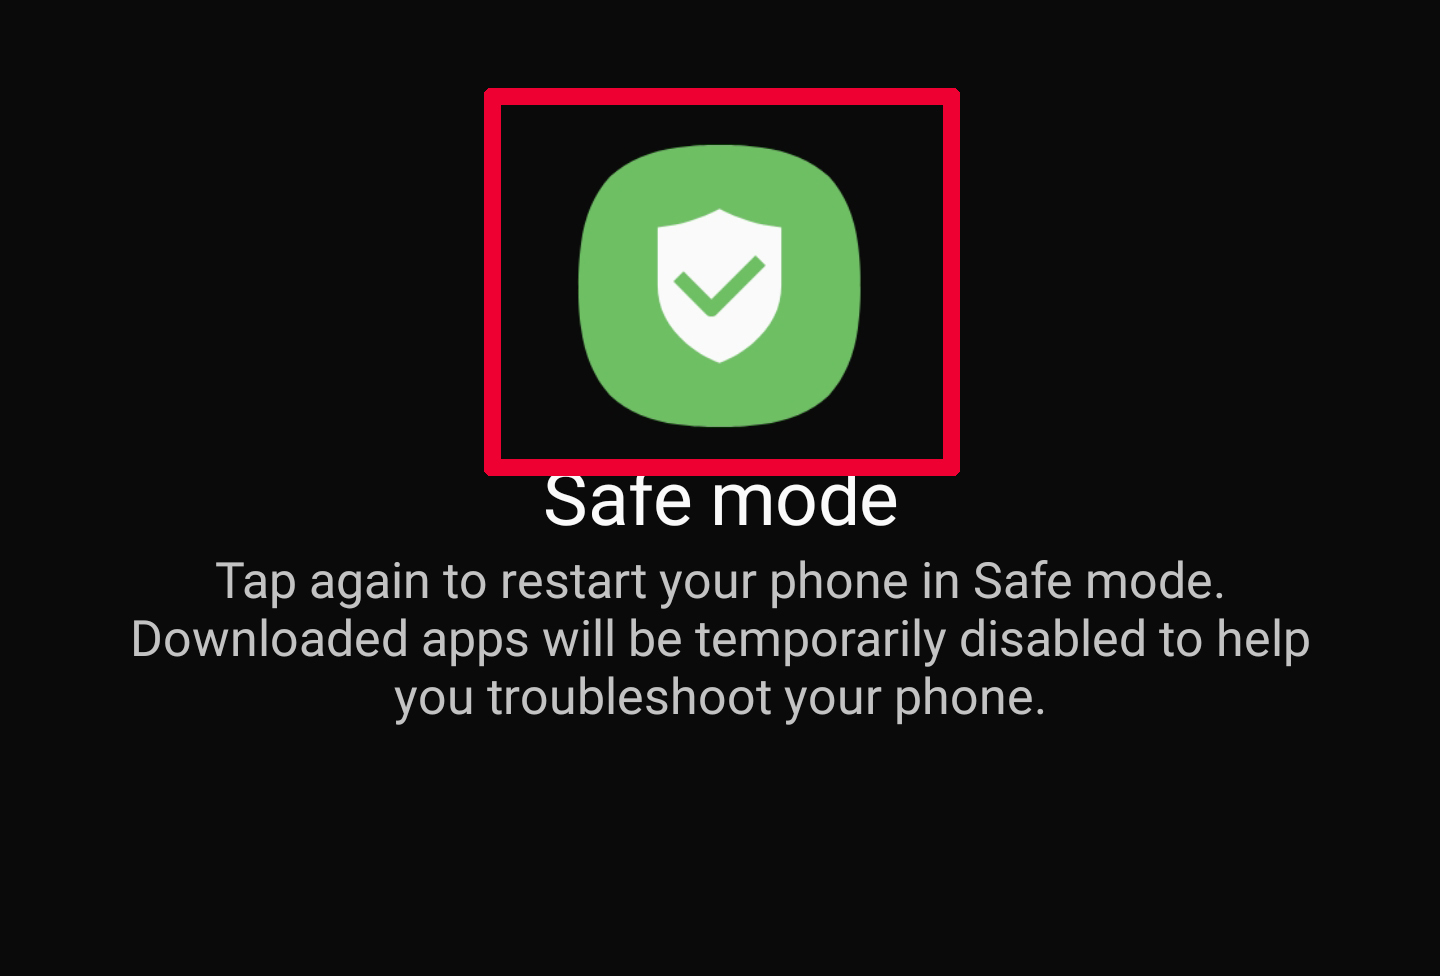
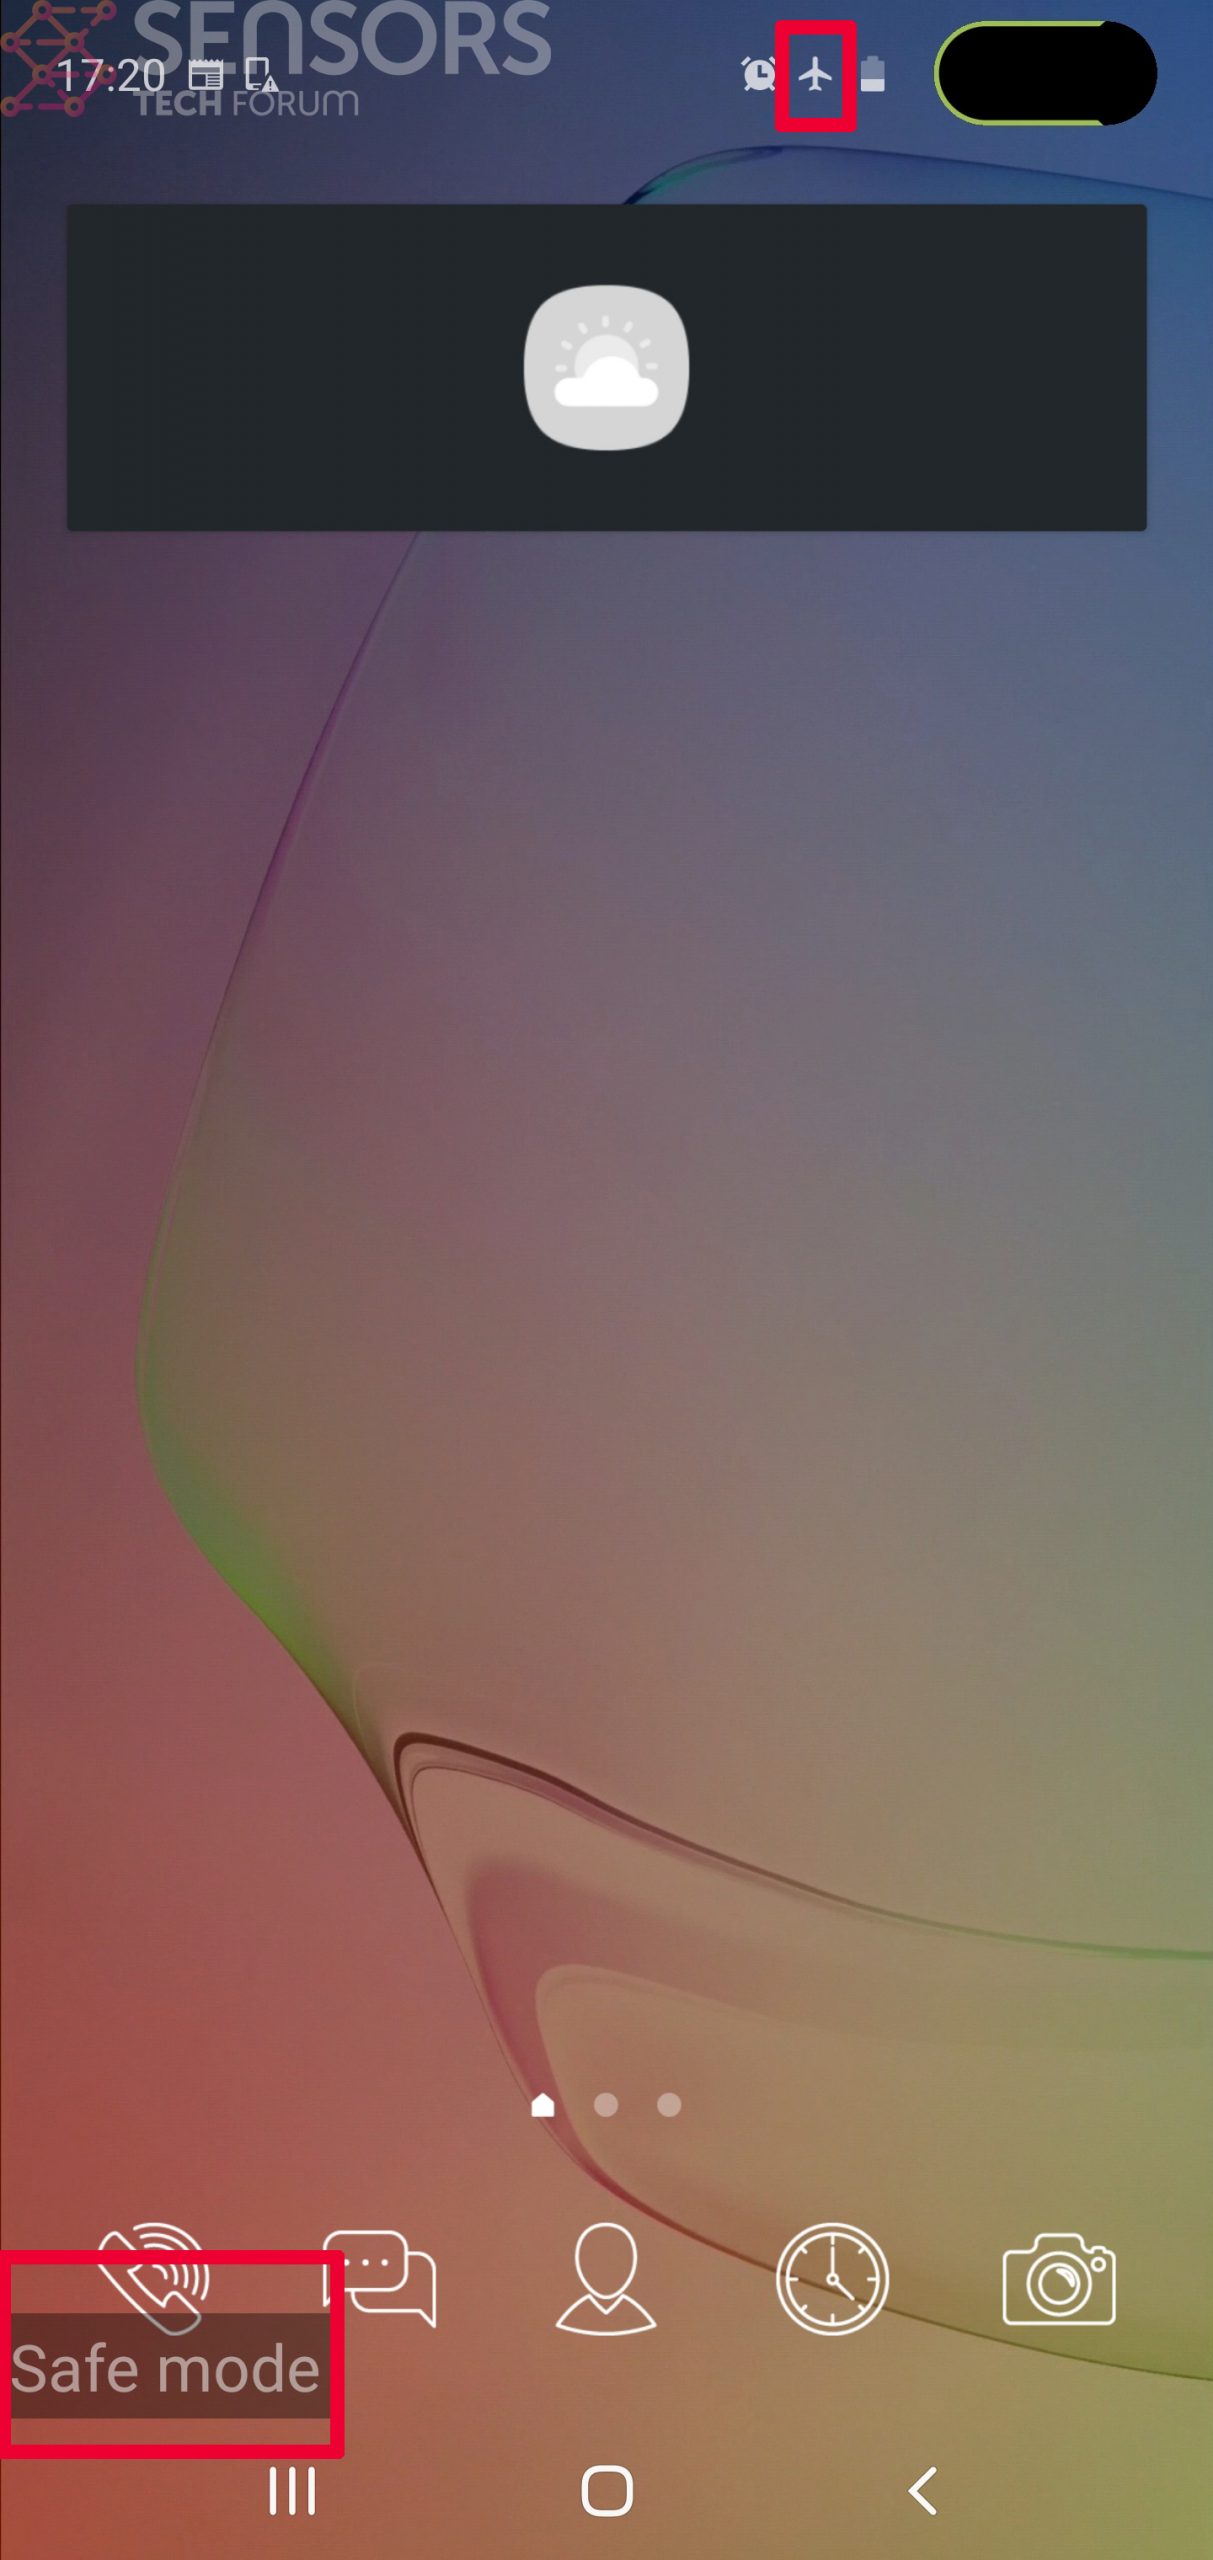
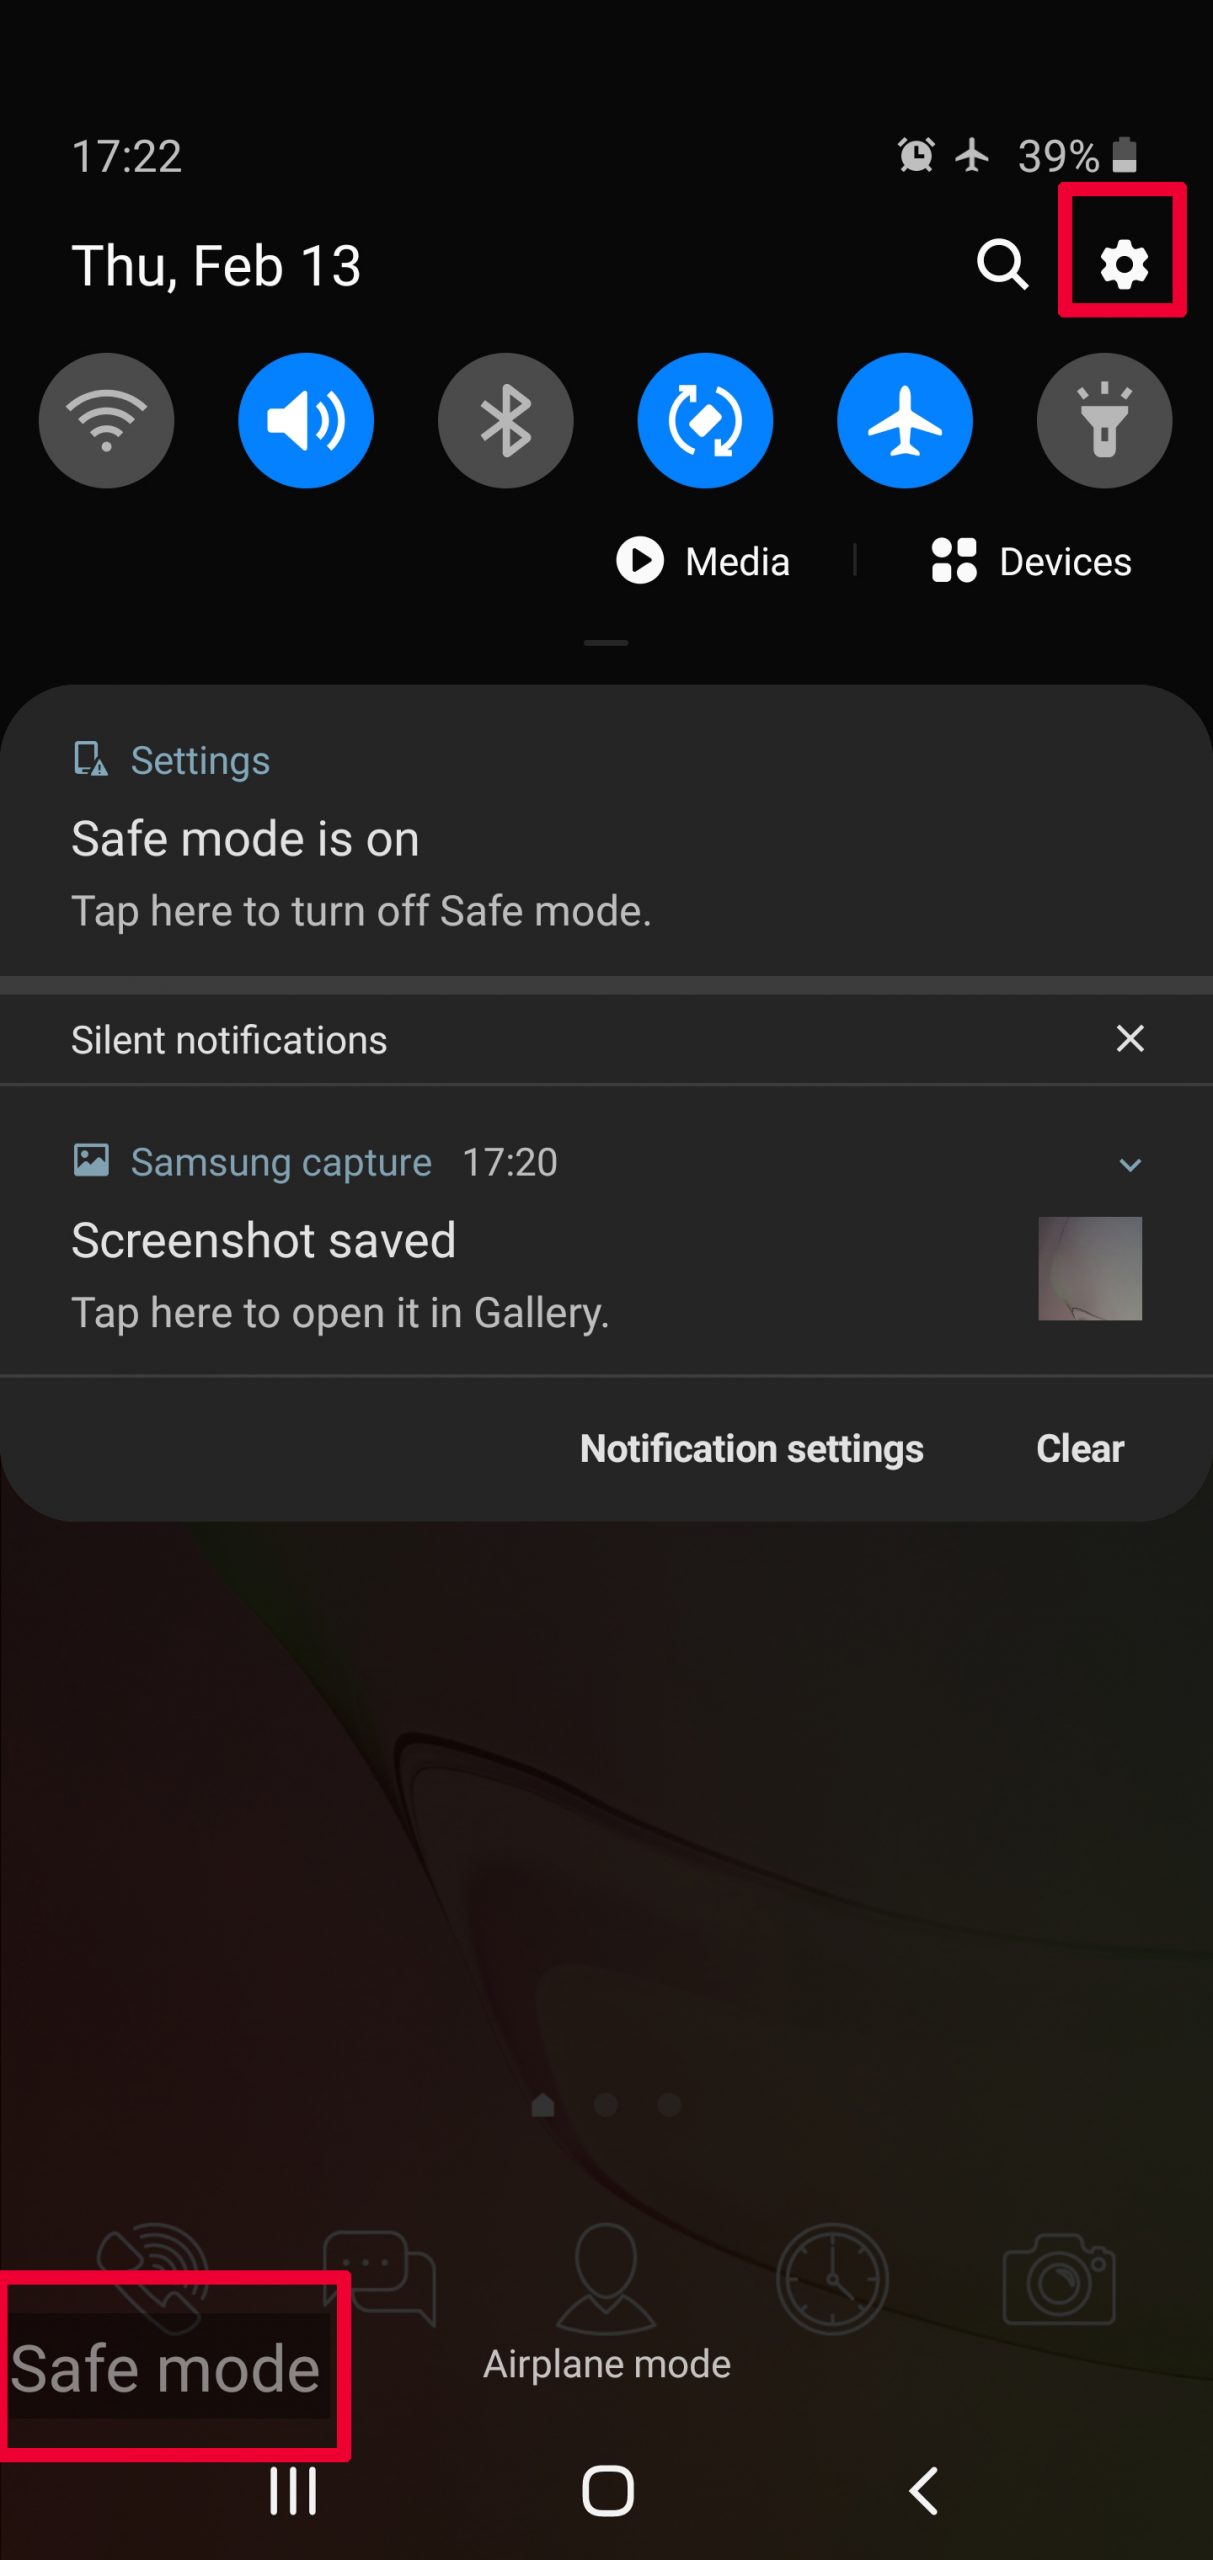
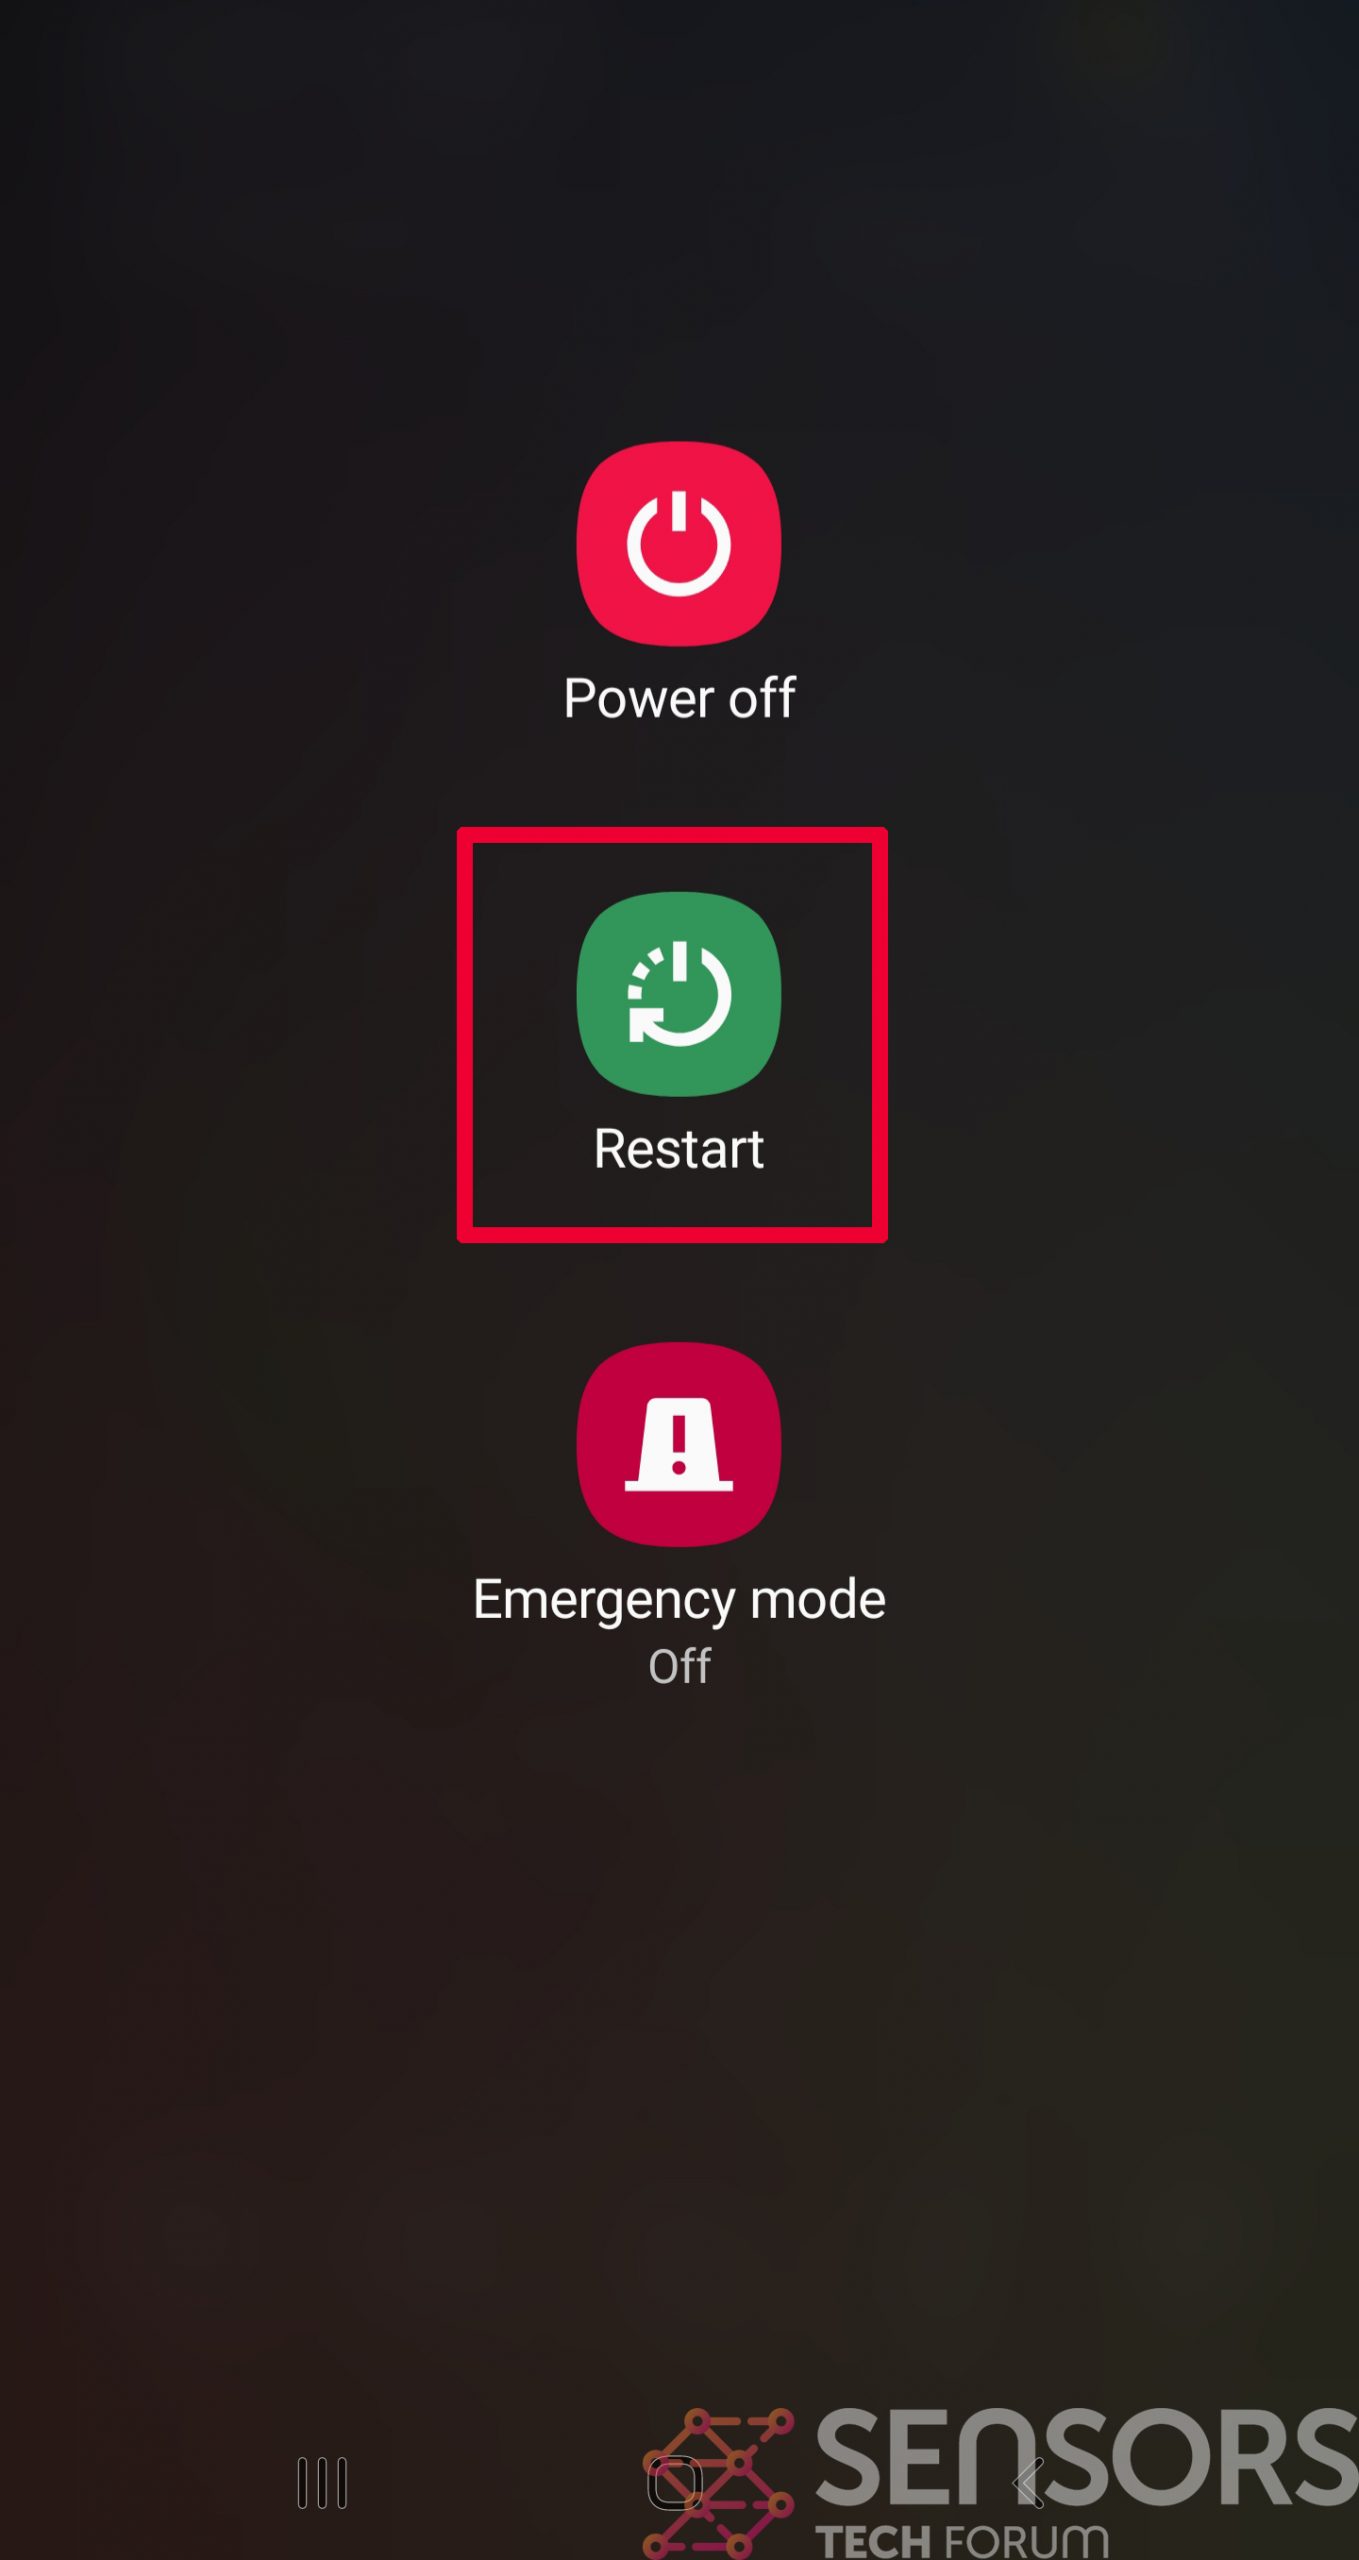
Step 2: Turn on Safe Mode of your Android device.
For most Android devices, switching to Safe Mode is the same. Its done by following these mini-steps:
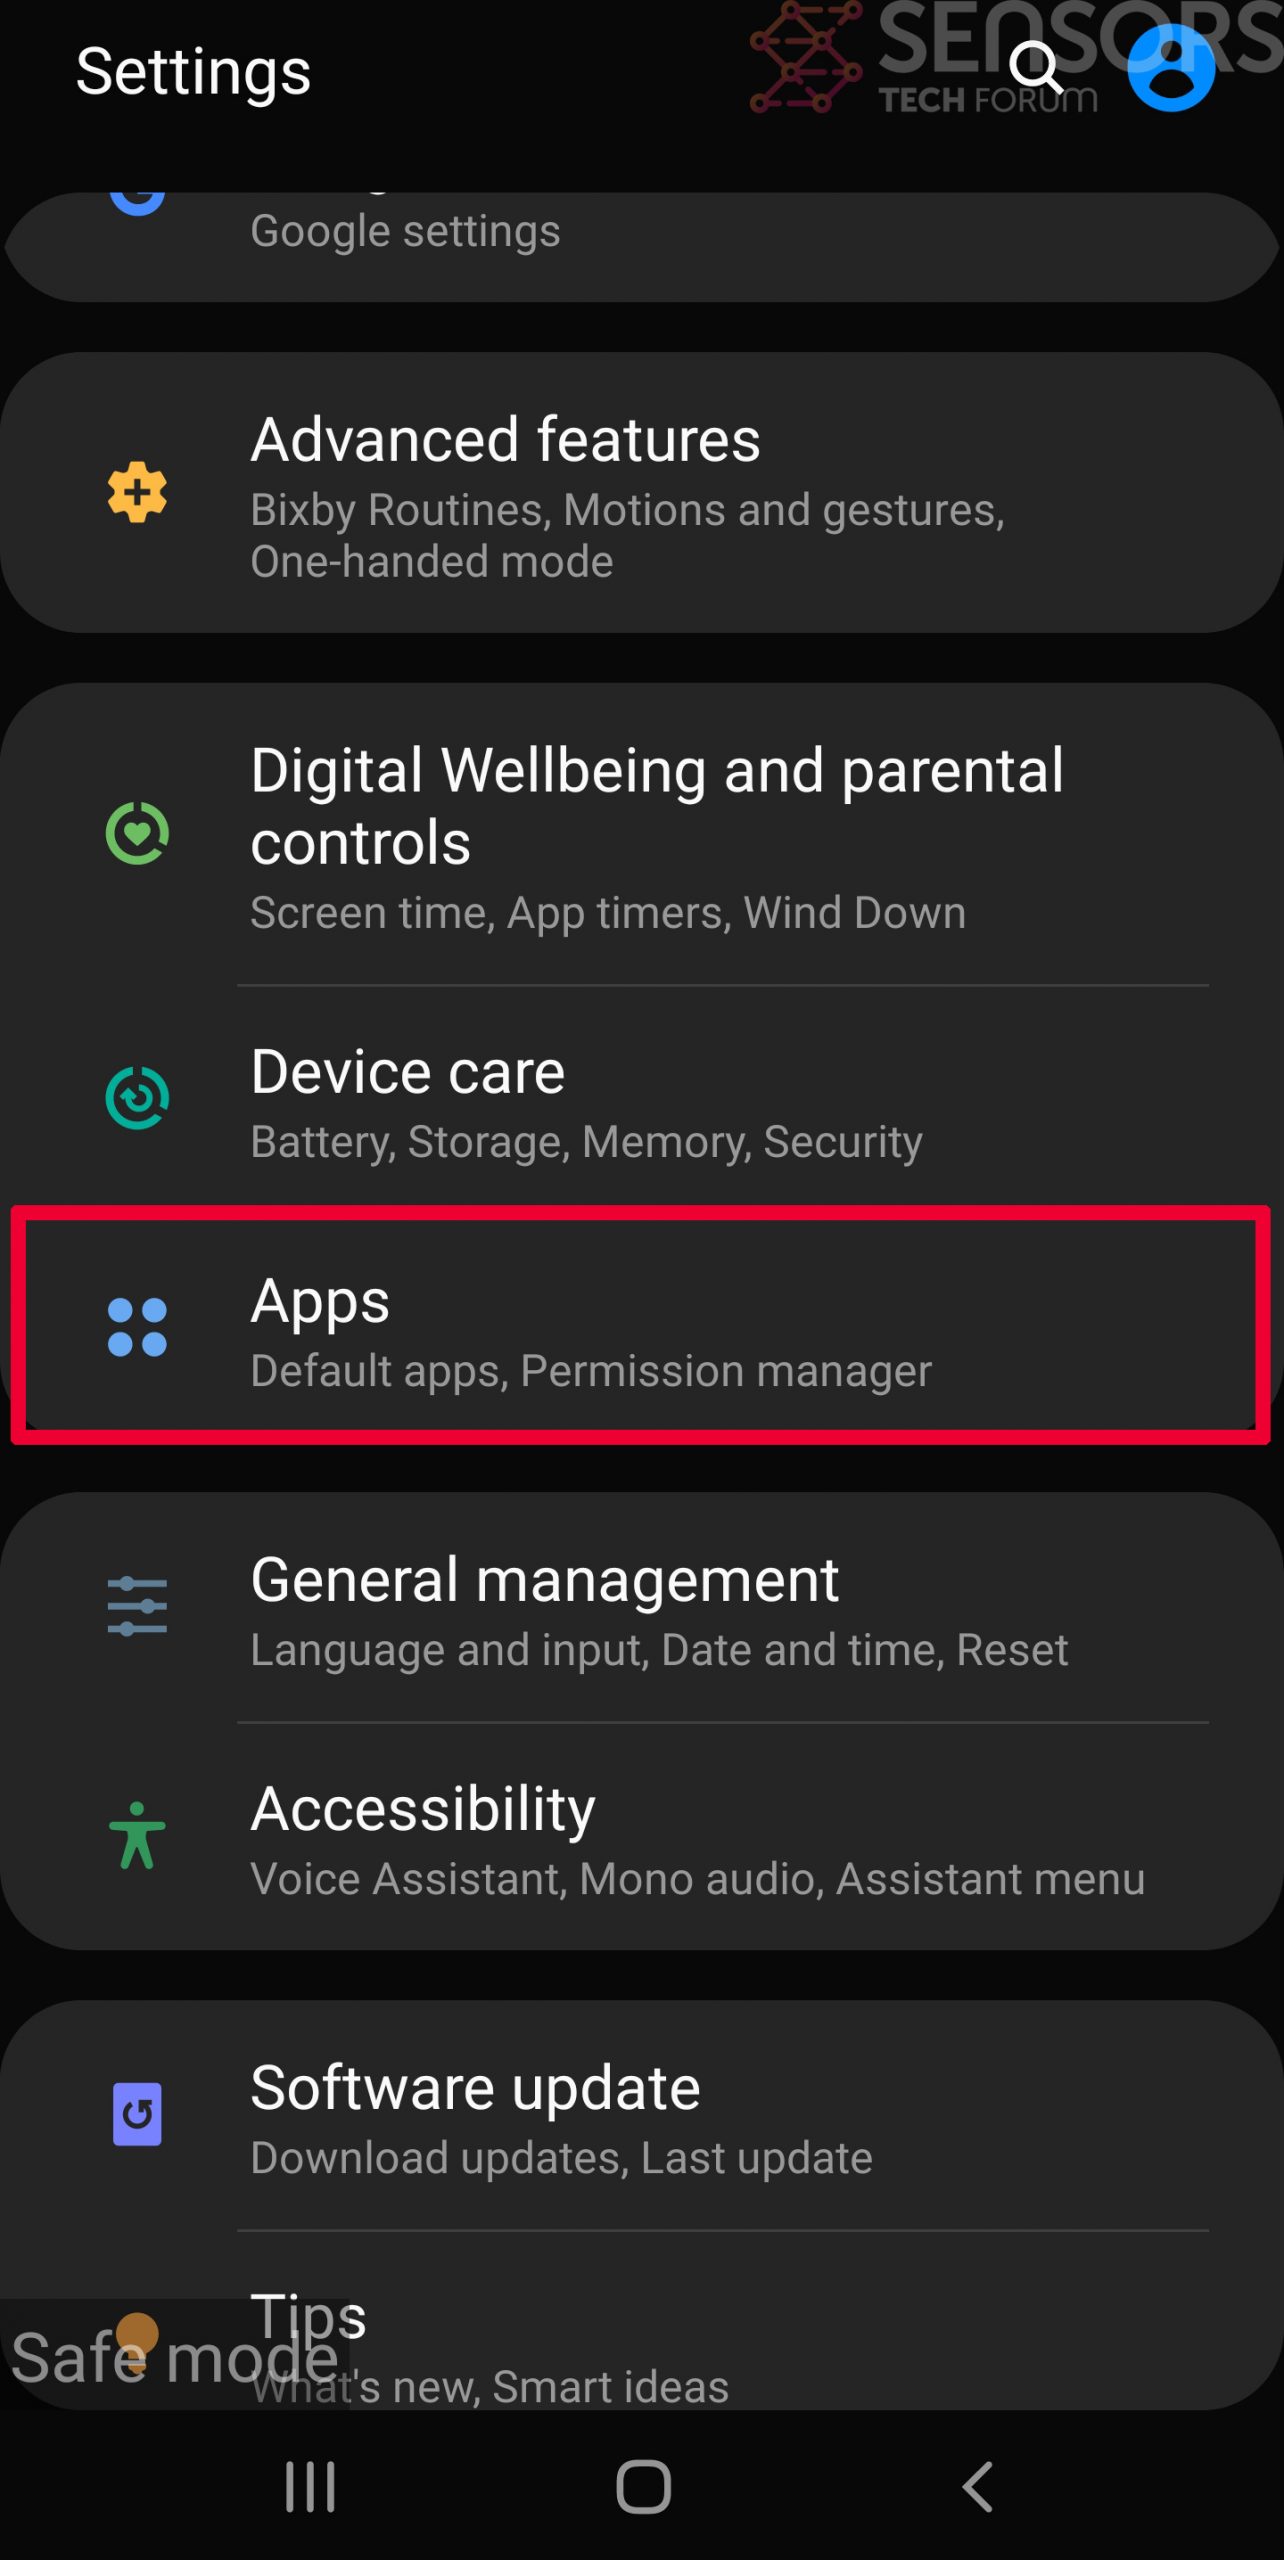
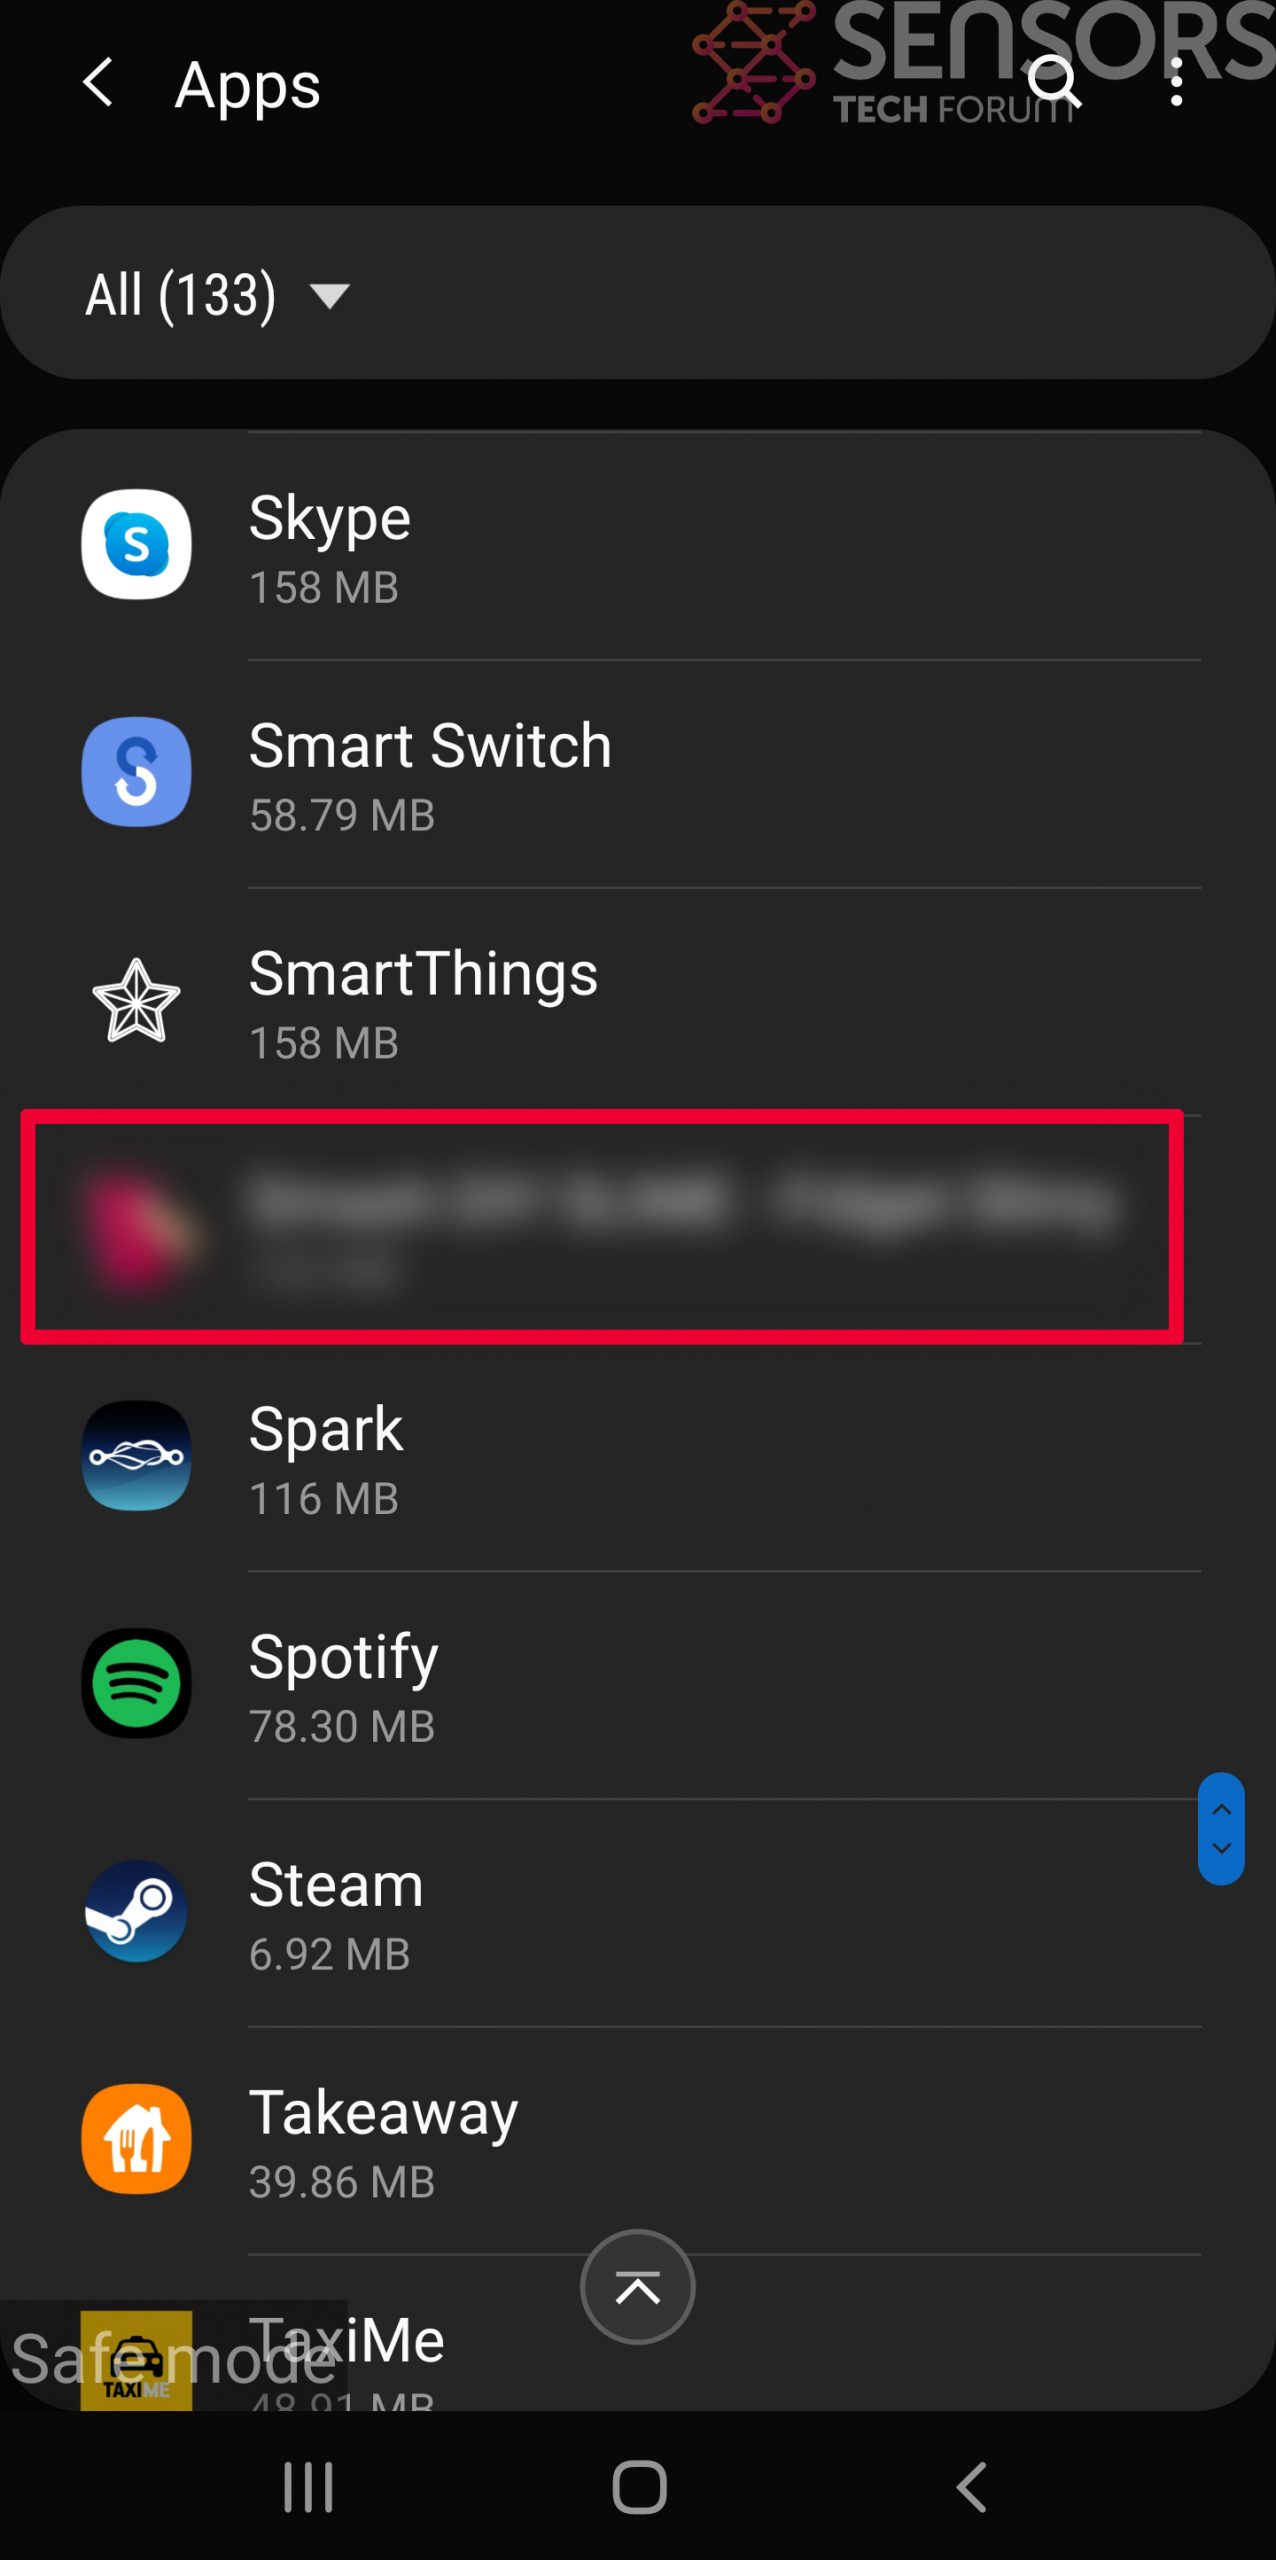
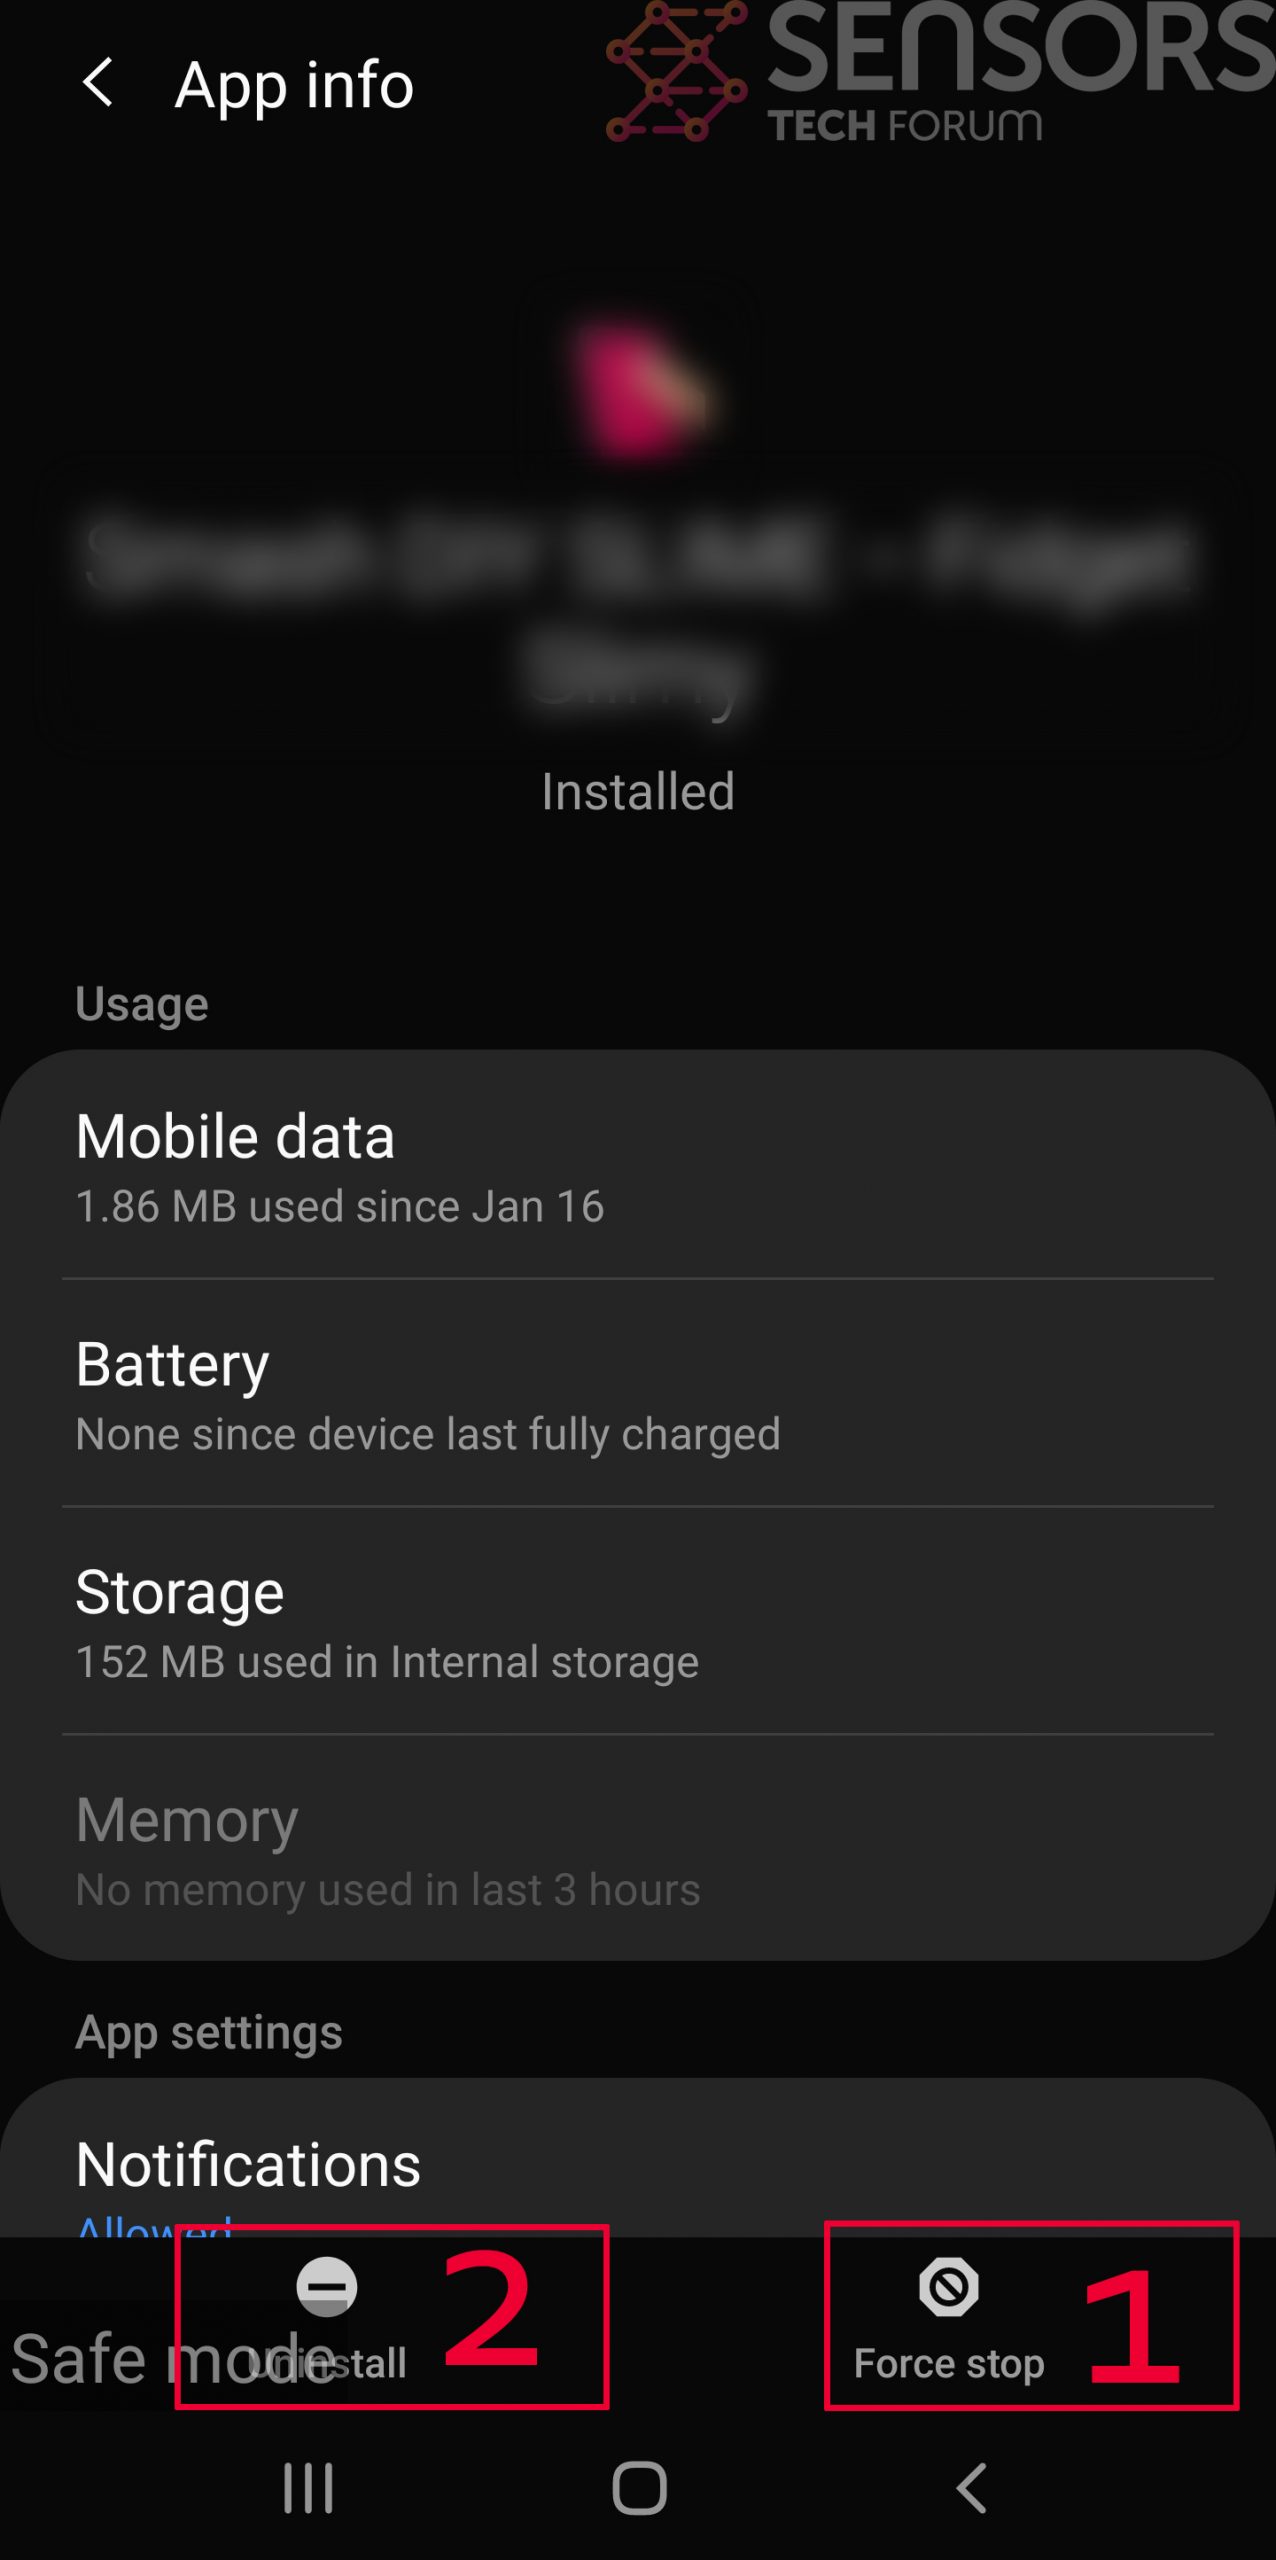
Step 3: Eliminate the App that Your Believe is the Virus
Usually Android viruses get masked in the form of applications. To eliminate apps, follow these mini-steps:
Step 4: Find Hidden Virus Files on Your Android Phone and Remove Them
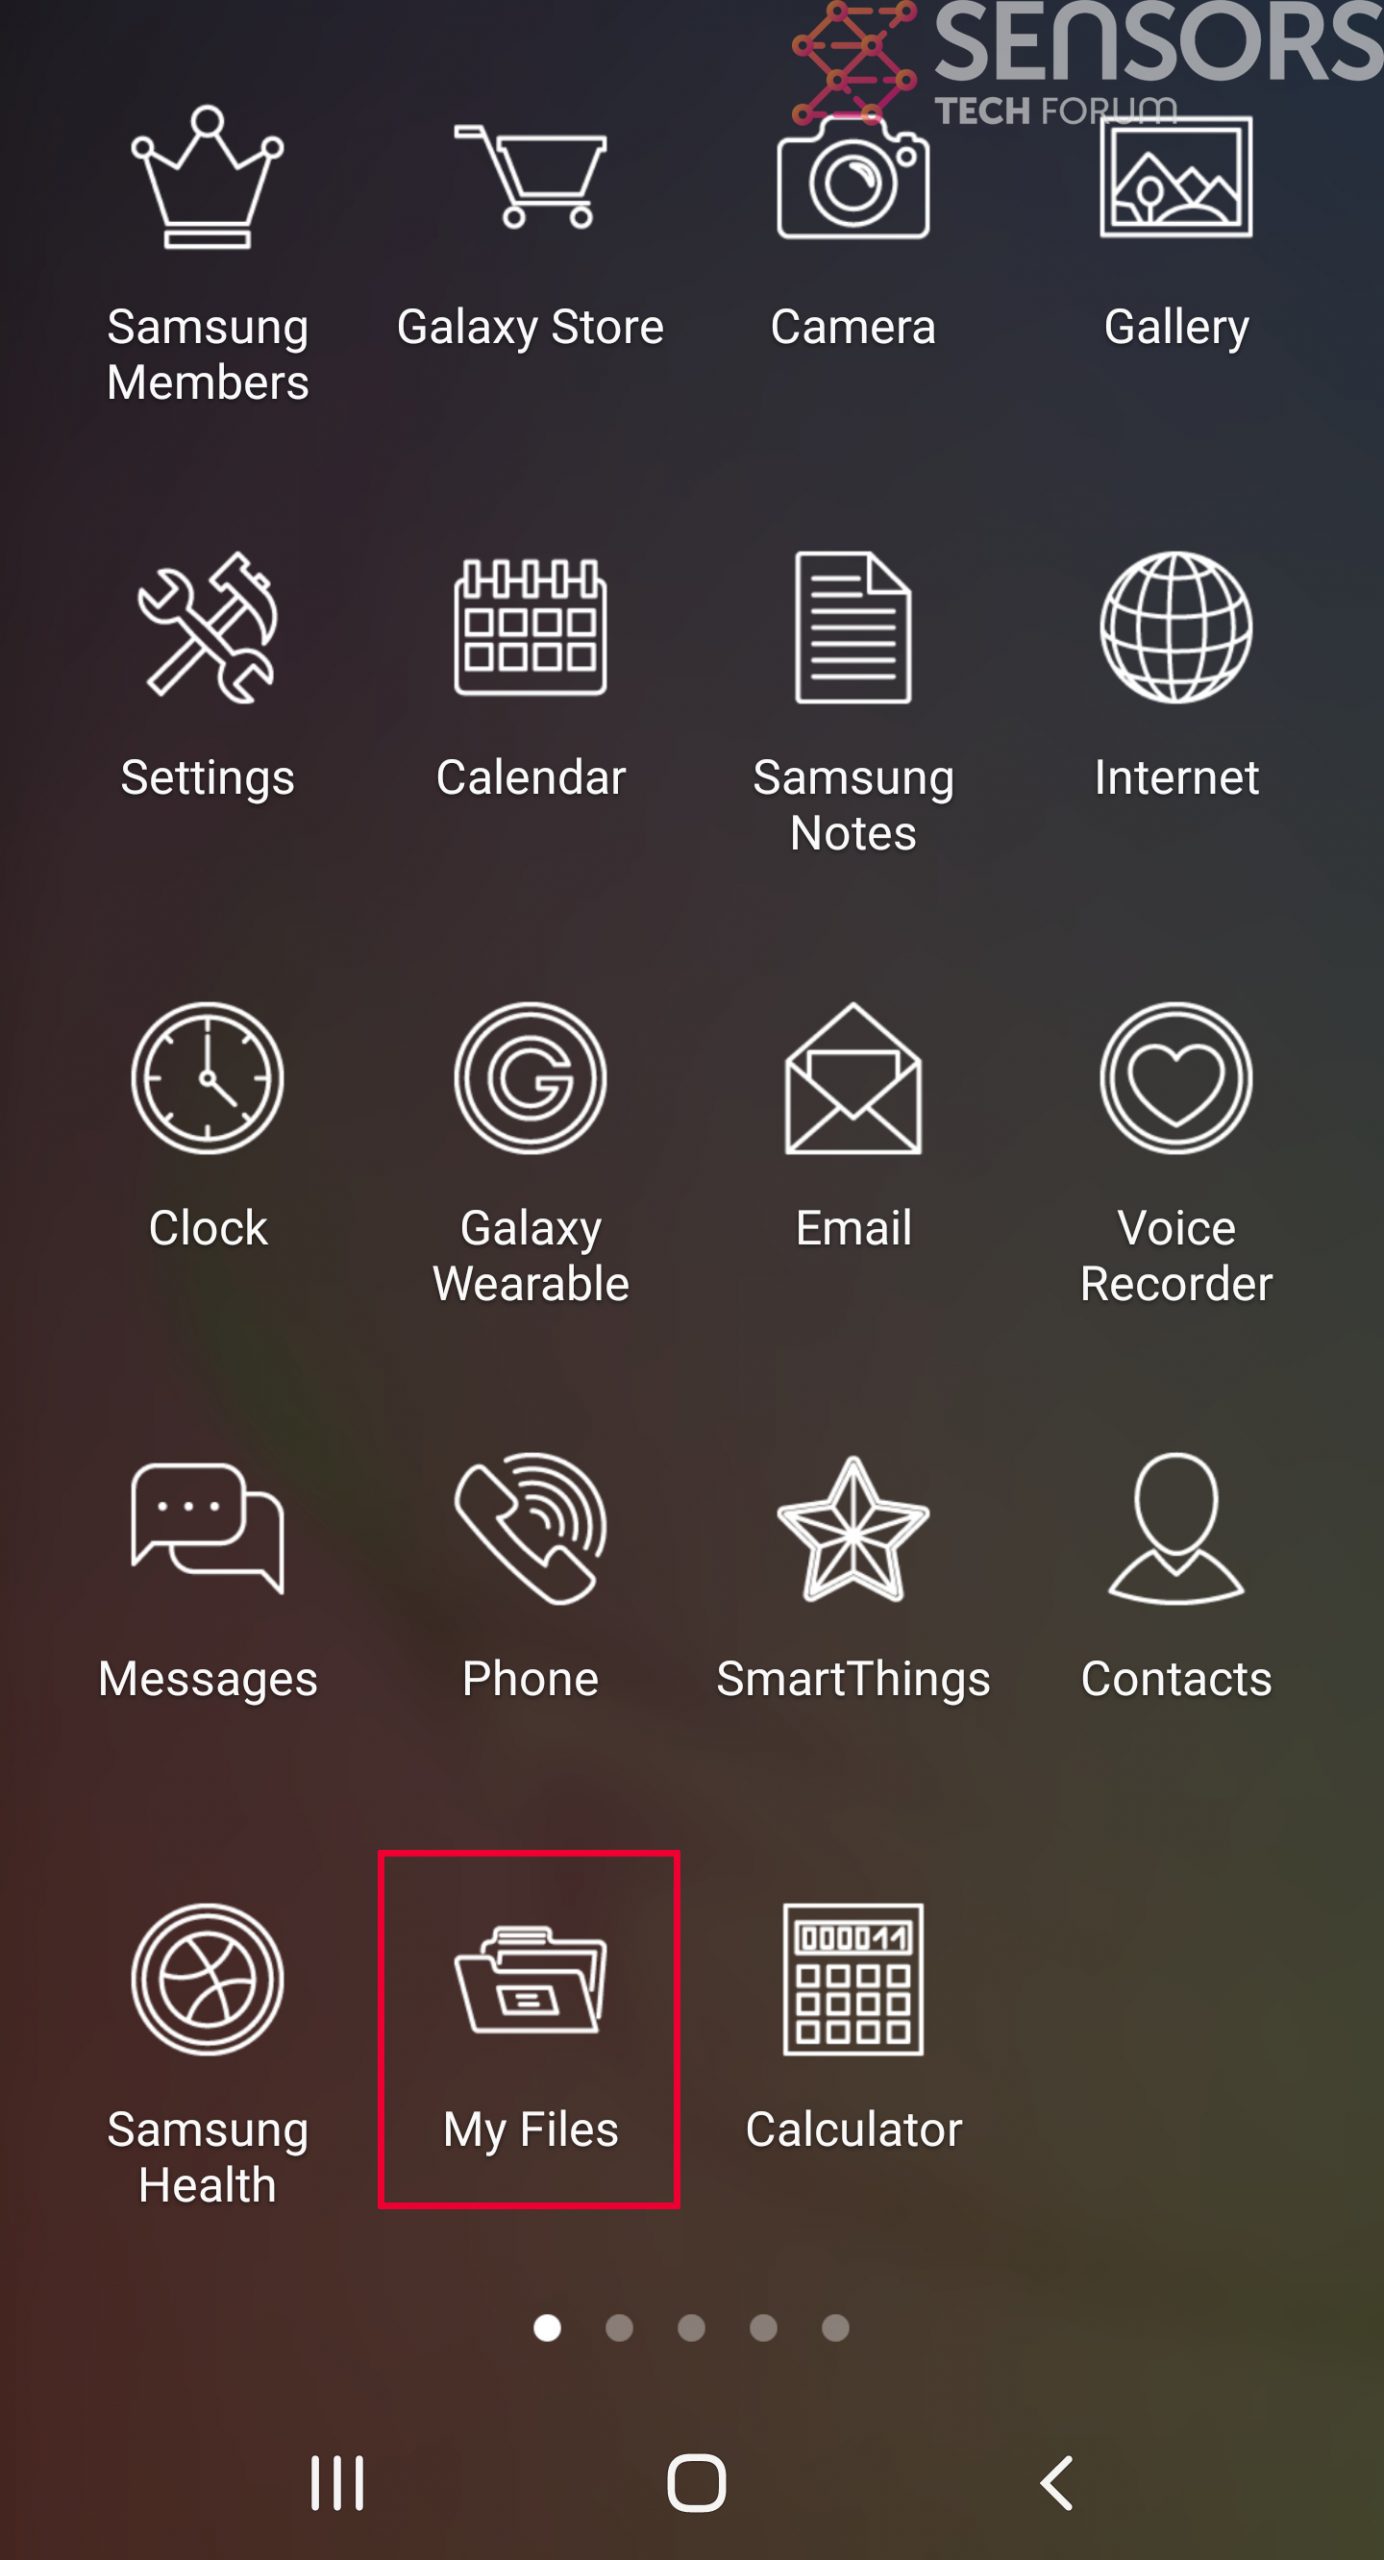
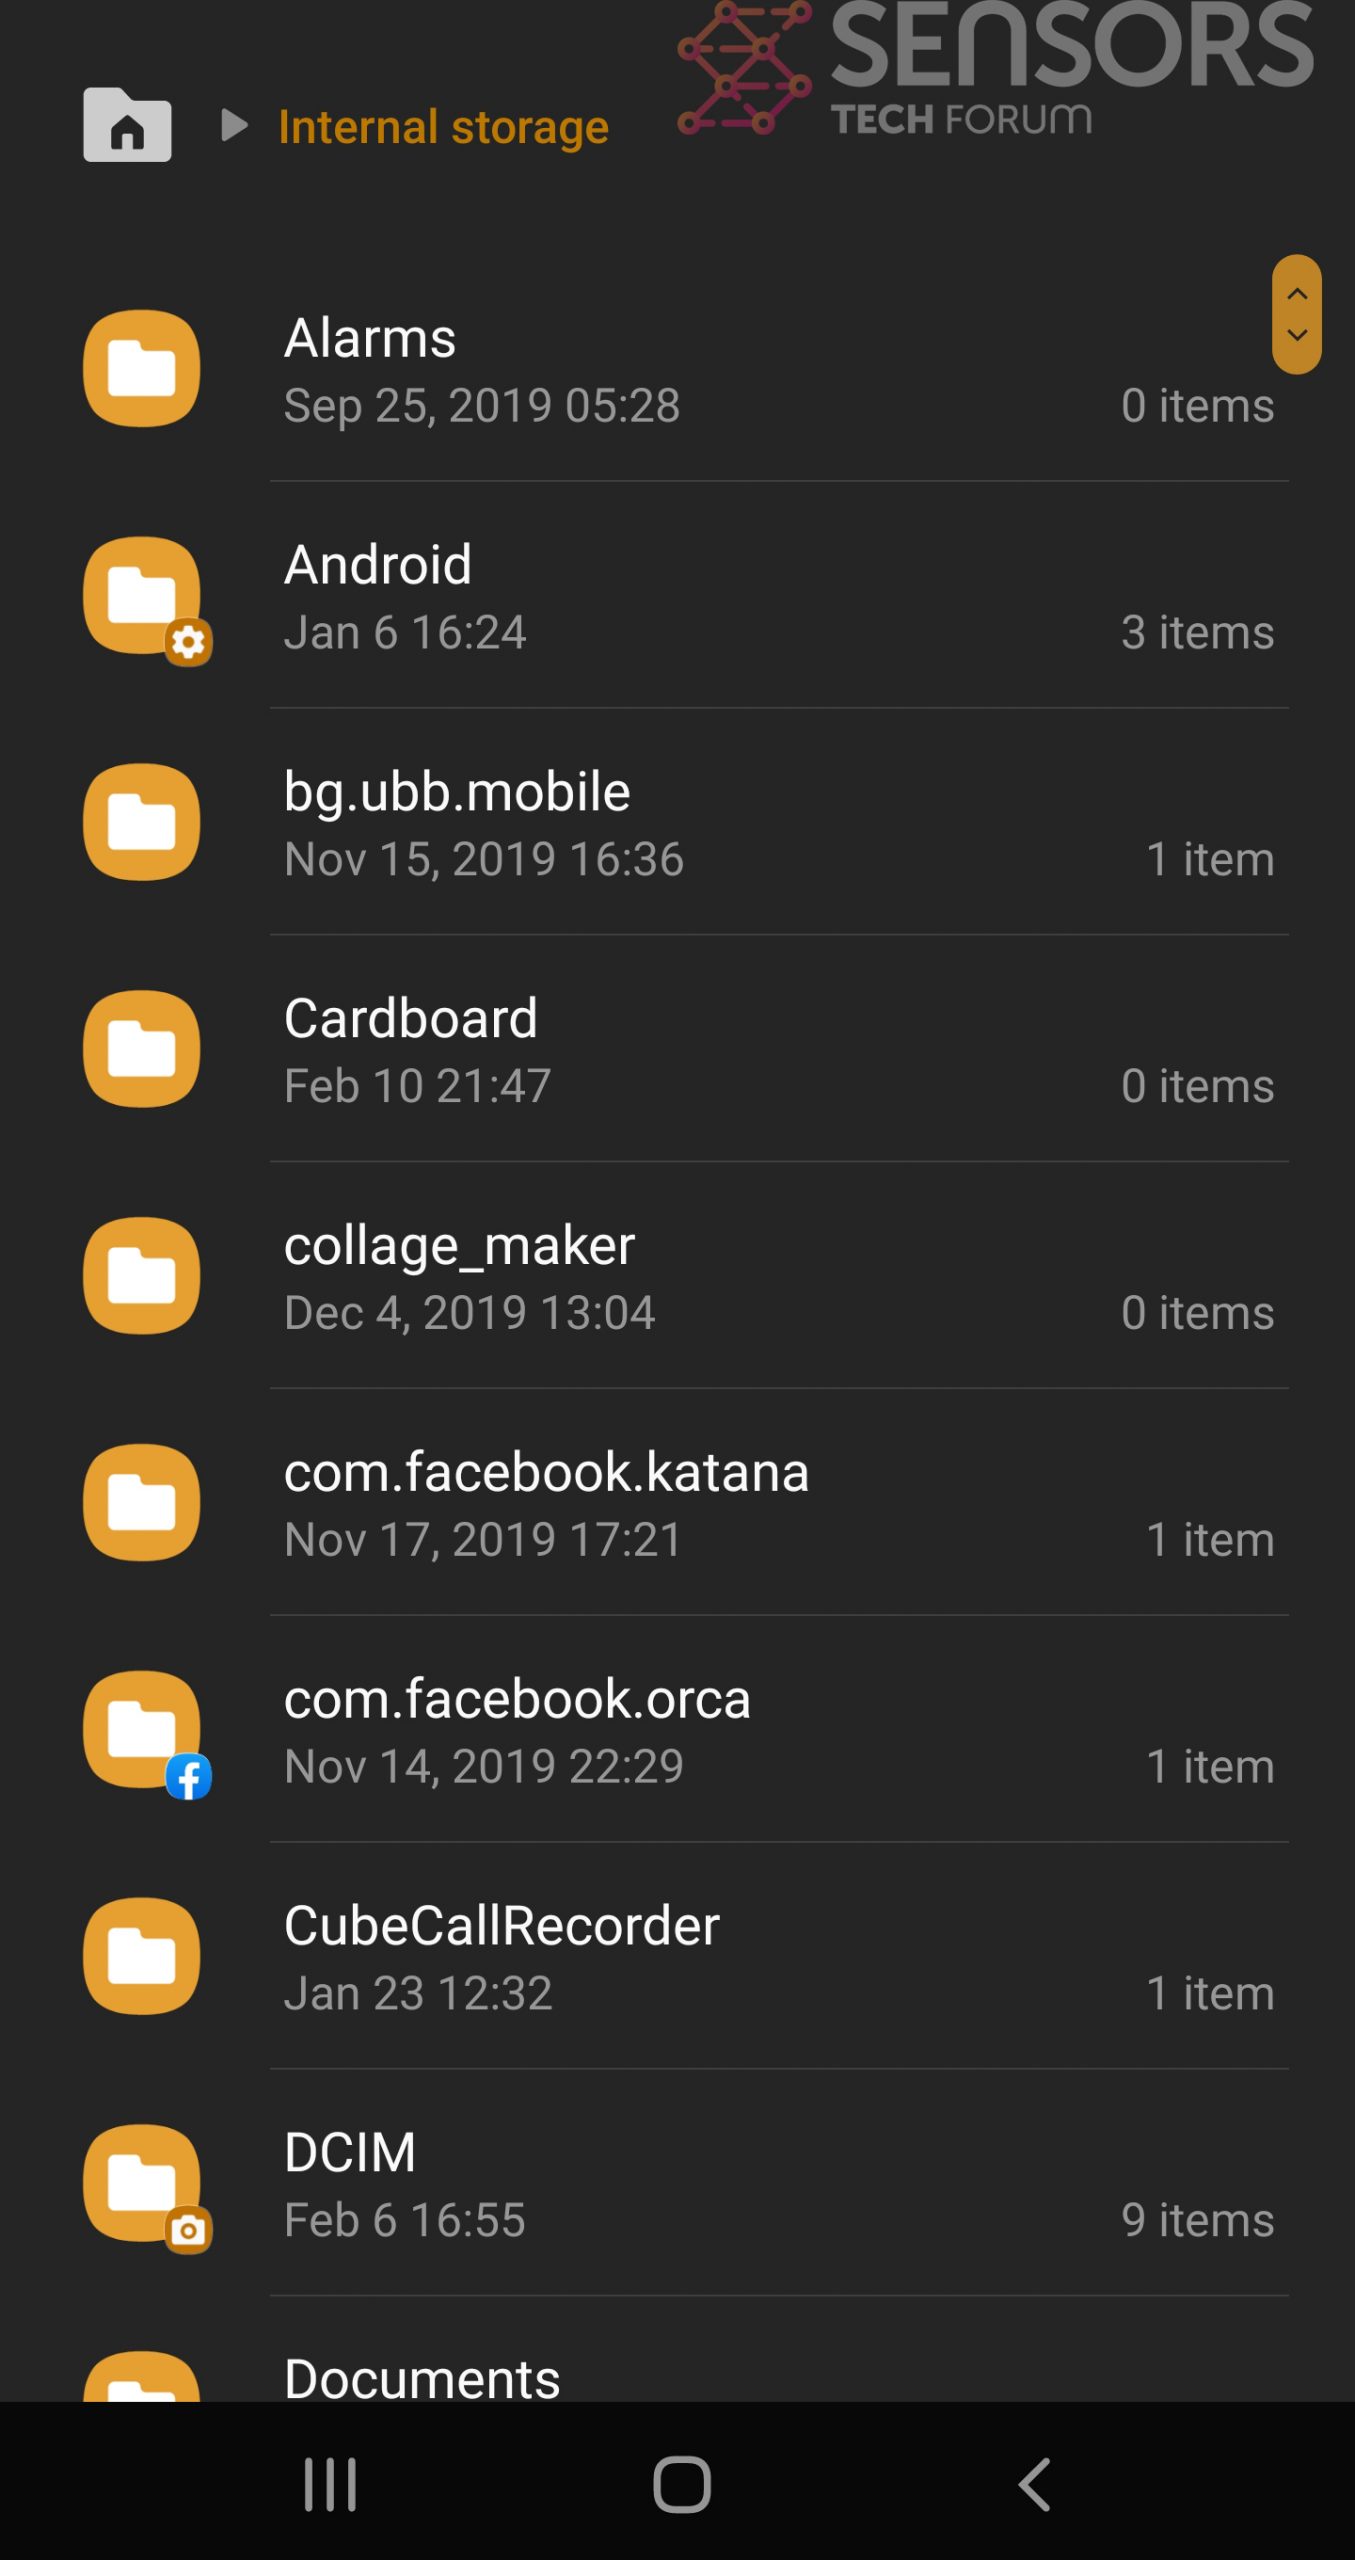
Simply locate the virus and hold-tap on the virus file to delete it.