
 This article aims to help you on how to remove XData ransomware and try to decrypt the files encrypted with .~xdata~ file extension.
HOW_CAN_I_DECRYPT_MY_FILES.txt is the ransom note by which the XData malware string could be recognized. The malware is from the file-encryption type, meaning that it uses the AES encryption algorithm to render the important files on the computer of the user no longer openable. The files are also appended the .xdata file suffix after their original extension as a signature your computer has been infected. In case your computer has been infected by the .xdata file virus, we advise you to read the following article thoroughly.

Threat Summary
| Name |
XDATA |
|
| Type | Ransomware | |
| Short Description | Encrypts files on the infected computers, demanding victims to pay a hefty ransom fee to retrieve them. | |
| Symptoms | Slow computer performance, files no longer openable with an added .~xdata~ file extension. A ransom note file, named HOW_CAN_I_DECRYPT_MY_FILES.txt. | |
| Distribution Method | Via an Exploit kit, Dll file attack, malicious JavaScript or a drive-by download of the malware itself in an obfuscated manner. | |
| Detection Tool |
See If Your System Has Been Affected by malware
Download
Malware Removal Tool
|
|
| User Experience | Join our forum to Discuss XDATA. | |
| Data Recovery Tool | Windows Data Recovery by Stellar Phoenix Notice! This product scans your drive sectors to recover lost files and it may not recover 100% of the encrypted files, but only few of them, depending on the situation and whether or not you have reformatted your drive. |

XData Ransomware – Distribution
Ransomware viruses like the XData infection can be spread with the aid of e-mail spam messages which contain:
- Malicious web links.
- Malicious e-mail attachments.
These e-mail messages usually contain deceitful instructions to open the attachment or click on the web link, making it seem to the user that it is a legitimate document of some sort.
Other methods by which XData ransomware could infect computer systems are via fake updates, malicious browser redirects as a result of adware on the computer, infected installers of software or fake key generators or license activators uploaded online.

XData Ransomware – More Information
The ransomware virus drops the following malicious files after an infection by it has occurred:
- msaddc.exe
- mscomrpc.exe
- msdcom.exe
- msdns.exe
- mssecsvc.exe
- mssql.exe
After the files are dropped, the virus may execute them in an obfuscated manner without being detected by any antivirus program. This may result in XData ransomware leaving behind malicious registry values on the user’s computer. The registry value strings which are attacked are the Run and RunOnce sub-keys that are responsible for the running of the malicious executable on system boot:
HKEY_CURRENT_USER\Software\Microsoft\Windows\CurrentVersion\Run
HKEY_LOCAL_MACHINE\Software\Microsoft\Windows\CurrentVersion\RunOnce
HKEY_CURRENT_USER\Software\Microsoft\Windows\CurrentVersion\RunOnce
After the registry entries are created, the XData ransomware infection may execute Windows Command Prompt as an administrator and run the following commands to delete the shadow copies:
→ process call create “cmd.exe /c
vssadmin.exe delete shadows /all /quiet
bcdedit.exe /set {default} recoveryenabled no
bcdedit.exe /set {default} bootstatuspolicy ignoreallfailures
Finally, the ransomware may drop it’s ransom note, named HOW_CAN_I_DECRYPT_MY_FILES.txt:
“Your important files were encrypted on this computer: documents, databases, photos, videos, etc.
Encryption was prodused using unique public key for this computer.
To decrypt files, you need to obtain private key and special tool.
To retrieve the private key and tool find your pc key file with ‘.key.~xdata~’ extension.
Depending on your operation system version and personal settings, you can find it in:
‘C:/’,
‘C:/ProgramData’,
‘C:/Documents and settings/All Users/Application Data’,
‘Your Desktop’
folders (eg.).
Then send it to one of following email addresses:
beqins@colocasia.org
bilbo@colocasia.org
frodo@colocasia.org
trevor@thwonderfulday.com
bob@thwonderfulday.com
bil@thwonderfulday.com
Your ID:
Do not worry if you did not find key file, anyway contact for support.”
XData Ransomware – Encryption Process
For the encryption process, XData ransomware uses the AES encryption algorithm which generates a symmetric key of the files encrypted encrypting them. This key can be used to decode the files back to their working state. The bad news is that only the cyber-criminals become the ones in possession of the key. The virus targets multiple important file types, such as the following:
→ “PNG .PSD .PSPIMAGE .TGA .THM .TIF .TIFF .YUV .AI .EPS .PS .SVG .INDD .PCT .PDF .XLR .XLS .XLSX .ACCDB .DB .DBF .MDB .PDB .SQL .APK .APP .BAT .CGI .COM .EXE .GADGET .JAR .PIF .WSF .DEM .GAM .NES .ROM .SAV CAD Files .DWG .DXF GIS Files .GPX .KML .KMZ .ASP .ASPX .CER .CFM .CSR .CSS .HTM .HTML .JS .JSP .PHP .RSS .XHTML. DOC .DOCX .LOG .MSG .ODT .PAGES .RTF .TEX .TXT .WPD .WPS .CSV .DAT .GED .KEY .KEYCHAIN .PPS .PPT .PPTX ..INI .PRF Encoded Files .HQX .MIM .UUE .7Z .CBR .DEB .GZ .PKG .RAR .RPM .SITX .TAR.GZ .ZIP .ZIPX .BIN .CUE .DMG .ISO .MDF .TOAST .VCD SDF .TAR .TAX2014 .TAX2015 .VCF .XML Audio Files .AIF .IFF .M3U .M4A .MID .MP3 .MPA .WAV .WMA Video Files .3G2 .3GP .ASF .AVI .FLV .M4V .MOV .MP4 .MPG .RM .SRT .SWF .VOB .WMV 3D .3DM .3DS .MAX .OBJ R.BMP .DDS .GIF .JPG ..CRX .PLUGIN .FNT .FON .OTF .TTF .CAB .CPL .CUR .DESKTHEMEPACK .DLL .DMP .DRV .ICNS .ICO .LNK .SYS .CFG”Source:fileinfo.com
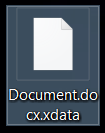
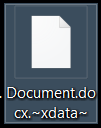
After the encryption process is complete, the XData ransomware infection appends the .~xdata~ file extension to the encrypted files. This results in the files looking like the following:

Remove XData Ransomware and Restore Encrypted Files
Even though it may seem like a tempting action to pay the ransom requested by the crooks, it is advisable not to for obvious reasons:
- You aid the cyber-criminals in further developing and spreading their malware.
- You may got get your files back after paying them.
This is why experts recommend following these steps:
1. Backup your data, despite it being encrypted.
2. Remove XData ransomware by following the instructions below. Experts strongly advise using an advanced anti-malware tool for this purpose.
3. Try to restore the files by using the alternative methods for file recovery in step “3. Restore files encrypted by XData” below.
Ventsislav Krastev
Ventsislav is a cybersecurity expert at SensorsTechForum since 2015. He has been researching, covering, helping victims with the latest malware infections plus testing and reviewing software and the newest tech developments. Having graduated Marketing as well, Ventsislav also has passion for learning new shifts and innovations in cybersecurity that become game changers. After studying Value Chain Management, Network Administration and Computer Administration of System Applications, he found his true calling within the cybersecrurity industry and is a strong believer in the education of every user towards online safety and security.
Follow Me:
- Step 1
- Step 2
- Step 3
- Step 4
- Step 5
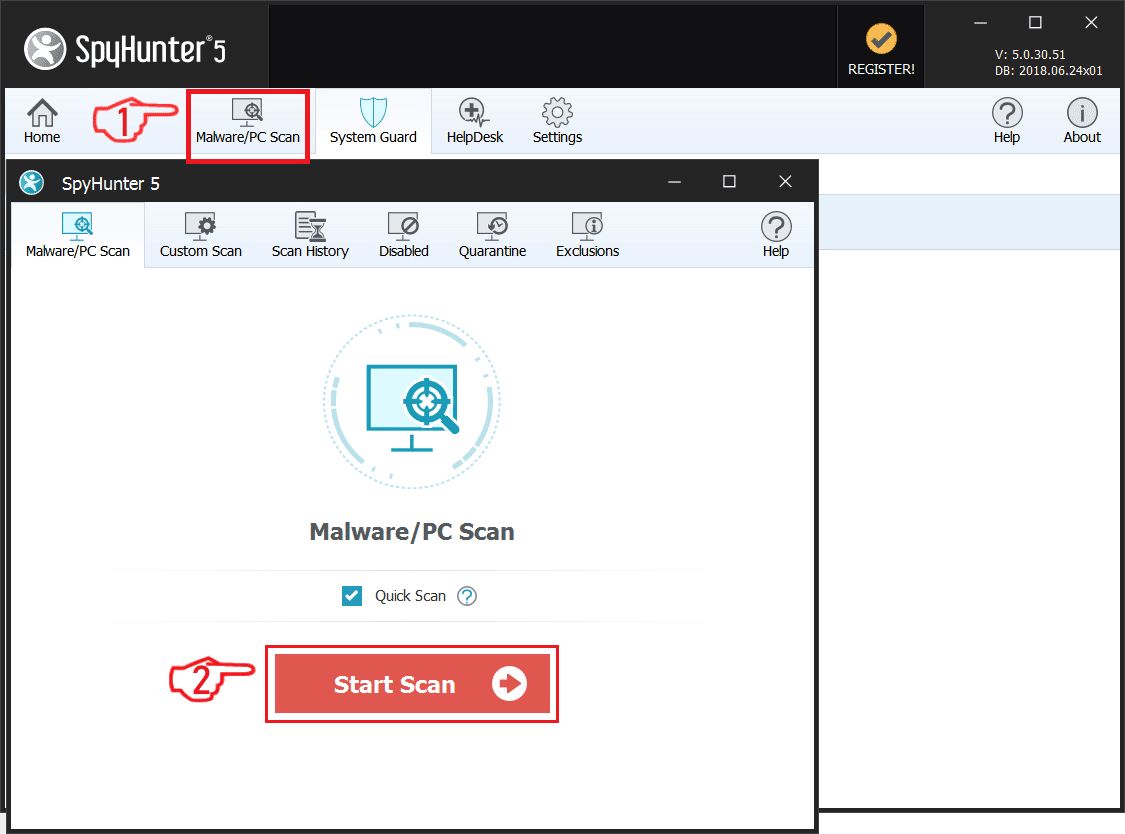
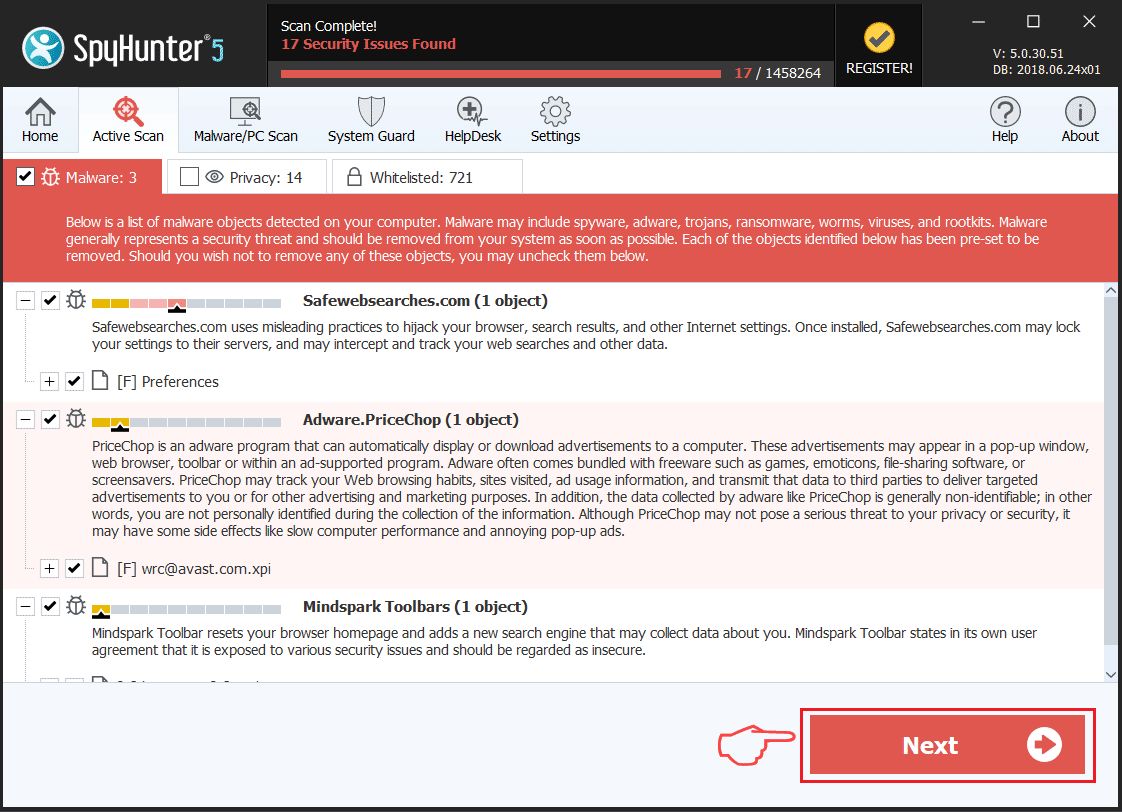
Step 1: Scan for XDATA with SpyHunter Anti-Malware Tool
Ransomware Automatic Removal - Video Guide
Step 2: Uninstall XDATA and related malware from Windows
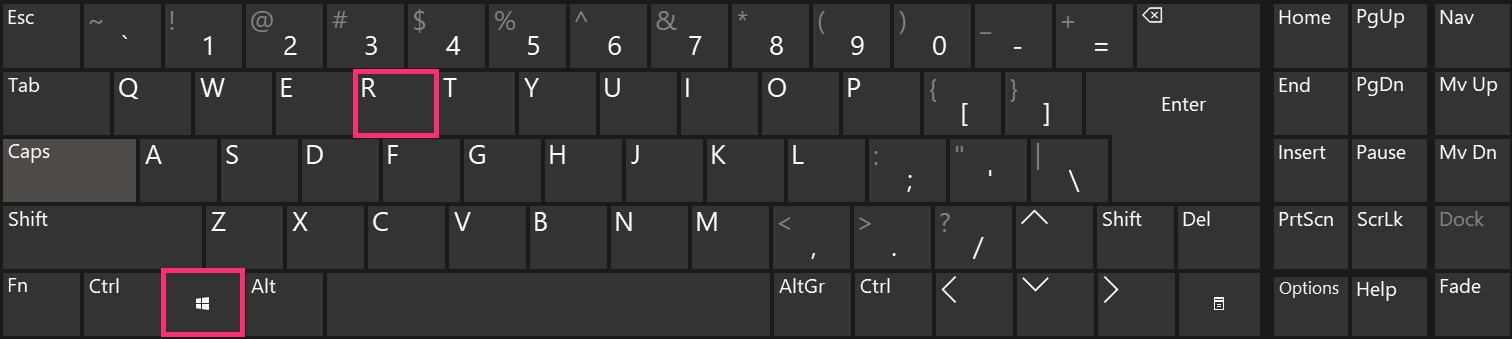
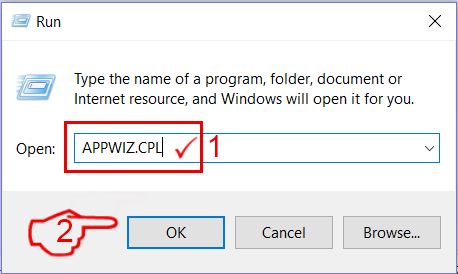
Here is a method in few easy steps that should be able to uninstall most programs. No matter if you are using Windows 10, 8, 7, Vista or XP, those steps will get the job done. Dragging the program or its folder to the recycle bin can be a very bad decision. If you do that, bits and pieces of the program are left behind, and that can lead to unstable work of your PC, errors with the file type associations and other unpleasant activities. The proper way to get a program off your computer is to Uninstall it. To do that:
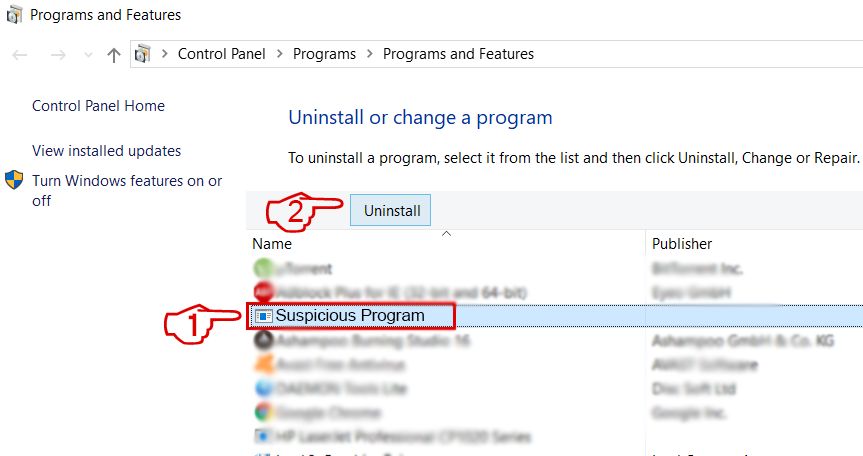 Follow the instructions above and you will successfully delete most unwanted and malicious programs.
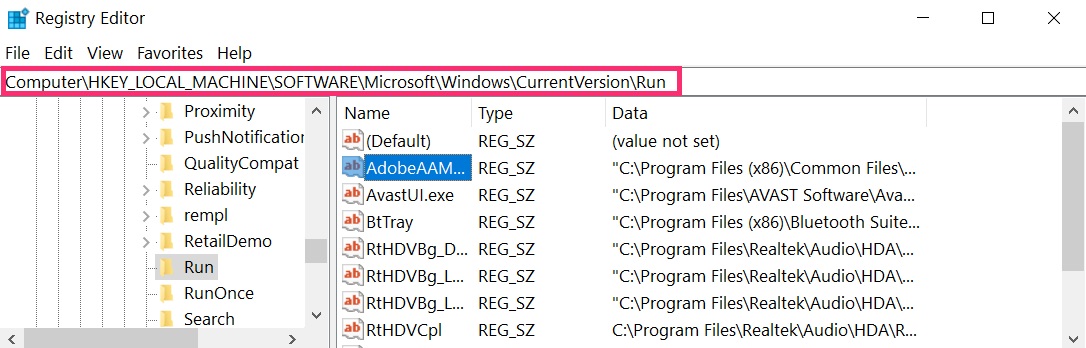
Step 3: Clean any registries, created by XDATA on your computer.
The usually targeted registries of Windows machines are the following:
- HKEY_LOCAL_MACHINE\Software\Microsoft\Windows\CurrentVersion\Run
- HKEY_CURRENT_USER\Software\Microsoft\Windows\CurrentVersion\Run
- HKEY_LOCAL_MACHINE\Software\Microsoft\Windows\CurrentVersion\RunOnce
- HKEY_CURRENT_USER\Software\Microsoft\Windows\CurrentVersion\RunOnce
You can access them by opening the Windows registry editor and deleting any values, created by XDATA there. This can happen by following the steps underneath:
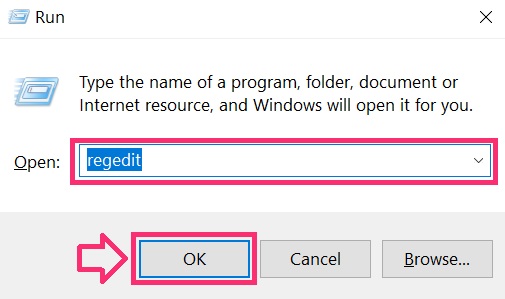
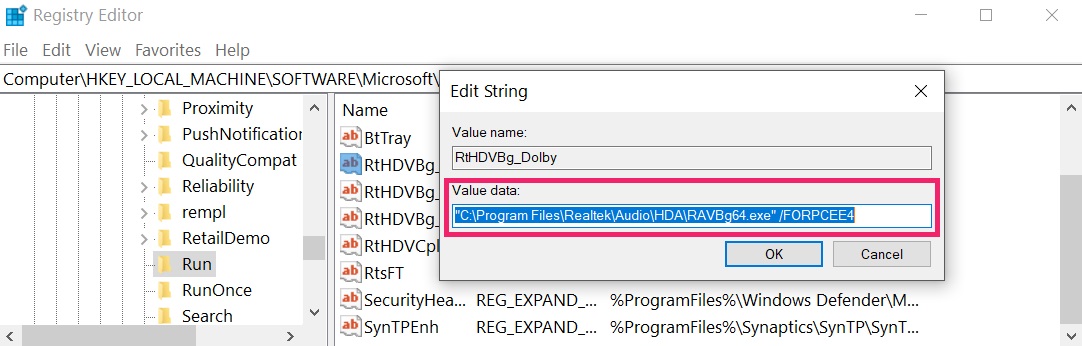 Tip: To find a virus-created value, you can right-click on it and click "Modify" to see which file it is set to run. If this is the virus file location, remove the value.
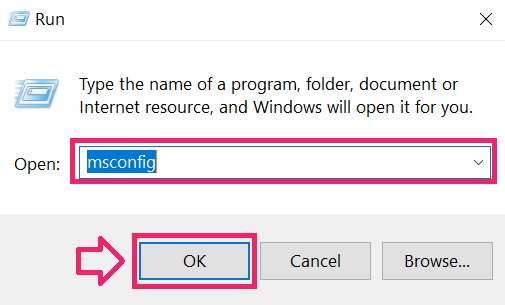
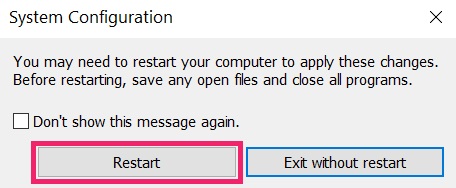
Before starting "Step 4", please boot back into Normal mode, in case you are currently in Safe Mode.
This will enable you to install and use SpyHunter 5 successfully.
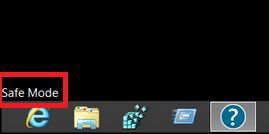
Step 4: Boot Your PC In Safe Mode to isolate and remove XDATA

Step 5: Try to Restore Files Encrypted by XDATA.
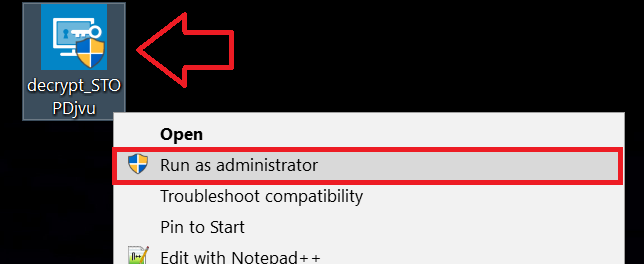
Method 1: Use STOP Decrypter by Emsisoft.
Not all variants of this ransomware can be decrypted for free, but we have added the decryptor used by researchers that is often updated with the variants which become eventually decrypted. You can try and decrypt your files using the instructions below, but if they do not work, then unfortunately your variant of the ransomware virus is not decryptable.
Follow the instructions below to use the Emsisoft decrypter and decrypt your files for free. You can download the Emsisoft decryption tool linked here and then follow the steps provided below:
1 Right-click on the decrypter and click on Run as Administrator as shown below:
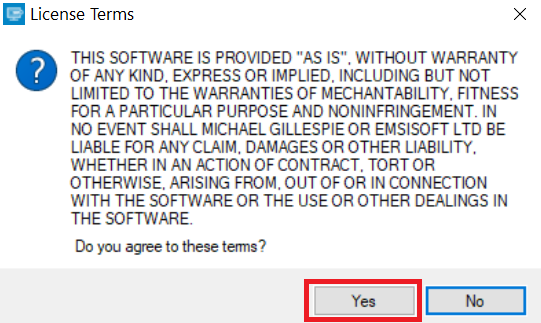
2. Agree with the license terms:
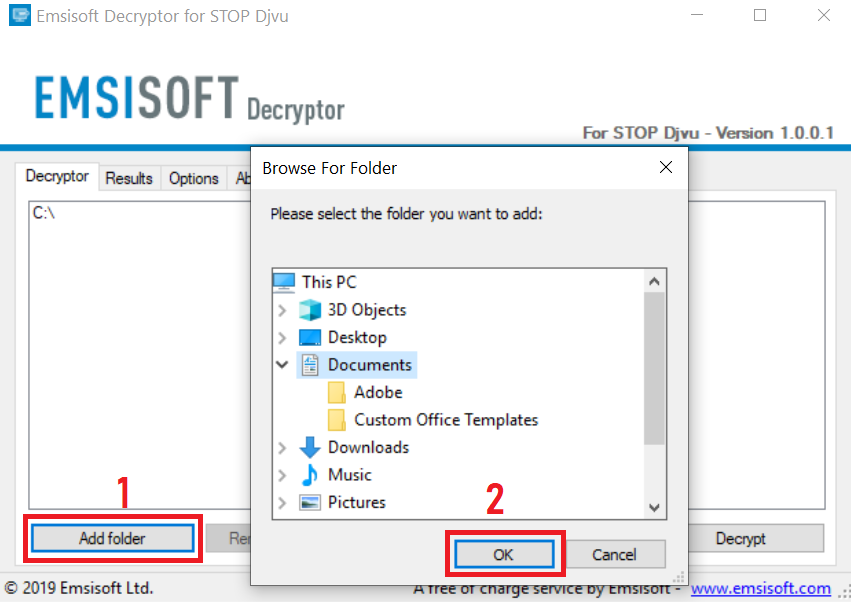
3. Click on "Add Folder" and then add the folders where you want files decrypted as shown underneath:
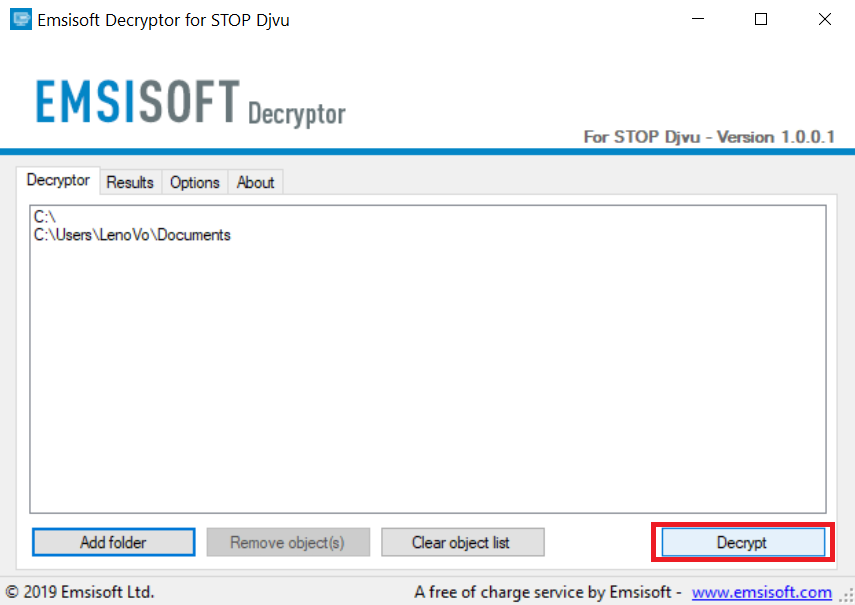
4. Click on "Decrypt" and wait for your files to be decoded.
Note: Credit for the decryptor goes to Emsisoft researchers who have made the breakthrough with this virus.
Method 2: Use data recovery software
Ransomware infections and XDATA aim to encrypt your files using an encryption algorithm which may be very difficult to decrypt. This is why we have suggested a data recovery method that may help you go around direct decryption and try to restore your files. Bear in mind that this method may not be 100% effective but may also help you a little or a lot in different situations.
Simply click on the link and on the website menus on the top, choose Data Recovery - Data Recovery Wizard for Windows or Mac (depending on your OS), and then download and run the tool.
XDATA-FAQ
What is XDATA Ransomware?
XDATA is a ransomware infection - the malicious software that enters your computer silently and blocks either access to the computer itself or encrypt your files.
Many ransomware viruses use sophisticated encryption algorithms to make your files inaccessible. The goal of ransomware infections is to demand that you pay a ransom payment to get access to your files back.
What Does XDATA Ransomware Do?
Ransomware in general is a malicious software that is designed to block access to your computer or files until a ransom is paid.
Ransomware viruses can also damage your system, corrupt data and delete files, resulting in the permanent loss of important files.
How Does XDATA Infect?
Via several ways.XDATA Ransomware infects computers by being sent via phishing emails, containing virus attachment. This attachment is usually masked as an important document, like an invoice, bank document or even a plane ticket and it looks very convincing to users.
Another way you may become a victim of XDATA is if you download a fake installer, crack or patch from a low reputation website or if you click on a virus link. Many users report getting a ransomware infection by downloading torrents.
How to Open .XDATA files?
You can't without a decryptor. At this point, the .XDATA files are encrypted. You can only open them once they are decrypted using a specific decryption key for the particular algorithm.
What to Do If a Decryptor Does Not Work?
Do not panic, and backup the files. If a decryptor did not decrypt your .XDATA files successfully, then do not despair, because this virus is still new.
Can I Restore ".XDATA" Files?
Yes, sometimes files can be restored. We have suggested several file recovery methods that could work if you want to restore .XDATA files.
These methods are in no way 100% guaranteed that you will be able to get your files back. But if you have a backup, your chances of success are much greater.
How To Get Rid of XDATA Virus?
The safest way and the most efficient one for the removal of this ransomware infection is the use a professional anti-malware program.
It will scan for and locate XDATA ransomware and then remove it without causing any additional harm to your important .XDATA files.
Can I Report Ransomware to Authorities?
In case your computer got infected with a ransomware infection, you can report it to the local Police departments. It can help authorities worldwide track and determine the perpetrators behind the virus that has infected your computer.
Below, we have prepared a list with government websites, where you can file a report in case you are a victim of a cybercrime:
Cyber-security authorities, responsible for handling ransomware attack reports in different regions all over the world:
Germany - Offizielles Portal der deutschen Polizei
United States - IC3 Internet Crime Complaint Centre
United Kingdom - Action Fraud Police
France - Ministère de l'Intérieur
Italy - Polizia Di Stato
Spain - Policía Nacional
Netherlands - Politie
Poland - Policja
Portugal - Polícia Judiciária
Greece - Cyber Crime Unit (Hellenic Police)
India - Mumbai Police - CyberCrime Investigation Cell
Australia - Australian High Tech Crime Center
Reports may be responded to in different timeframes, depending on your local authorities.
Can You Stop Ransomware from Encrypting Your Files?
Yes, you can prevent ransomware. The best way to do this is to ensure your computer system is updated with the latest security patches, use a reputable anti-malware program and firewall, backup your important files frequently, and avoid clicking on malicious links or downloading unknown files.
Can XDATA Ransomware Steal Your Data?
Yes, in most cases ransomware will steal your information. It is a form of malware that steals data from a user's computer, encrypts it, and then demands a ransom in order to decrypt it.
In many cases, the malware authors or attackers will threaten to delete the data or publish it online unless the ransom is paid.
Can Ransomware Infect WiFi?
Yes, ransomware can infect WiFi networks, as malicious actors can use it to gain control of the network, steal confidential data, and lock out users. If a ransomware attack is successful, it could lead to a loss of service and/or data, and in some cases, financial losses.
Should I Pay Ransomware?
No, you should not pay ransomware extortionists. Paying them only encourages criminals and does not guarantee that the files or data will be restored. The better approach is to have a secure backup of important data and be vigilant about security in the first place.
What Happens If I Don't Pay Ransom?
If you don't pay the ransom, the hackers may still have access to your computer, data, or files and may continue to threaten to expose or delete them, or even use them to commit cybercrimes. In some cases, they may even continue to demand additional ransom payments.
Can a Ransomware Attack Be Detected?
Yes, ransomware can be detected. Anti-malware software and other advanced security tools can detect ransomware and alert the user when it is present on a machine.
It is important to stay up-to-date on the latest security measures and to keep security software updated to ensure ransomware can be detected and prevented.
Do Ransomware Criminals Get Caught?
Yes, ransomware criminals do get caught. Law enforcement agencies, such as the FBI, Interpol and others have been successful in tracking down and prosecuting ransomware criminals in the US and other countries. As ransomware threats continue to increase, so does the enforcement activity.
About the XDATA Research
The content we publish on SensorsTechForum.com, this XDATA how-to removal guide included, is the outcome of extensive research, hard work and our team’s devotion to help you remove the specific malware and restore your encrypted files.
How did we conduct the research on this ransomware?
Our research is based on an independent investigation. We are in contact with independent security researchers, and as such, we receive daily updates on the latest malware and ransomware definitions.
Furthermore, the research behind the XDATA ransomware threat is backed with VirusTotal and the NoMoreRansom project.
To better understand the ransomware threat, please refer to the following articles which provide knowledgeable details.
As a site that has been dedicated to providing free removal instructions for ransomware and malware since 2014, SensorsTechForum’s recommendation is to only pay attention to trustworthy sources.
How to recognize trustworthy sources:
- Always check "About Us" web page.
- Profile of the content creator.
- Make sure that real people are behind the site and not fake names and profiles.
- Verify Facebook, LinkedIn and Twitter personal profiles.