It is not a secret that Windows 10 may collect more information than usually stated in their privacy policy. And despite that the updates of the latest Windows OS are patching important bugs, some might prefer to have the option to consider which updates they want to download. This is why we have set up quick instructions on how to tamper with Windows Update and restrict or completely stop Windows 10 from updating.
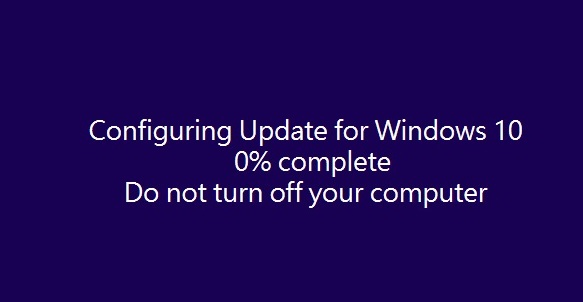
Disclaimer. Before we proceed, keep in mind that by stopping the updates, you may open up your system to cyber threats by leaving bad code and security holes as well as bugs unpatched. The consequences of stopping Windows 10 updates is solely your responsibility.
Prevent Updates in Windows 10 Pro Version
There are certain benefits of using the Pro version of 10 and the most important one is the Group Policy Editor. It allows the user to control updates are being served. Here is how to do it:
Step 1: Press +R and then type gpedit.msc after which hit Enter.

Step 2: In Computer Configuration\Administrative Templates\Windows Components\Windows Update, locate the policy, called Configure Automatic Updates.
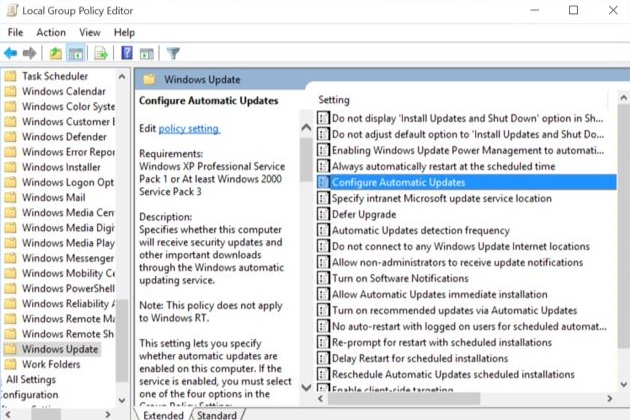
Step 3: Double click it and you will see the following configuration:
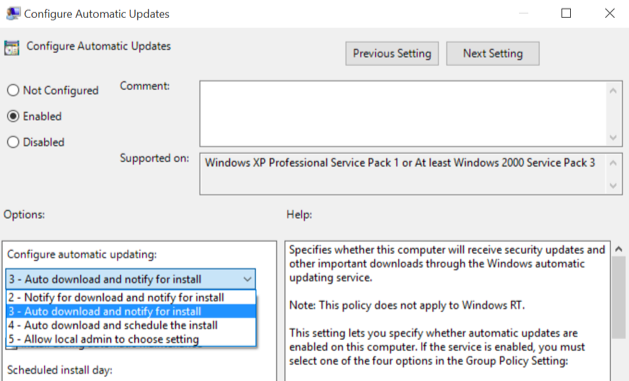
Step 4: From here you can set the updates to Disabled or set the following options:
- “Notify for download and notify for install.”
- “Auto download and schedule the install.”
- >“Auto download and notify the install.”
- “Allow local admin to choose settings.”
N.B. To bring back your automatic updates, simply repeat the steps by clicking Enable.
Stop or Block Updates in Windows 10 Home Version
Unfortunately, the forced updates are not available for configuration via the Policy Editor since the Home version of Windows 10 does not contain gpuedit. This is why you can use the following alternatives to stop or block certain software updates from installing if they are causing bugs to your programs or drivers.
Stop Windows 10 Home Updates
Step 1: Press +R and in the Run window type services.msc after which hit Enter.

Step 2: Locate a service, called Windows Update, right-click it and click on Properties.
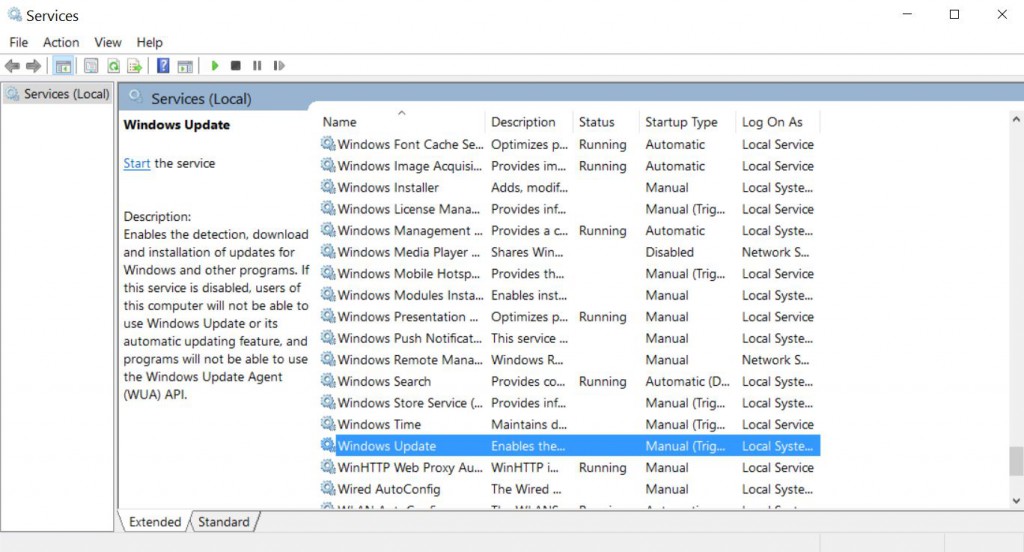
Step 3: If the service is running, in the General tab click on Stop.
Step 4: To disable the updates, click and choose Disabled from the Startup Type drop-down menu in the General Tab.
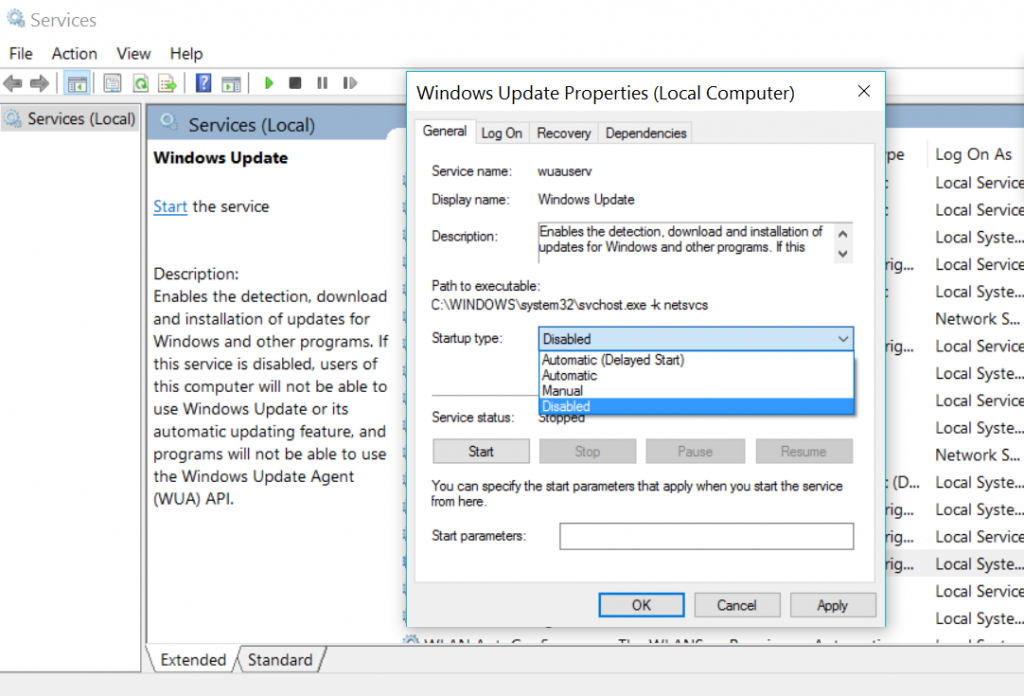
Step 5: Restart your system and it should no longer look for updates.
Block Windows 10 Driver and Software Updates
If you do not want to disable the automatic updates, but wish to stop Windows 10 from forcing your automatic driver or other software to update, this might be your lucky day. Fortunately for users, Windows have come up with a new tool that helps users to “hide” certain updates next time they are downloaded. Here is how to download, install and use it:
Step 1: Download the Show and Hide Update Troubleshooter from Microsoft.
Step 2: After you start the program and click Next.
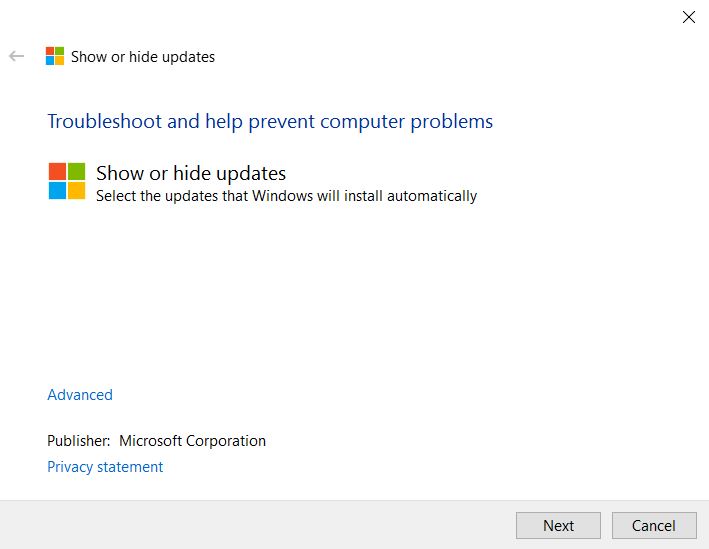
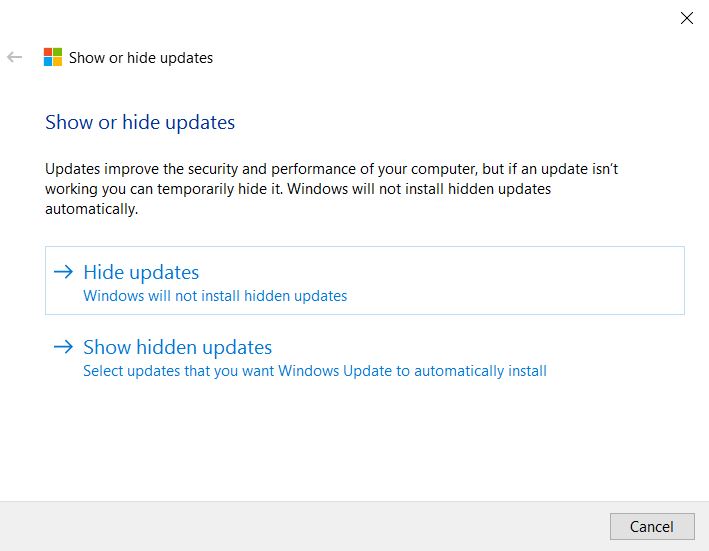
Step 3: Choose Hide Updates.
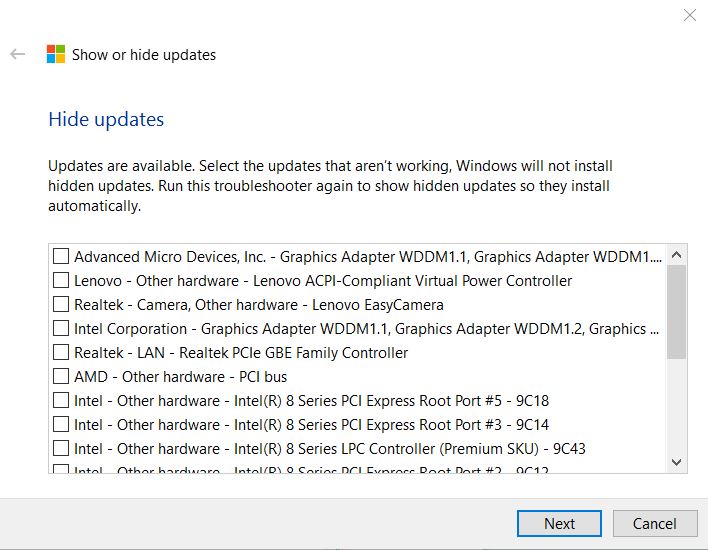
Step 4: Choose which updates you want to hide from automatically installing.
What Should You Do Regarding Updates
It’s up to users to decide how they want their updates installed or whether they want to have updates at all. All Windows users should keep in mind that Windows Updates are important. However, users should also think about what control they have over the updates that are automatically downloaded to their machines.
In addition to these instructions, we have provided more information about the updates that are currently featured in the Windows 10 versions. If you want to uninstall them, use the following instructions:
Go to “Control Panel > Programs and Features > View Installed Updates >” and paste the name of the update you wish to be removed.
Here is a list with more information, regarding Windows Updates:
- KB3132372-KB3133431
- From KB2919355 to KB3124557
- KB312420
- From KB3116180 to KB3116900
- KB3122947
- KB3097877
- From KB3100773 to KB3105211
- KB3105210
- KB3083710 and KB3083711
- KB3081448, KB3081449, KB308145
- KB3081424


