

What is the Cadaver Virus?
A security tool flagged a process or file called cadaver, cadaver.exe, or cadaver 32 bit on your system and you want to know whether it is legitimate or a threat. Read this guide before taking any action.
The cadaver process has a dual identity that makes it important to check before drawing any conclusions. On one side, Cadaver is a legitimate open-source WebDAV client for Unix and Linux systems – a command-line tool for accessing WebDAV servers, maintained as a genuine open-source project. On Windows, however, a process or executable called cadaver.exe is not part of any standard Windows installation and is not distributed as a standard Windows application by any major publisher. A cadaver 32-bit process appearing on a 64-bit Windows system is a particular red flag: legitimate system processes on modern Windows run as 64-bit unless there is a specific compatibility requirement from a recognized application. Security alerts for cadaver on Windows most commonly reflect one of two scenarios: a Trojan or malware component using the cadaver name to appear legitimate, or a PUP bundled under this name. The file path, digital signature, and source are the decisive factors.
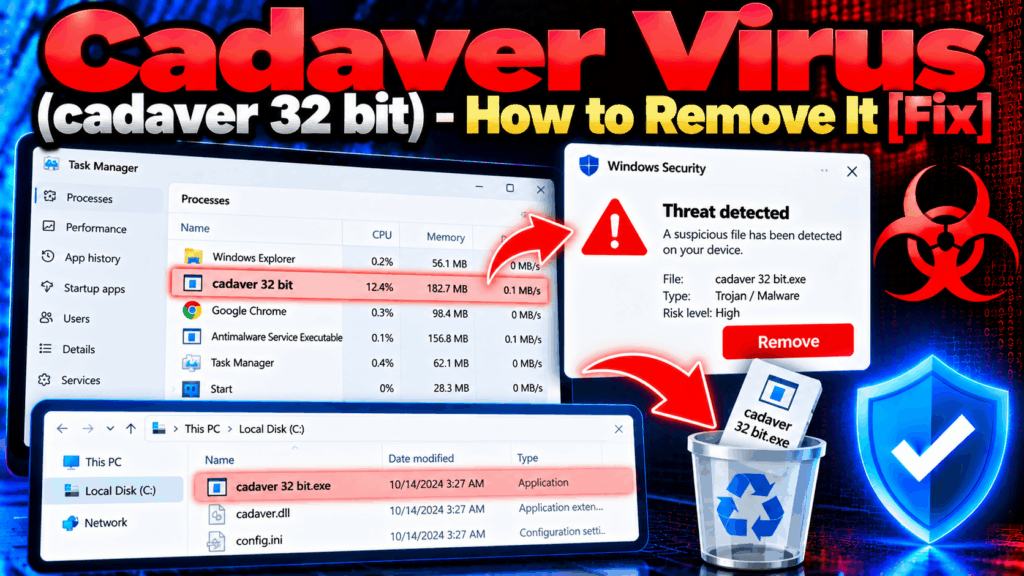
Cadaver Short Overview
| Type | Suspicious process on Windows using the cadaver name. Cadaver is a legitimate open-source WebDAV client for Unix/Linux, but cadaver.exe on Windows without a deliberate developer tool installation is not a standard system component. Running as a 32-bit process on a 64-bit system without a recognized compatibility requirement is an additional red flag. File path and digital signature are the decisive diagnostic factors. |
| Symptoms | A security tool flagging cadaver.exe or cadaver 32 bit on a Windows system. The process appearing in AppData, Temp, or ProgramData rather than a standard application directory. Cadaver.exe running at startup without a recognized application requiring it. A 32-bit cadaver process on a 64-bit Windows system without a deliberate WebDAV developer tool installation. |
| Removal Time | Approximately 15 minutes for a full-system scan |
| Removal Tool | See If Your System Has Been Affected by malware
Download
Malware Removal Tool
|
How Did the Cadaver Process End Up on Windows?
- Malware or a PUP using the cadaver name as a disguise – The most common Windows scenario: a malicious process or PUP component was given the cadaver.exe name to appear like a technical tool rather than malware. This is a documented naming technique across the threat landscape.
- Software bundling with unofficial free downloads – A free program from a third-party site installs a cadaver-named component as a bundled addition through software bundling.
- A Trojan dropper placing it in an unexpected location – An existing malware component downloaded cadaver.exe to Temp, AppData, or ProgramData as a second-stage payload.
- A legitimate developer tool installation on a Windows developer machine – In some developer environments, WebDAV tooling including cadaver-related binaries may be installed deliberately. If you did not install any WebDAV development tool, this scenario does not apply.
Is the Cadaver Process on Your System Legitimate or Malicious?
- Check the file path and digital signature first – Right-click the cadaver.exe file, select Properties, and go to the Digital Signatures tab. A legitimate open-source tool may not have a signature; a malicious impersonator definitely will not. Also check the path: a cadaver.exe in AppData, Temp, ProgramData, or any user-writeable location is almost certainly malicious.
- Check whether you or a developer tool installed it deliberately – If no WebDAV client or development tool was deliberately installed and no recognized application in your installed programs list references cadaver, the process should not be on the system.
- Submit the specific file to VirusTotal – Upload the cadaver.exe file from its detected location to VirusTotal for a multi-engine scan. A legitimate open-source binary will be recognized as clean by most engines. A malicious impersonator will be flagged by multiple engines.
- Note the 32-bit status on a 64-bit system – A cadaver 32-bit process running on a 64-bit Windows system without a recognized application requiring 32-bit compatibility is an additional red flag, as malware frequently runs as 32-bit even on 64-bit systems to maximize compatibility with older injection and evasion techniques.
How to Remove the Cadaver Virus [Fix]
- End the process in Task Manager and open its file location – Right-click the cadaver or cadaver.exe process in Task Manager, select Open file location to identify the path, then end the process.
- Delete the file if it is in a non-standard location – If the file is in AppData, Temp, ProgramData, or any location not associated with a recognized deliberately installed application, delete it and its containing folder.
- Check Task Scheduler and startup entries – Open taskschd.msc and the Startup tab in Task Manager. Delete any entry pointing to the cadaver.exe path.
- Run a full anti-malware scan – Use a dedicated anti-malware tool to identify all components associated with the cadaver infection, including any downloader or persistence components that placed the file there.
- If the process is from a legitimate developer tool you installed – Verify the installation source and the tool’s publisher. If the tool has a recognized publisher and was installed from an official source, the security alert is likely a false positive – submit the file to VirusTotal and report the false positive to your security vendor.
Follow the complete removal guide below this article for the full step-by-step process.

Ventsislav Krastev
Ventsislav is a cybersecurity expert at SensorsTechForum since 2015. He has been researching, covering, helping victims with the latest malware infections plus testing and reviewing software and the newest tech developments. Having graduated Marketing as well, Ventsislav also has passion for learning new shifts and innovations in cybersecurity that become game changers. After studying Value Chain Management, Network Administration and Computer Administration of System Applications, he found his true calling within the cybersecrurity industry and is a strong believer in the education of every user towards online safety and security.
Follow Me:
Preparation before removing Cadaver.
Before starting the actual removal process, we recommend that you do the following preparation steps.
- Make sure you have these instructions always open and in front of your eyes.
- Do a backup of all of your files, even if they could be damaged. You should back up your data with a cloud backup solution and insure your files against any type of loss, even from the most severe threats.
- Be patient as this could take a while.
- Scan for Malware
- Fix Registries
- Remove Virus Files
Step 1: Scan for Cadaver with SpyHunter Anti-Malware Tool
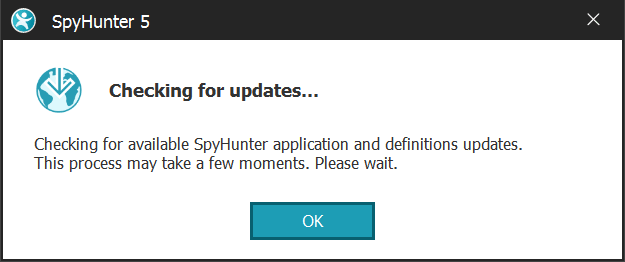
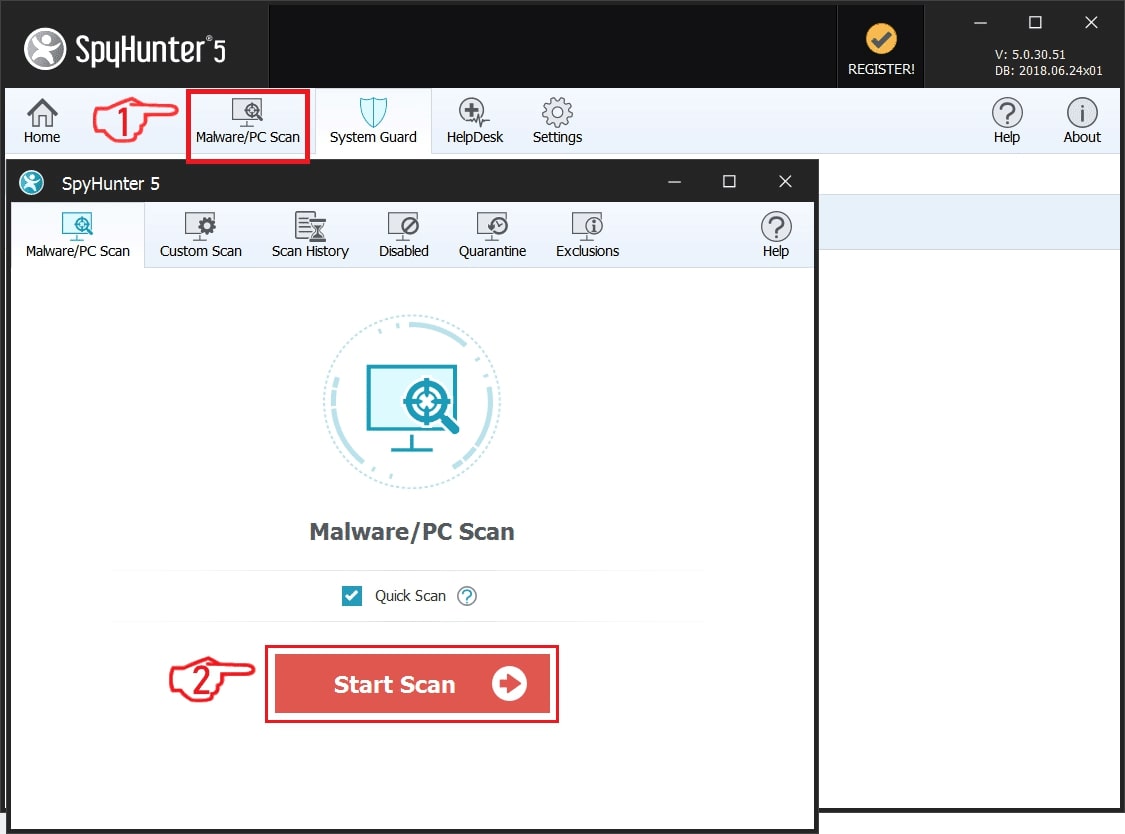
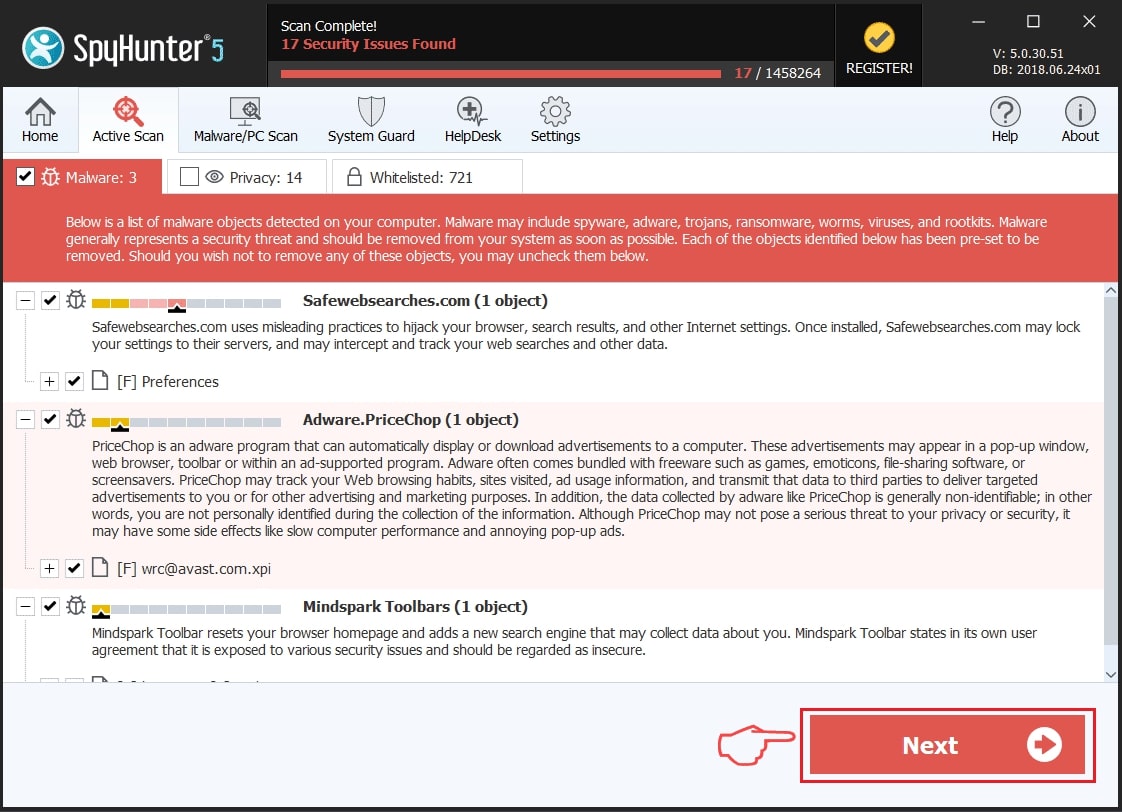
Step 2: Clean any registries, created by Cadaver on your computer.
The usually targeted registries of Windows machines are the following:
- HKEY_LOCAL_MACHINE\Software\Microsoft\Windows\CurrentVersion\Run
- HKEY_CURRENT_USER\Software\Microsoft\Windows\CurrentVersion\Run
- HKEY_LOCAL_MACHINE\Software\Microsoft\Windows\CurrentVersion\RunOnce
- HKEY_CURRENT_USER\Software\Microsoft\Windows\CurrentVersion\RunOnce
You can access them by opening the Windows registry editor and deleting any values, created by Cadaver there. This can happen by following the steps underneath:
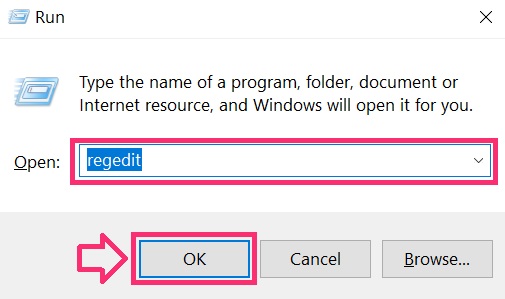
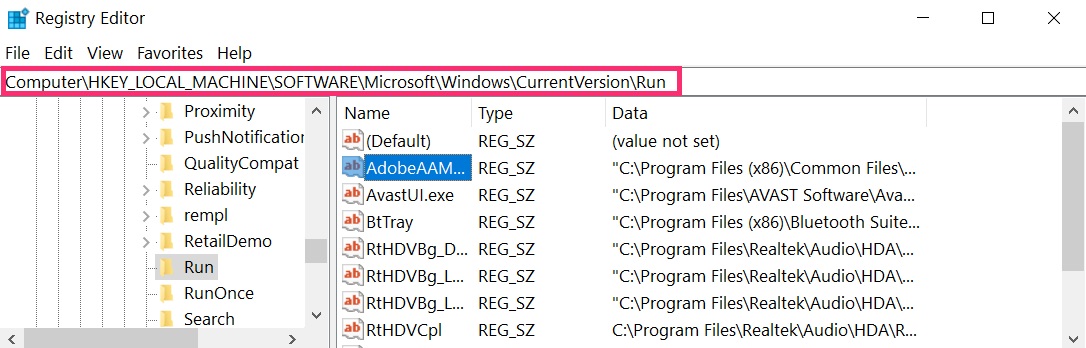
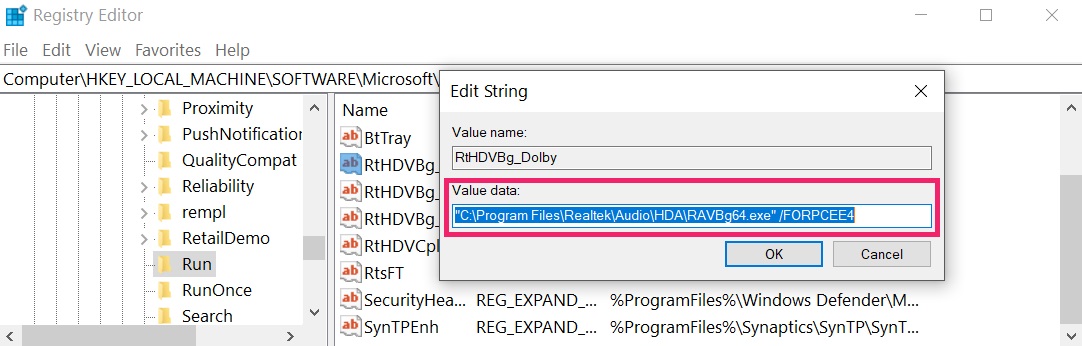 Tip: To find a virus-created value, you can right-click on it and click "Modify" to see which file it is set to run. If this is the virus file location, remove the value.
Step 3: Find virus files created by Cadaver on your PC.
1.For Windows 8, 8.1 and 10.
For Newer Windows Operating Systems
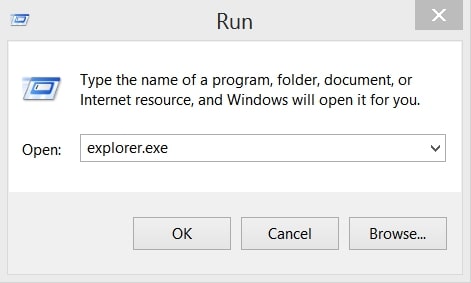
1: On your keyboard press + R and write explorer.exe in the Run text box and then click on the Ok button.
2: Click on your PC from the quick access bar. This is usually an icon with a monitor and its name is either “My Computer”, “My PC” or “This PC” or whatever you have named it.
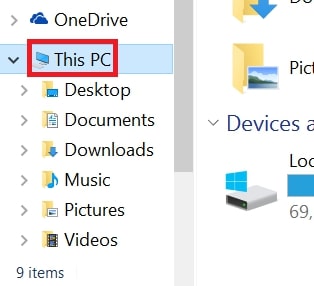
3: Navigate to the search box in the top-right of your PC's screen and type “fileextension:” and after which type the file extension. If you are looking for malicious executables, an example may be "fileextension:exe". After doing that, leave a space and type the file name you believe the malware has created. Here is how it may appear if your file has been found:
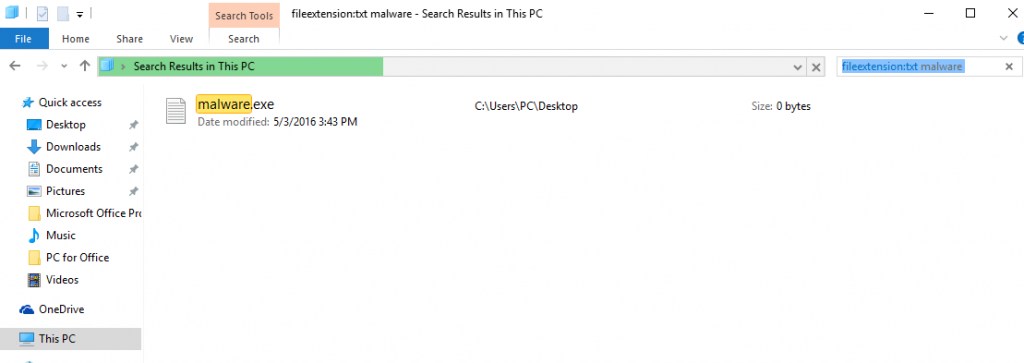
N.B. We recommend to wait for the green loading bar in the navigation box to fill up in case the PC is looking for the file and hasn't found it yet.
2.For Windows XP, Vista, and 7.
For Older Windows Operating Systems
In older Windows OS's the conventional approach should be the effective one:
1: Click on the Start Menu icon (usually on your bottom-left) and then choose the Search preference.
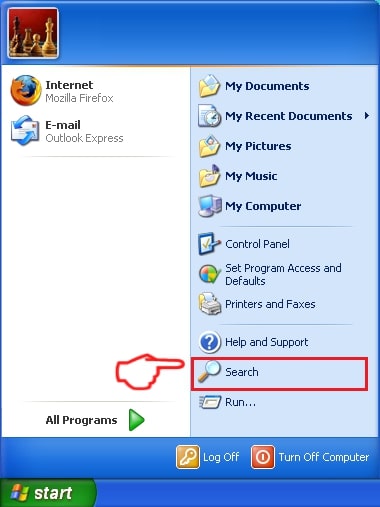
2: After the search window appears, choose More Advanced Options from the search assistant box. Another way is by clicking on All Files and Folders.
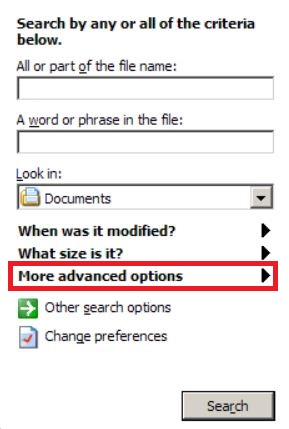
3: After that type the name of the file you are looking for and click on the Search button. This might take some time after which results will appear. If you have found the malicious file, you may copy or open its location by right-clicking on it.
Now you should be able to discover any file on Windows as long as it is on your hard drive and is not concealed via special software.
Cadaver FAQ
What Does Cadaver Trojan Do?
The Cadaver Trojan is a malicious computer program designed to disrupt, damage, or gain unauthorized access to a computer system. It can be used to steal sensitive data, gain control over a system, or launch other malicious activities.
Can Trojans Steal Passwords?
Yes, Trojans, like Cadaver, can steal passwords. These malicious programs are designed to gain access to a user's computer, spy on victims and steal sensitive information such as banking details and passwords.
Can Cadaver Trojan Hide Itself?
Yes, it can. A Trojan can use various techniques to mask itself, including rootkits, encryption, and obfuscation, to hide from security scanners and evade detection.
Can a Trojan be Removed by Factory Reset?
Yes, a Trojan can be removed by factory resetting your device. This is because it will restore the device to its original state, eliminating any malicious software that may have been installed. Bear in mind that there are more sophisticated Trojans that leave backdoors and reinfect even after a factory reset.
Can Cadaver Trojan Infect WiFi?
Yes, it is possible for a Trojan to infect WiFi networks. When a user connects to the infected network, the Trojan can spread to other connected devices and can access sensitive information on the network.
Can Trojans Be Deleted?
Yes, Trojans can be deleted. This is typically done by running a powerful anti-virus or anti-malware program that is designed to detect and remove malicious files. In some cases, manual deletion of the Trojan may also be necessary.
Can Trojans Steal Files?
Yes, Trojans can steal files if they are installed on a computer. This is done by allowing the malware author or user to gain access to the computer and then steal the files stored on it.
Which Anti-Malware Can Remove Trojans?
Anti-malware programs such as SpyHunter are capable of scanning for and removing Trojans from your computer. It is important to keep your anti-malware up to date and regularly scan your system for any malicious software.
Can Trojans Infect USB?
Yes, Trojans can infect USB devices. USB Trojans typically spread through malicious files downloaded from the internet or shared via email, allowing the hacker to gain access to a user's confidential data.
About the Cadaver Research
The content we publish on SensorsTechForum.com, this Cadaver how-to removal guide included, is the outcome of extensive research, hard work and our team’s devotion to help you remove the specific trojan problem.
How did we conduct the research on Cadaver?
Please note that our research is based on an independent investigation. We are in contact with independent security researchers, thanks to which we receive daily updates on the latest malware definitions, including the various types of trojans (backdoor, downloader, infostealer, ransom, etc.)
Furthermore, the research behind the Cadaver threat is backed with VirusTotal.
To better understand the threat posed by trojans, please refer to the following articles which provide knowledgeable details.