
This article has been created in order to help you by explaining to you how to remove the Google Critical Security Alert scam which can be encountered on your Gmail.
Update November 2019. The Google Critical Security Alert is a good system designed by google which is used to notify you every time there is a new login on your account from a new device. It can often confuse people who are using new devices to log in from, like their phone or even if they use a VPN or a proxy service to access Gmail securely. However, reports have started to add up that there is a fake message, which is the same as the original Google Critical Security Alert scam and this fake message may contain a virus after the victim clicks on Its button to check if their account is secure. If you are not sure whether the Google Critical Security Alert message is actual we recommend that you read this article in order to learn how to remove the Google Critical Security Alert from your computer.
Subnote: This post was originally created in May 2018, but we gave it an update in November 2019.

Threat Summary
| Name | Google Critical Security Alert |
| Type | Scam / Malware |
| Short Description | Aims to trick victims to be redirected to a third-party web link which can infect their computer |
| Symptoms | A message, claiming the computer of the victim has been compromised. |
| Distribution Method | Via e-mail messages that imitate the original Gmail Critical Security Alert, claiming that the a new and unfamiliar device has logged in to your Google account. |
| Detection Tool |
See If Your System Has Been Affected by malware
Download
Malware Removal Tool
|
User Experience | Join Our Forum to Discuss Google Critical Security Alert. |

Google Critical Security Alert Scam – Update November 2019
You can get a Google Critical Security Alert email as a spam message. That has been prevalent in the last few months and it does not seem to go away soon. People have to be on high alert more than ever, as more and more emails of that sort are being sent out to unsuspecting victims. The emails try to be more creative and to use the Google logos more often in the associated scams. People are falling for them as the Privacy Policy links may actually link to the authentic one of Google.
Google Critical Security Alert Scam – Update September 2019
The Google Critical Security Alert Scam has begun to change a bit and diversify the phishing methods it uses to infect computers and hijack passwords. One of its new phishing attempts that were recently detected could appear like the following:
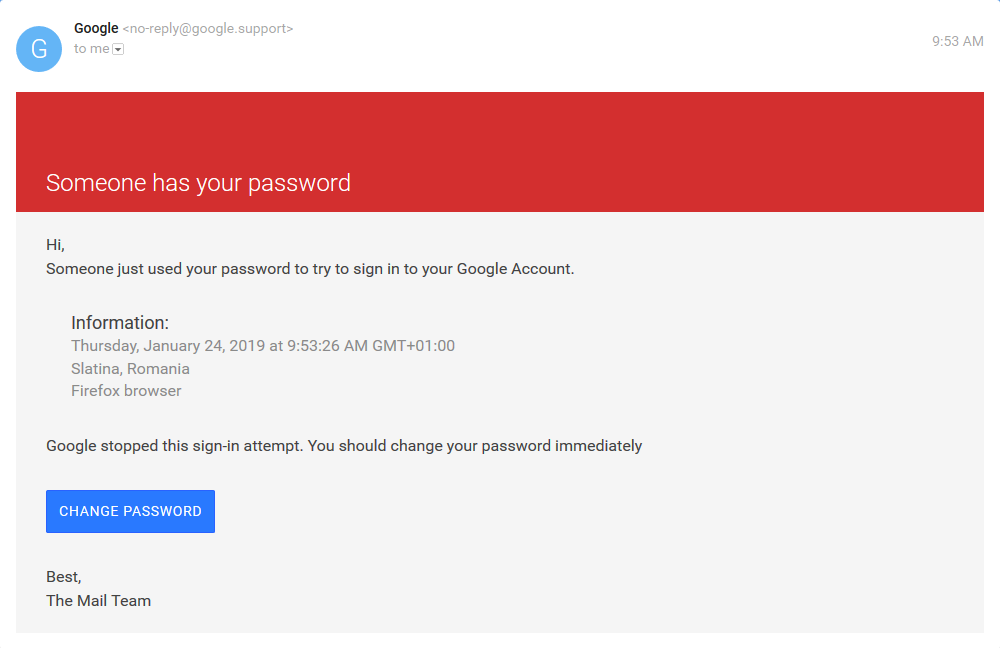
Be very careful, because the scam targets Windows as well as Mac devices, so if you spot such or similar notifications, always make sure that they are from google and not a spoofed e-mail address.
Google Critical Security Alert Sign-In Attempt Was Blocked – Update January 2019
The Google Critical Security alert has also been seen in a massive spam outbreak via Gmail. The alert messages appear like the image we have received from Twitter reports:
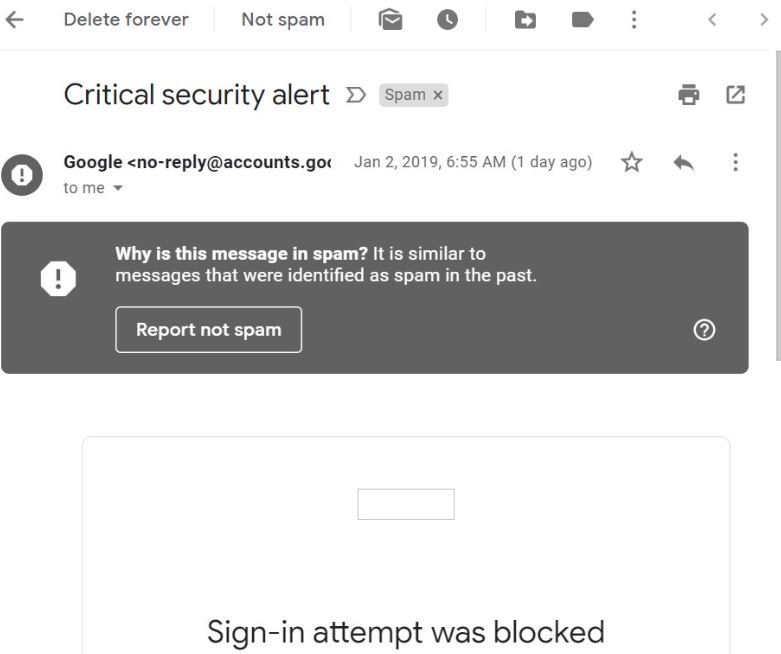
Above you can see the Google Sign in attempt was Blocked message that has been plaguing more and more people.
Users should be aware not to trust the fake Google Critical Security alert messages, since opening files attached or URLs that are linked as hyperlinks there may lead to a dangerous malware infection.
Google Critical Security Alert Scam – Update November 2018
A second smaller campaign that is related to the Google Critical Security Alert Scam is a pop-up message or graphics image that can be distributed using various methods:
- Phishing Emails
- Web Redirects
- Virus Infections
The message will display an URL and a counterfeit Google alert warning the victims that their Gmail accounts have been accessed. A password reset link is showed which will open a fake login page. Any entered account credentials will be stolen by the operators.
A sample scam text reads the following:
Critical security alert A suspicious app was blocked from accessing your account ………..@—.com Google prevented someone from signing in to your account using a non-Google app. If this wasn’t you, they know your password and you should change it… https://219.115.87.158/
Critical Security Alert from Google – Update August 2018
New information has come to light concerning the scam Critical Security Alert from Google. It appears that the e-mails have started to spread with an increased rate and the new e-mail form has been modified to say the following:
“Someone just used your passowrd to try and sign in to your account. Google blocked them, but you should check what happened”
or
someone just used your password to try to sign in to your account from a non-google app. google blocked them, but you should check what happened. review your account activity to make sure no one else has access.
In seems that the e-mails now lead to a web link where the crooks may attempt to trick victims into entering their personal information. The scam, which was first detected by Wordfence seems to have come back and despite the fact that Google Chrome has resolved this issue, users still report it as a virus. One particular report has been detected in association with a scam that asks users to click on a link that is not the original sign in web link for their accounts, which is https://myactivity.google.com/. If you see any other URL besides this fake URL, we advise you not to enter your username and password. And if you encounter such e-mail, we do recommend that you immediately contact us via our support e-mail or via writing a comment in the comment section below.
Google Critical Security Alert Malware – How Does It Spread
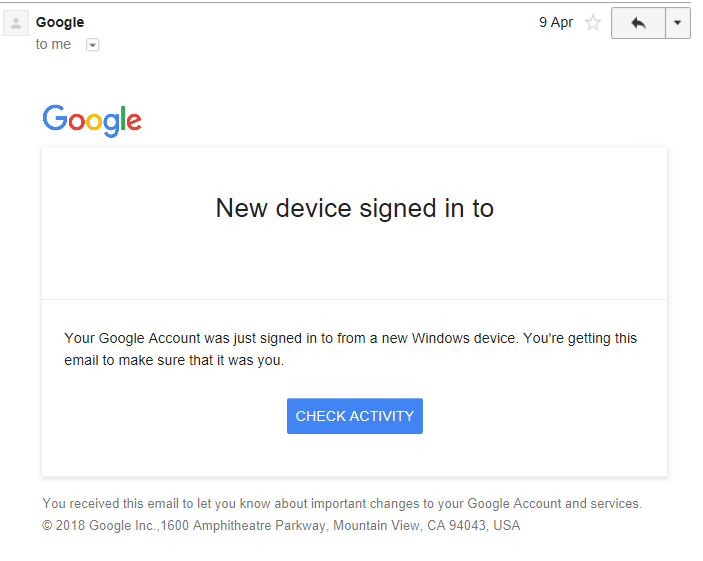
The main method which is used by the Google Critical Security Alert scam is to send phishing e-mails to the victim’s e-mail account which are the same as the original Google e-mails that a new device has logged into your computer. The message being used by it may appear like the following:
The message also says that a sign-in attempt was blocked on your e-mail address and may contain a sub-message saying “Someone just used your password to try to sign in to your account. Google blocked them, but you should check what happened”.
While many of those messages may be actual, the Google “Critical security alert” scam may appear without you having to log in as a new device, which is the strongest indicator.

Google “Critical Security Alert” – More Information
The Critical Security Alert message may come directly into your Gmail and after you click on the button it wants you to, you have successfully fallen into it’s trap, it may download it’s payload files directly onto your computer. These files may be of different file types:
→ .exe, .dll, .tmp, .vbs, .js, .bat, .cmd, .reg
The files may be located under different names in the following Windows directories:
- %AppData%
- %Local%
- %LocalLow%
- %Roaming%
- %Temp%
After the files are dropped onto your computer, the Google “Critical Security Alert” “virus” may perform series of modifications that give it privileges to perform different administrative activities. Such activities are likely to:
- Create mutexes.
- Touch system files of Windows.
- Create registry entries in different administrative sub-keys.
- Create scheduled tasks on your PC.
This may ultimately result in the Google Security Alert malware to be able to steal information directly from your computer and perform series of malicious activities, like:
- Install copies of itself in case you remove it’s payload manually.
- Update itself to remain hidden on your PC.
- Take screenshots of your desktop.
- Log your keystrokes.
- Scan for and steal saved passwords on your drive and web browser.
- Steal files by copying them and silently sending them to the cyber-criminals via unsecured ports.
- Download malware and adware on your computer without your consent or knowledge.

Remove “Critical Security Alert” Scam from Your Computer
In order to make sure that the “Critical Security Alert” scam is fully gone from your computer, we recommend that you follow the removal instructions underneath this article. They have been divided in manual and automatic removal manuals so that they can help you delete this threat based on your malware removal experience. If manual removal is not exactly something that you feel confident in doing, recommendations are to remove this malware or check if it has your infected your computer automatically by downloading and scanning your computer via an advanced anti-malware program. Such software will effectively make sure that your PC is fully secured and you passwords and data remain safe in the future.
Ventsislav Krastev
Ventsislav is a cybersecurity expert at SensorsTechForum since 2015. He has been researching, covering, helping victims with the latest malware infections plus testing and reviewing software and the newest tech developments. Having graduated Marketing as well, Ventsislav also has passion for learning new shifts and innovations in cybersecurity that become game changers. After studying Value Chain Management, Network Administration and Computer Administration of System Applications, he found his true calling within the cybersecrurity industry and is a strong believer in the education of every user towards online safety and security.
Follow Me:
Preparation before removing Google Critical Security Alert.
Before starting the actual removal process, we recommend that you do the following preparation steps.
- Make sure you have these instructions always open and in front of your eyes.
- Do a backup of all of your files, even if they could be damaged. You should back up your data with a cloud backup solution and insure your files against any type of loss, even from the most severe threats.
- Be patient as this could take a while.
- Scan for Malware
- Fix Registries
- Remove Virus Files
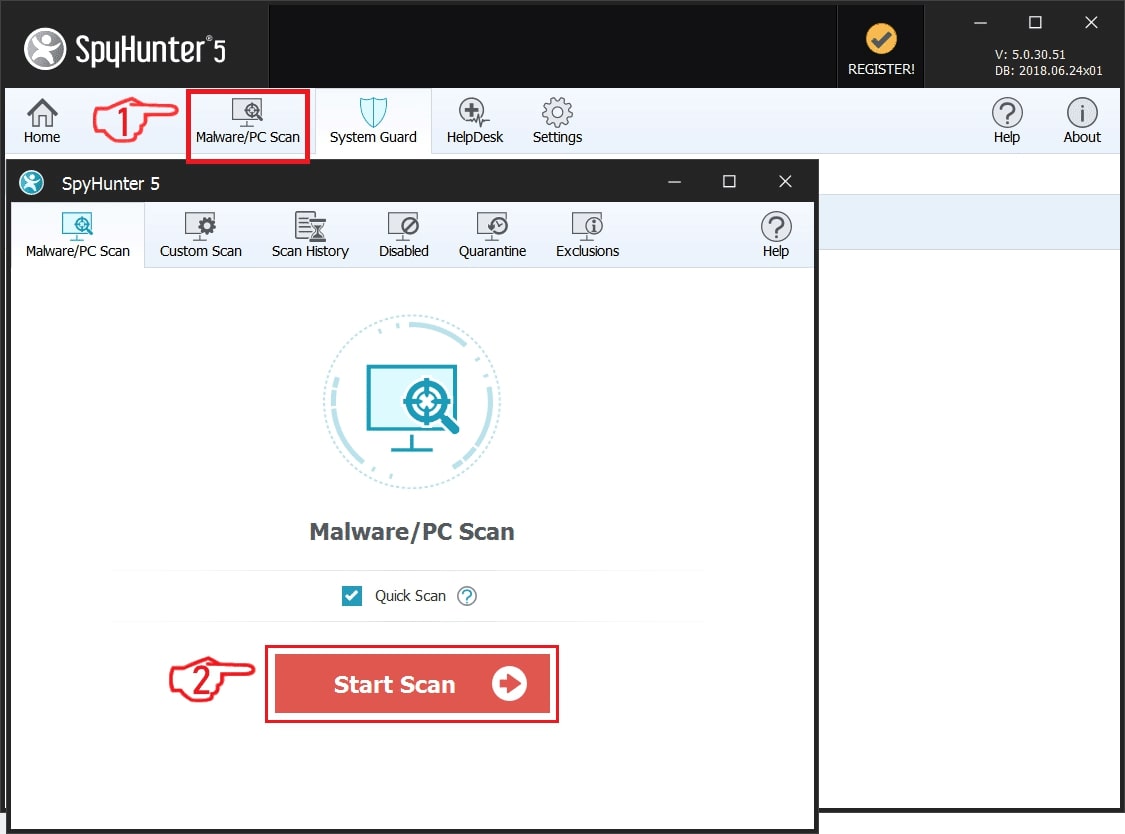
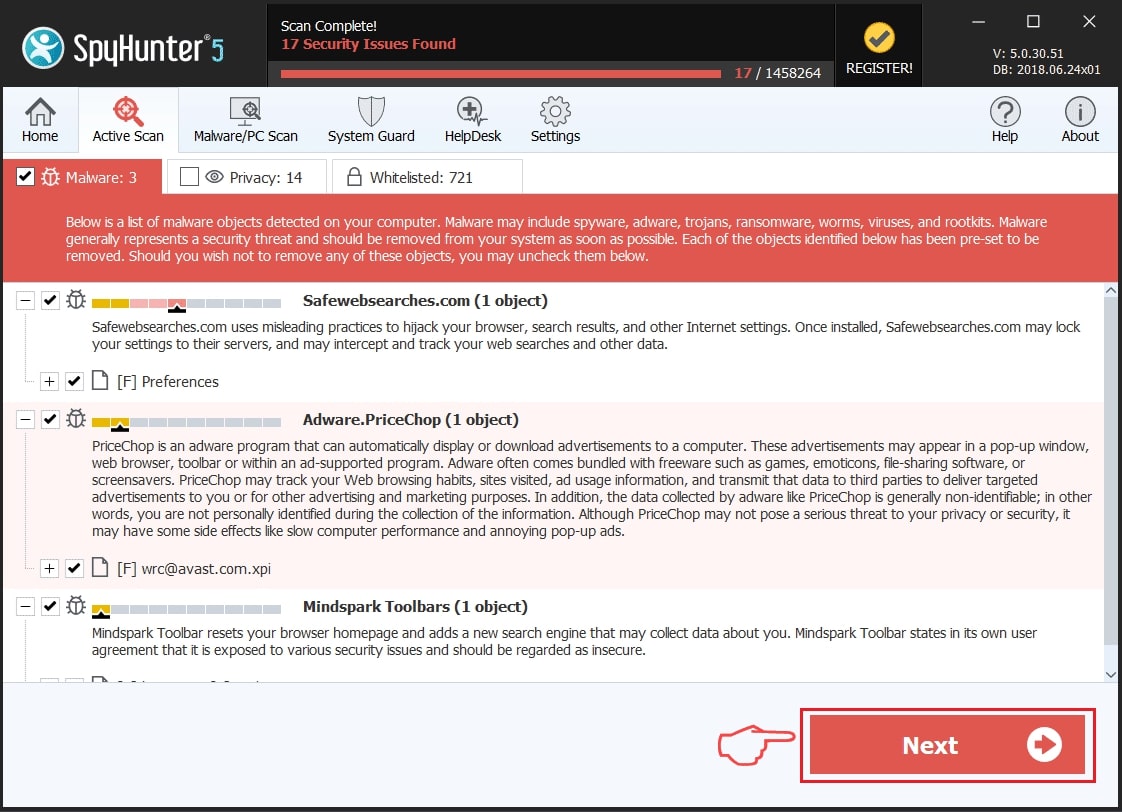
Step 1: Scan for Google Critical Security Alert with SpyHunter Anti-Malware Tool
Step 2: Clean any registries, created by Google Critical Security Alert on your computer.
The usually targeted registries of Windows machines are the following:
- HKEY_LOCAL_MACHINE\Software\Microsoft\Windows\CurrentVersion\Run
- HKEY_CURRENT_USER\Software\Microsoft\Windows\CurrentVersion\Run
- HKEY_LOCAL_MACHINE\Software\Microsoft\Windows\CurrentVersion\RunOnce
- HKEY_CURRENT_USER\Software\Microsoft\Windows\CurrentVersion\RunOnce
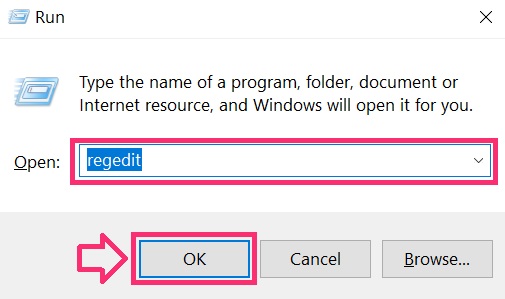
You can access them by opening the Windows registry editor and deleting any values, created by Google Critical Security Alert there. This can happen by following the steps underneath:
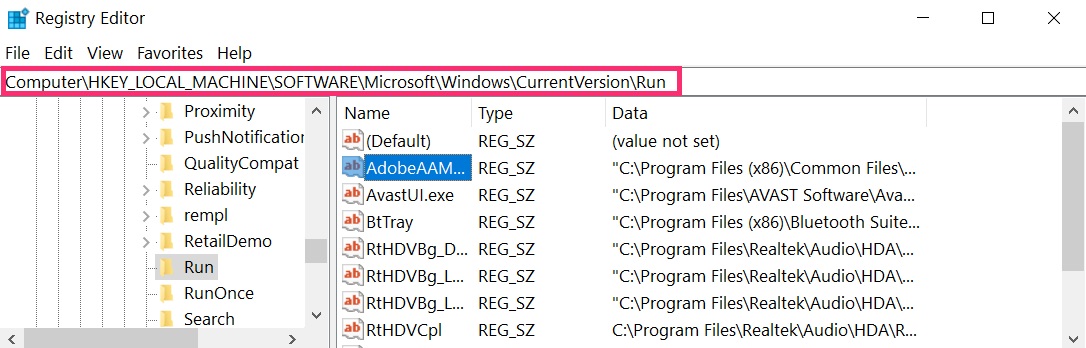
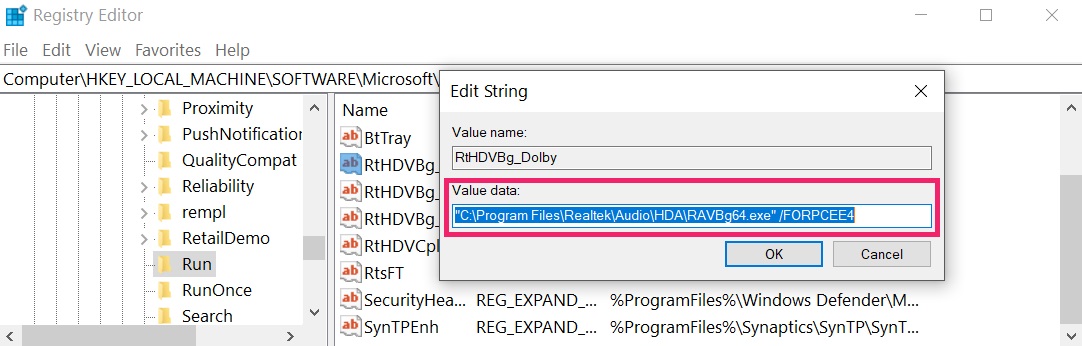 Tip: To find a virus-created value, you can right-click on it and click "Modify" to see which file it is set to run. If this is the virus file location, remove the value.
Step 3: Find virus files created by Google Critical Security Alert on your PC.
1.For Windows 8, 8.1 and 10.
For Newer Windows Operating Systems
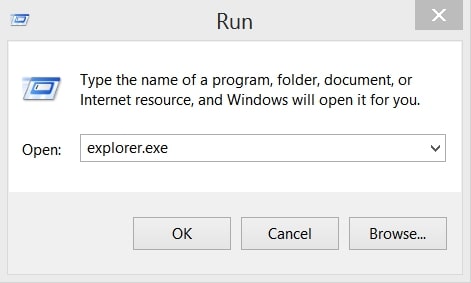
1: On your keyboard press + R and write explorer.exe in the Run text box and then click on the Ok button.
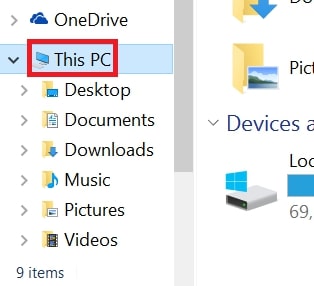
2: Click on your PC from the quick access bar. This is usually an icon with a monitor and its name is either “My Computer”, “My PC” or “This PC” or whatever you have named it.
3: Navigate to the search box in the top-right of your PC's screen and type “fileextension:” and after which type the file extension. If you are looking for malicious executables, an example may be "fileextension:exe". After doing that, leave a space and type the file name you believe the malware has created. Here is how it may appear if your file has been found:
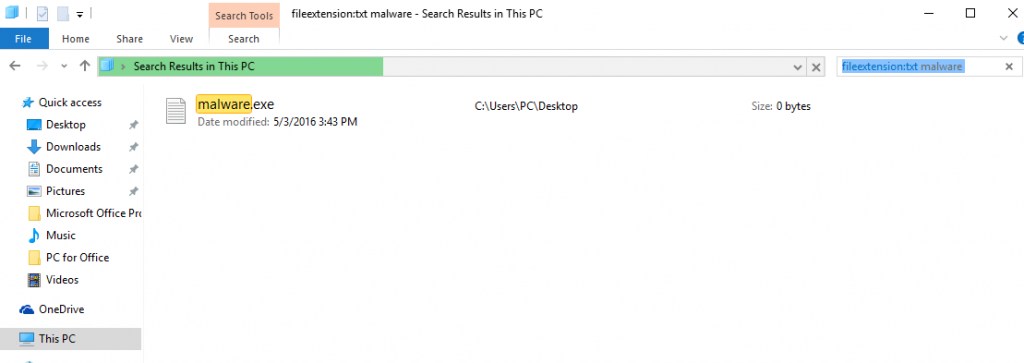
N.B. We recommend to wait for the green loading bar in the navigation box to fill up in case the PC is looking for the file and hasn't found it yet.
2.For Windows XP, Vista, and 7.
For Older Windows Operating Systems
In older Windows OS's the conventional approach should be the effective one:
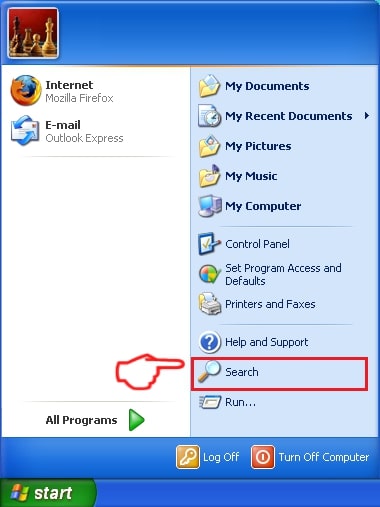
1: Click on the Start Menu icon (usually on your bottom-left) and then choose the Search preference.
2: After the search window appears, choose More Advanced Options from the search assistant box. Another way is by clicking on All Files and Folders.
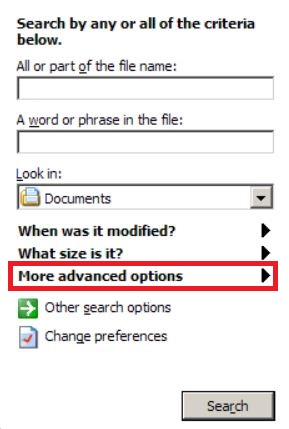
3: After that type the name of the file you are looking for and click on the Search button. This might take some time after which results will appear. If you have found the malicious file, you may copy or open its location by right-clicking on it.
Now you should be able to discover any file on Windows as long as it is on your hard drive and is not concealed via special software.
Google Critical Security Alert FAQ
What Does Google Critical Security Alert Trojan Do?
The Google Critical Security Alert Trojan is a malicious computer program designed to disrupt, damage, or gain unauthorized access to a computer system. It can be used to steal sensitive data, gain control over a system, or launch other malicious activities.
Can Trojans Steal Passwords?
Yes, Trojans, like Google Critical Security Alert, can steal passwords. These malicious programs are designed to gain access to a user's computer, spy on victims and steal sensitive information such as banking details and passwords.
Can Google Critical Security Alert Trojan Hide Itself?
Yes, it can. A Trojan can use various techniques to mask itself, including rootkits, encryption, and obfuscation, to hide from security scanners and evade detection.
Can a Trojan be Removed by Factory Reset?
Yes, a Trojan can be removed by factory resetting your device. This is because it will restore the device to its original state, eliminating any malicious software that may have been installed. Bear in mind that there are more sophisticated Trojans that leave backdoors and reinfect even after a factory reset.
Can Google Critical Security Alert Trojan Infect WiFi?
Yes, it is possible for a Trojan to infect WiFi networks. When a user connects to the infected network, the Trojan can spread to other connected devices and can access sensitive information on the network.
Can Trojans Be Deleted?
Yes, Trojans can be deleted. This is typically done by running a powerful anti-virus or anti-malware program that is designed to detect and remove malicious files. In some cases, manual deletion of the Trojan may also be necessary.
Can Trojans Steal Files?
Yes, Trojans can steal files if they are installed on a computer. This is done by allowing the malware author or user to gain access to the computer and then steal the files stored on it.
Which Anti-Malware Can Remove Trojans?
Anti-malware programs such as SpyHunter are capable of scanning for and removing Trojans from your computer. It is important to keep your anti-malware up to date and regularly scan your system for any malicious software.
Can Trojans Infect USB?
Yes, Trojans can infect USB devices. USB Trojans typically spread through malicious files downloaded from the internet or shared via email, allowing the hacker to gain access to a user's confidential data.
About the Google Critical Security Alert Research
The content we publish on SensorsTechForum.com, this Google Critical Security Alert how-to removal guide included, is the outcome of extensive research, hard work and our team’s devotion to help you remove the specific trojan problem.
How did we conduct the research on Google Critical Security Alert?
Please note that our research is based on an independent investigation. We are in contact with independent security researchers, thanks to which we receive daily updates on the latest malware definitions, including the various types of trojans (backdoor, downloader, infostealer, ransom, etc.)
Furthermore, the research behind the Google Critical Security Alert threat is backed with VirusTotal.
To better understand the threat posed by trojans, please refer to the following articles which provide knowledgeable details.

I have just received an email saying someone has tried to get into my Google account, same description as above.
just got the alert that someone in russia logged in on my google acct.